Como Criar Arquivos SRT: Um Guia Prático para Vídeos Modernos
Aprenda a criar arquivos SRT com nosso guia prático. Descubra métodos manuais, ferramentas de IA e dicas de especialistas para legendas perfeitas que impulsionam o engajamento e o SEO.
Kate, Praveen
April 16, 2025
Na sua essência, um arquivo SRT é apenas um documento simples de texto puro. Ele contém todo o diálogo falado do seu vídeo, bem organizado com carimbos de data/hora de início e fim precisos. Quando você associa este arquivo ao seu vídeo, as legendas aparecem na tela, perfeitamente sincronizadas com o áudio.
Pode parecer técnico, mas aprender a criar arquivos SRT é uma habilidade fundamental para qualquer criador de vídeo sério hoje em dia.
Por que os Arquivos SRT são um divisor de águas para seus vídeos
Antes de entrarmos no processo passo a passo, é importante entender por que isso é tão importante. Criar um arquivo SRT não é apenas uma caixa a ser marcada; é um movimento estratégico que impulsiona diretamente o alcance, o engajamento e o desempenho geral do seu vídeo.
Pense nisso menos como uma tarefa e mais como uma ferramenta indispensável em seu kit de ferramentas de criador. Os benefícios são claros, poderosos e impactam tudo, desde os rankings de busca até a experiência do espectador.
Capacidades Essenciais que Tornam os Arquivos SRT Indispensáveis
IA de última geração
Alimentado pelo Whisper da OpenAI para precisão líder na indústria. Suporte para vocabulários personalizados, arquivos de até 10 horas e resultados ultra rápidos.

Detecção de falantes
Identifique automaticamente diferentes falantes nas suas gravações e rotule-os com seus nomes.
Exportar em múltiplos formatos
Exporte suas transcrições em múltiplos formatos incluindo TXT, DOCX, PDF, SRT e VTT com opções de formatação personalizáveis.
Aqui está um resumo rápido do que você ganha:
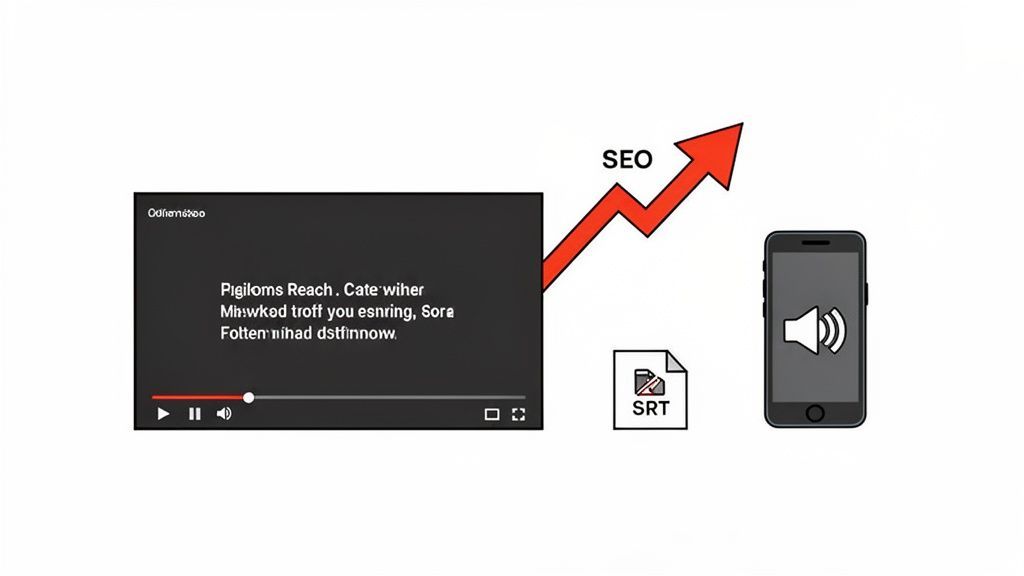
- Desempenho de SEO Aprimorado: Os robôs dos motores de busca não conseguem "assistir" ao seu vídeo para entender seu conteúdo, mas são incrivelmente bons em ler texto. Um arquivo SRT lhes fornece uma transcrição completa, palavra por palavra, tornando cada palavra falada indexável.
- Engajamento do Usuário Disparado: Uma quantidade impressionante de vídeos em mídias sociais é consumida com o som desligado. Legendas são sua arma secreta, permitindo que os espectadores acompanhem em ambientes silenciosos, como transporte público ou escritórios tranquilos. Isso aumenta drasticamente o tempo de exibição e a retenção da mensagem.
- Acessibilidade Massivamente Expandida: Legendas abrem seu conteúdo para espectadores surdos ou com deficiência auditiva. Isso não é apenas uma questão de conformidade; é sobre ser inclusivo e alcançar um público muito mais amplo.
Desbloqueando o Crescimento Através de SEO e uma Melhor Experiência do Usuário
Além do básico, um arquivo SRT bem feito é uma potência para a otimização de mecanismos de busca. Quando você carrega um arquivo SRT em uma plataforma como o YouTube, você está essencialmente entregando ao Google um roteiro rico em palavras-chave de todo o seu vídeo. Esse texto fornece ao algoritmo um contexto crucial, ajudando-o a entender do que se trata o seu vídeo e a classificá-lo para pesquisas relevantes. Para um mergulho mais profundo, confira estas dicas acionáveis de otimização de SEO para o YouTube para ver como as legendas se encaixam em uma estratégia maior.
Essa comunicação direta com os algoritmos de busca pode abrir novas avenidas de descoberta que, de outra forma, você perderia completamente.
Ponto Chave: O diálogo falado do seu vídeo é uma mina de ouro de palavras-chave e informações contextuais. Sem um arquivo SRT, essa mina de ouro permanece enterrada e completamente invisível para os mecanismos de busca que você está tentando impressionar.
O impacto dos arquivos SRT nas principais métricas de vídeo é inegável. Vamos ver como adicionar legendas pode influenciar os números que mais importam.
Impacto do Arquivo SRT nas Principais Métricas de Vídeo
| Métrica | Impacto do Uso de Arquivos SRT | Exemplo do Mundo Real |
|---|---|---|
| Tempo de Exibição | Aumenta significativamente à medida que os espectadores podem acompanhar com o som desligado ou em ambientes barulhentos. | O tempo de exibição de um tutorial de culinária salta 25% porque os espectadores podem seguir as etapas da receita no trem sem fones de ouvido. |
| Alcance do Público | Expande seu público para incluir falantes não nativos e os 430 milhões de pessoas globalmente com perda auditiva. | Um canal focado em negócios nos EUA vê um crescimento de 15% em seu público internacional após adicionar legendas em inglês. |
| Classificações de Busca | Melhora a visibilidade ao fornecer uma transcrição completa e indexável para os rastreadores de mecanismos de busca. | Um vídeo sobre "dicas de reforma de casa" começa a ser classificado para palavras-chave de cauda longa faladas no vídeo, como "como instalar buchas de drywall". |
| Taxa de Engajamento | Gera mais curtidas, comentários e compartilhamentos porque o conteúdo é mais fácil de entender e consumir. | Um esquete de comédia recebe mais compartilhamentos no Facebook porque as piadas são claras mesmo quando o vídeo é reproduzido automaticamente sem som. |
Como você pode ver, os dados mostram consistentemente que os arquivos SRT não são apenas um recurso, mas um catalisador para o crescimento.
Como os Arquivos SRT Impulsionam o Crescimento de Vídeos no Mundo Real
Descoberta por Pesquisa
Arquivos SRT transformam palavras faladas em texto rastreável, ajudando os motores de busca a entender e classificar seu conteúdo de vídeo com precisão.
Retenção de Audiência
Legendas mantêm os espectadores engajados mesmo quando o som está desligado, aumentando o tempo de visualização e a clareza da mensagem.
Conformidade de Acessibilidade
Legendas garantem que seu conteúdo seja inclusivo para espectadores surdos ou com deficiência auditiva, expandindo o alcance e a confiança.
Reaproveitamento de Conteúdo
Um arquivo de legendas serve também como transcrição que você pode reutilizar para blogs, posts em redes sociais, resumos e trechos de SEO.
O formato SubRip Text (SRT) tem suas raízes nos primórdios da cultura de "ripping" de DVDs, projetado para tornar as legendas portáteis e fáceis de compartilhar. O YouTube adicionou oficialmente suporte a ele em agosto de 2008, cimentando seu lugar como o padrão global para criadores de vídeo. Você pode aprender mais sobre sua história técnica e influência no formato SubRip na Wikipedia.
Em última análise, dedicar tempo para aprender a criar legendas para vídeos é um investimento inteligente. Ele rende dividendos ao tornar seu conteúdo mais descoberto pelos motores de busca e muito mais envolvente para as pessoas que o encontram.
Conhecendo o Formato de Arquivo SRT
Antes de começar a criar arquivos SRT que funcionam em todos os lugares, você precisa entender o que os faz funcionar. À primeira vista, um arquivo SRT pode parecer um pouco com código, mas é realmente apenas um arquivo de texto simples e lógico. Essa simplicidade é exatamente o motivo pelo qual ele se tornou o padrão universal para legendas.
Pense nisso como um script básico para o seu reprodutor de vídeo. Cada pequeno trecho de texto diz ao reprodutor exatamente quais palavras mostrar, quando mostrá-las e quando removê-las. Cada legenda no arquivo segue exatamente a mesma estrutura de quatro partes, sem exceção.
As Quatro Partes Principais de um Bloco SRT
Um arquivo SRT é apenas uma série desses blocos repetidos, com cada um representando uma única legenda que aparece na tela. Acertar esses quatro elementos é crucial, quer você os esteja digitando manualmente ou limpando um arquivo de uma ferramenta automatizada.
Vamos dissecar um único bloco de legenda para ver o que está acontecendo:
1 00:00:03,450 --> 00:00:05,820 Esta é a primeira linha de diálogo, e esta é a segunda linha.
Este pequeno bloco tem tudo o que um reprodutor de vídeo precisa. Vamos detalhar cada linha.
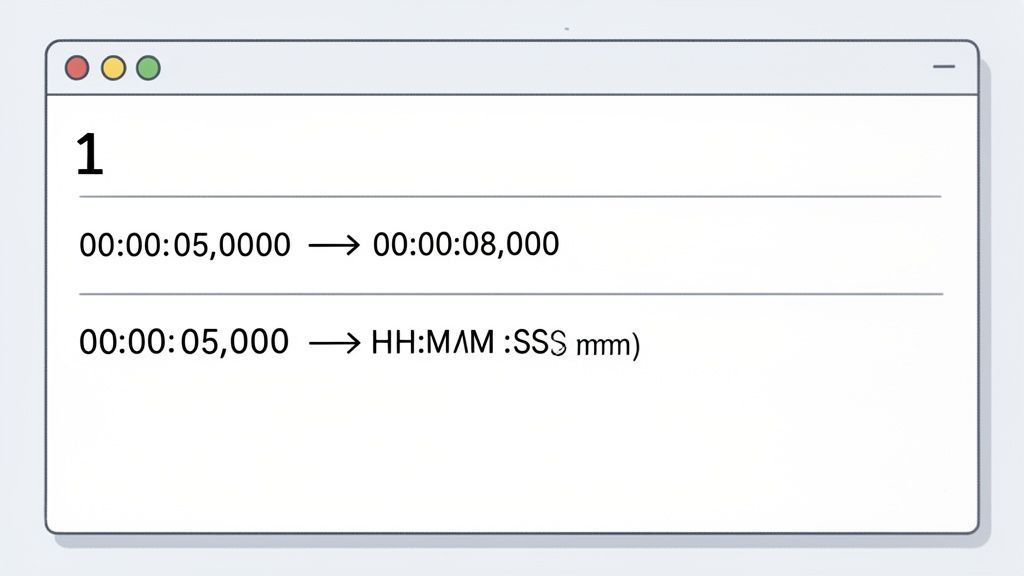
- O Número: A primeira linha é apenas um contador, começando em 1. Ele informa ao reprodutor a sequência das legendas, aumentando em um para cada nova legenda.
- O Carimbo de Data/Hora: Esta é a parte mais importante. Ele define os tempos de início e fim da legenda usando um formato muito rigoroso: HH:MM:SS,mmm (Horas:Minutos:Segundos,milissegundos). Os tempos de início e fim são sempre separados por uma seta,
-->. - O Texto da Legenda: Logo após o carimbo de data/hora, você tem o texto real da legenda. Normalmente, você verá uma ou duas linhas aqui. Embora você possa tecnicamente adicionar mais, manter um máximo de duas linhas é uma boa prática para legibilidade.
- A Linha em Branco: Esta é uma parte inegociável do formato. Uma única linha em branco deve seguir o texto da legenda. Ela atua como um separador, dizendo ao reprodutor: "Esta legenda está pronta, prepare-se para a próxima." Eu vi inúmeros arquivos falharem ao carregar simplesmente por causa de uma linha em branco faltando.
Por Que o Formato do Carimbo de Data/Hora é Tão Rigoroso
O carimbo de data/hora é onde a maioria dos erros acontece quando as pessoas tentam criar esses arquivos manualmente. O formato, HH:MM:SS,mmm, tem que ser perfeito. Preste muita atenção à vírgula que separa os milissegundos — não é um ponto. Um pequeno erro, como usar dois pontos em vez de uma vírgula ou usar apenas dois dígitos para os milissegundos, pode tornar o arquivo inteiro inútil.
Minha Opinião: A estrutura rígida de um arquivo SRT é sua maior força e sua fraqueza mais comum. Ele funciona em todas as plataformas por causa desse formato rigoroso, mas também significa que não há absolutamente nenhuma margem para erros de sintaxe, especialmente nos carimbos de data/hora.
Para quem quer acertar o tempo, entender isso é fundamental. Se você está procurando um mergulho mais profundo no tempo, nosso guia sobre transcrição com timecode é um ótimo recurso. Ele realmente entra nos detalhes de capturar e formatar esses carimbos de data/hora com precisão.
Uma vez que você tenha uma compreensão sólida desses quatro componentes simples — o número, o carimbo de data/hora, o texto e a linha em branco de suma importância — você tem o projeto para qualquer arquivo SRT. Esse conhecimento lhe dá o poder não apenas de construir seus próprios arquivos do zero, mas também de identificar e corrigir rapidamente problemas em arquivos que você obtém de outras fontes.
O Método Manual: Criando Arquivos SRT do Zero
Às vezes, você só precisa colocar a mão na massa. Embora as ferramentas automatizadas sejam uma salvação, construir um arquivo SRT manualmente lhe dá controle absoluto e uma sensação real de como as legendas funcionam. Pense nisso como aprender os fundamentos. É perfeito para clipes curtos, projetos de alto risco onde cada milissegundo conta, ou se você apenas quer entender o ofício antes de depender de software.
Tudo o que você precisa é de um editor de texto básico — o Bloco de Notas no Windows ou o TextEdit no macOS servirão — e seu arquivo de vídeo. É um processo direto, mas exige paciência e um bom ouvido. Você está essencialmente desempenhando o papel duplo de transcritor e cronometrista, um fluxo de trabalho que foi o padrão da indústria por anos.
Preparando Seu Espaço de Trabalho para o Sucesso
Primeiro, organize sua tela. Abra seu reprodutor de vídeo de um lado e seu editor de texto do outro. Essa visualização lado a lado é inegociável, pois você alternará constantemente entre reproduzir o vídeo, digitar o que ouve e anotar o tempo.
Uma pequena dica profissional da experiência: aprenda os atalhos de teclado do seu reprodutor de vídeo. Ser capaz de reproduzir e pausar com uma única tecla (geralmente a barra de espaço) economizará uma montanha de cliques do mouse e o ajudará a entrar em um bom ritmo.
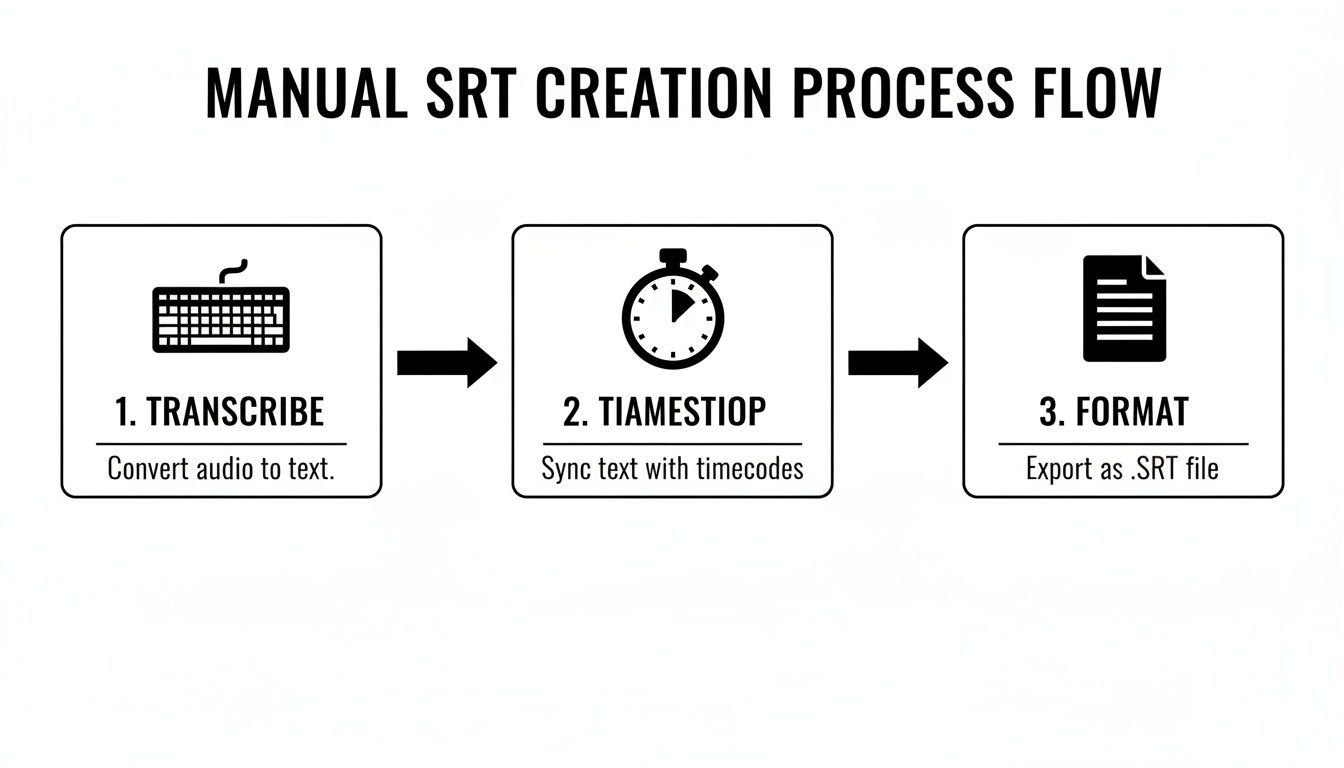
O Fluxo de Trabalho Manual Principal
Criar um arquivo SRT à mão é realmente apenas um loop simples e repetitivo para cada trecho de diálogo. Parece meticuloso no início, mas você descobrirá que se torna natural depois de algumas linhas.
Aqui está o ciclo básico que você repetirá repetidamente:
- Ouça e Digite: Reproduza um pequeno trecho do vídeo — apenas alguns segundos é o melhor — e digite o diálogo em seu editor de texto.
- Registre os Carimbos de Data/Hora: Volte um segundo, reproduza novamente e anote cuidadosamente o tempo exato em que o diálogo começa e quando termina. Você precisará usar o formato
HH:MM:SS,mmm --> HH:MM:SS,mmm. - Monte o Bloco: Agora, junte tudo. Você adicionará o número da sequência, o carimbo de data/hora que acabou de registrar e o texto que digitou. Não se esqueça de pressionar Enter duas vezes para adicionar uma linha em branco, que diz ao reprodutor que essa legenda está concluída.
Uma Breve Verificação da Realidade sobre o Tempo: Este não é um processo rápido. Antes da automação, esta era a única maneira, com editores ouvindo meticulosamente linha por linha. Um vídeo de 60 minutos, que pode facilmente ter 700–1.200 legendas individuais, poderia levar de 180 a 360 minutos de trabalho puro e focado. Esse enorme compromisso de tempo é exatamente o motivo pelo qual as ferramentas automatizadas decolaram. Se você quiser se aprofundar, Sally.io tem um ótimo artigo sobre a história da criação manual de SRT.
Você repetirá este ciclo até que todo o vídeo seja legendado. Pode parecer muito, mas você está apenas construindo uma transcrição, uma peça cronometrada de cada vez. Se a parte da transcrição parecer um pouco complicada, nosso guia sobre como transcrever vídeo para texto tem algumas dicas sólidas que são perfeitas para este fluxo de trabalho.
Salvando Seu Arquivo Corretamente
Você fez todo o trabalho árduo, então não tropece na linha de chegada! Salvar o arquivo corretamente é o que transforma seu documento de texto simples em um arquivo SRT funcional. É aqui que muitas pessoas cometem um erro.
- Para usuários do Windows (Bloco de Notas): Vá em
Arquivo > Salvar como. Procure o menu suspenso "Salvar como tipo" e escolha "Todos os arquivos". Em seguida, nomeie seu arquivo com a extensão.srt, comomeu-video-incrivel.srt. - Para usuários do Mac (TextEdit): Antes de salvar, você precisa mudar para texto simples. Vá em
Formatar > Tornar Texto Simples. Ao salvar, certifique-se de desmarcar a caixa que diz "Se nenhuma extensão for fornecida, use .txt" e adicione manualmente.srtao nome do seu arquivo.
Um último detalhe crítico: sempre escolha UTF-8 para a codificação ao salvar. Isso garante que quaisquer caracteres especiais, acentos ou emojis apareçam corretamente em qualquer dispositivo ou plataforma. É um pequeno passo que evita um mundo de frustração com erros de texto ilegíveis no futuro.
O Método Automatizado: Usando IA para Criar Arquivos SRT
Embora criar um arquivo SRT manualmente lhe dê controle total, sejamos realistas — é um enorme desperdício de tempo. A maioria dos criadores que conheço já está sobrecarregada, e passar horas transcrevendo e cronometrando manualmente simplesmente não é viável. É aqui que a automação se torna uma salvação. Usar uma ferramenta alimentada por IA transforma o que costumava ser uma tarefa de várias horas em uma tarefa rápida de cinco minutos.
Isso não se trata de cortar caminho; trata-se de ser inteligente com seu tempo. A transcrição moderna de IA é surpreendentemente boa, muitas vezes atingindo 99% de precisão ou melhor com áudio claro. Seu papel muda de trabalho braçal para controle de qualidade. Em vez de construir uma transcrição do zero, você está apenas dando um polimento final a um rascunho quase perfeito.
Como é o Fluxo de Trabalho da IA na Realidade
Ferramentas como Transcript.LOL são construídas para tornar esse processo incrivelmente simples. O objetivo é deixar a IA cuidar das partes mais entediantes do trabalho — a digitação real e a cronometragem inicial — para que você possa se concentrar em criar ótimo conteúdo.
Aqui está o fluxo típico:
- Faça Upload da Sua Mídia: Basta arrastar e soltar seu arquivo de vídeo ou áudio. A maioria das plataformas também permite colar um link ou conectar-se ao armazenamento em nuvem.
- Deixe a IA Fazer o Trabalho Pesado: O sistema processará seu arquivo, convertendo a fala em texto e atribuindo um carimbo de data/hora a cada palavra.
- Revise e Refine: Entre no editor para fazer quaisquer correções rápidas. Geralmente, é apenas corrigir um nome ou ajustar uma frase para maior clareza.
- Exporte para SRT: Um clique, e você terá um arquivo SRT perfeitamente formatado pronto para uso.
Este fluxo de trabalho visualiza o quanto do tedioso processo manual é completamente automatizado.
Como você pode ver, a IA assume a transcrição, a cronometragem e a formatação, reduzindo um processo outrora doloroso a uma única etapa automatizada.
Um Exemplo do Mundo Real com Transcript.LOL
Vamos dizer que você acabou de gravar um podcast de entrevista de 30 minutos. Criar um SRT manualmente para isso facilmente levaria mais de duas horas, talvez mais.
Com uma ferramenta de IA, o processo é completamente diferente. Você faz o upload do seu arquivo de áudio final. Em cerca de cinco minutos, você recebe uma notificação de que a transcrição está pronta. Ao abrir o editor, você encontrará o diálogo completo, muitas vezes com os falantes identificados e rotulados automaticamente.
Em vez de digitar e sincronizar, você está apenas revisando. Talvez você corrija alguns termos específicos da indústria ou ajuste uma frase para um melhor fluxo. Essa revisão pode levar dez minutos, no máximo. Assim que estiver satisfeito, você clica em "Exportar", escolhe "SRT", e o arquivo está no seu computador. Você acabou de economizar algumas horas.
Se você quiser se aprofundar na tecnologia por trás disso, nosso guia sobre software de transcrição com IA o cobre em mais detalhes.
Minha Conclusão: A automação muda completamente a matemática da legendagem. Quando a criação de legendas não é mais um grande compromisso de tempo, ela deixa de ser um "nice-to-have" e se torna uma parte padrão do fluxo de trabalho de todo vídeo.

Importar de múltiplas fontes
Importe arquivos de áudio e vídeo de várias fontes, incluindo upload direto, Google Drive, Dropbox, URLs, Zoom e mais.
Ferramentas de edição
Edite transcrições com ferramentas poderosas incluindo buscar e substituir, atribuição de falantes, formatos de texto rico e destaque.
Resumos e Chatbot
Gere resumos e outros insights da sua transcrição, prompts personalizados reutilizáveis e chatbot para o seu conteúdo.
Criação Manual vs. Automatizada de SRT com Transcript.LOL
A diferença entre os dois métodos é gritante. Não se trata apenas de velocidade; trata-se de precisão, consistência e sanidade geral. Automatizar a criação de SRT libera você para produzir mais conteúdo, interagir com sua comunidade ou simplesmente recuperar um pedaço do seu dia.
Esta tabela detalha as principais diferenças e, para a maioria dos criadores, a escolha é bastante clara.
| Recurso | Criação Manual (Editor de Texto) | Criação Automatizada (Transcript.LOL) |
|---|---|---|
| Investimento de Tempo | 5-10x a duração do vídeo (ex: 50–100 min para um vídeo de 10 min) | ~5–10 minutos no total, independentemente da duração do vídeo |
| Precisão | Propenso a erros humanos, erros de digitação e erros de tempo | Até 99% de precisão com áudio claro; necessita de revisão mínima |
| Marcação de Tempo | Registro manual meticuloso e lento de cada tempo de início/fim | Marcação de tempo totalmente automática, a nível de palavra, em segundos |
| Fluxo de Trabalho | Pausar, retroceder, digitar e formatar constantemente | Carregar, revisar e exportar — um processo simples de três etapas |
| Identificação do Orador | Deve ser anotado e digitado manualmente para cada linha | A rotulagem automática do orador economiza muito tempo |
| Ideal Para | Clipes curtos, projetos de alta precisão ou para aprender o básico | Qualquer criador que queira economizar tempo e escalar a produção |
Em última análise, usar uma ferramenta de IA para criar arquivos SRT é um movimento estratégico. Você está investindo em um fluxo de trabalho que permite entregar consistentemente conteúdo acessível e otimizado para SEO sem esgotamento ou ficar para trás. Trata-se de recuperar seu ativo mais valioso: seu tempo.
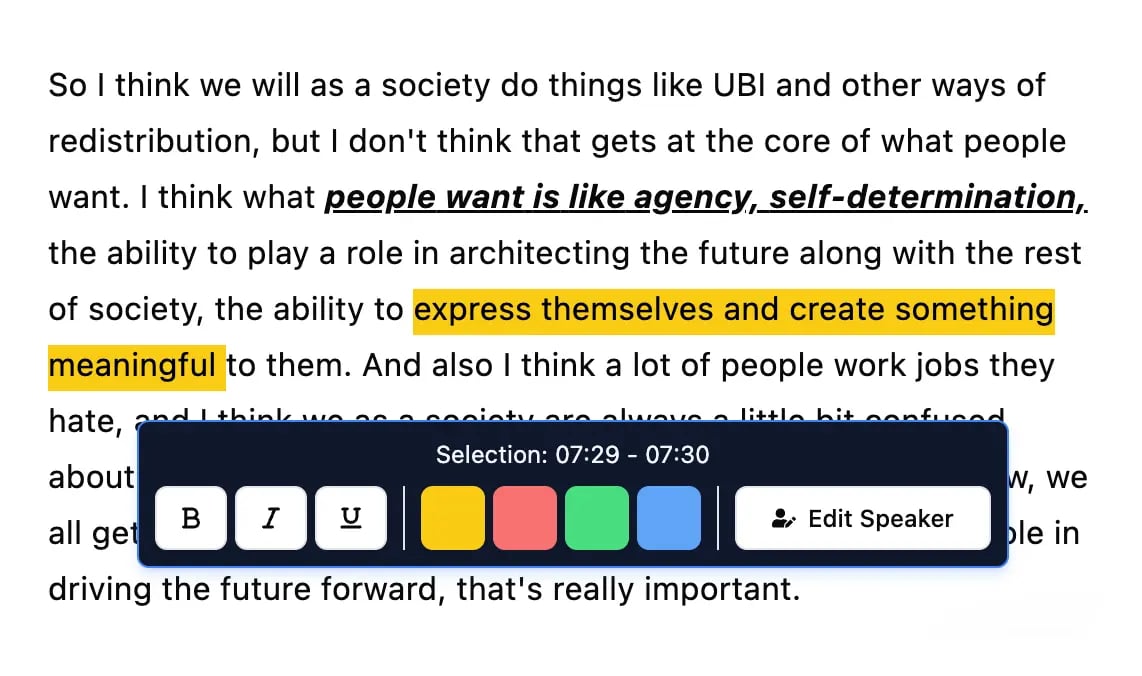
Editando e Sincronizando Seus Arquivos SRT Como um Profissional
![Um cursor de mão interage com uma linha do tempo de edição de áudio digital, selecionando um segmento de '[risada]'.](https://cdn.outrank.so/6a7d1029-9d02-4bcf-a50b-954cb77aff1e/e4cafdec-a1b5-4c3f-aaca-82783a87e503/create-srt-files-audio-editing.jpg) Obter um arquivo SRT gerado por IA é um ótimo ponto de partida, mas seu trabalho ainda não acabou. Pense nesse arquivo inicial como um rascunho de alta qualidade. A verdadeira mágica acontece na fase de edição, onde você transforma uma transcrição simples em uma experiência de visualização polida e profissional.
Obter um arquivo SRT gerado por IA é um ótimo ponto de partida, mas seu trabalho ainda não acabou. Pense nesse arquivo inicial como um rascunho de alta qualidade. A verdadeira mágica acontece na fase de edição, onde você transforma uma transcrição simples em uma experiência de visualização polida e profissional.
Este polimento final é o que separa um arquivo SRT aceitável de um excepcional. Tudo se resume a refinar o texto para legibilidade, ajustar o tempo para corresponder ao ritmo natural de uma pessoa e garantir que cada palavra esteja perfeitamente sincronizada com a ação na tela.
Torne Seu Texto Fácil de Ler
O objetivo principal das legendas é a comunicação clara, não apenas um despejo palavra por palavra do áudio. Ferramentas automatizadas são ótimas para capturar o que foi dito, mas é seu trabalho moldar esse texto para que ele seja fácil de absorver rapidamente.
Grandes blocos densos de texto são um pesadelo para os espectadores. A melhor abordagem é dividir frases mais longas em blocos de legendas menores e concisos. Isso dá ao público um momento para ler e processar as informações sem se sentir apressado.
- Divida Frases Longas: Se uma frase ficar complexa, encontre uma pausa natural — como logo após uma vírgula — e divida-a em uma nova legenda. Isso torna o texto muito menos intimidador.
- Fique de Olho na Contagem de Caracteres: Uma regra geral sólida é manter cada linha de sua legenda em cerca de 32-40 caracteres. Isso impede que o texto domine a tela e o torna escaneável.
- Mantenha Duas Linhas (Máximo): Nunca, jamais ultrapasse duas linhas de texto em uma única legenda. Isso mantém a composição do seu vídeo limpa e profissional.
Esses pequenos ajustes fazem uma grande diferença no fluxo do seu vídeo, evitando que seu público se sinta sobrecarregado.
Uma ótima legenda não apenas mostra o que foi dito; ela cadencia a informação para corresponder à velocidade de leitura humana. O objetivo é a compreensão sem esforço, não um desafio de leitura rápida.
Acertando o Tempo e a Sincronização
A sincronização perfeita é a marca de uma legenda de nível profissional. Não se trata apenas de quando as palavras aparecem, mas de como elas se sentem ao lado da entrega do orador. Uma legenda que aparece um instante antes ou permanece por muito tempo pode ser incrivelmente distrativa.
Seu objetivo aqui é ajustar os carimbos de data/hora para corresponder à cadência do orador. Ouça suas pausas naturais, respirações e mudanças de tom. O tempo de início de uma legenda deve atingir o momento exato em que a primeira palavra é falada.
Da mesma forma, o tempo de término deve coincidir com o fim daquela frase falada, desaparecendo assim que o orador terminar. Quando feito corretamente, isso cria uma experiência contínua onde o texto parece uma parte natural do áudio.
Lide com Mais do que Apenas Diálogos
Vídeos raramente são apenas cabeças falantes. Você tem risadas, música de fundo, aplausos e outros sinais de áudio que adicionam contexto e emoção cruciais. Um arquivo SRT bem elaborado precisa levar em conta esses sons não verbais.
Você pode anotar esses sons usando colchetes, como [risada], [aplausos] ou [música tocando]. Isso é essencial para acessibilidade, pois permite que espectadores surdos ou com deficiência auditiva entendam toda a atmosfera da cena.
Diálogos sobrepostos são outro desafio clássico. Quando duas pessoas falam uma sobre a outra, não tente colocar tudo em um único bloco de legendas. Uma solução muito mais limpa é usar um hífen para mostrar uma mudança de orador em uma nova linha:
- Acho que deveríamos ir para a esquerda.
- Não, a direita é definitivamente mais rápida.
Essa formatação simples mantém a conversa fácil de seguir. Você provavelmente fará esse trabalho em um software de edição de vídeo dedicado. Para uma boa visão geral de ferramentas de nível profissional, você pode conferir alguns dos melhores softwares de edição de vídeo para Mac e ver o que se encaixa no seu fluxo de trabalho. O passo final é quase sempre importar seu SRT polido para um programa como Premiere Pro ou Final Cut Pro para uma última verificação visual na linha do tempo, garantindo um resultado impecável.
Algumas Perguntas Comuns Sobre a Criação de Arquivos SRT
Ao se dedicar à criação de arquivos SRT, você certamente encontrará alguns obstáculos. É totalmente normal fazer parte da curva de aprendizado, quer você esteja digitando tudo manualmente ou usando uma ferramenta de IA sofisticada para fazer o trabalho pesado.
Deixar suas legendas perfeitas vai além de apenas colocar as palavras na tela. Vamos analisar algumas das perguntas mais frequentes que recebo de criadores, para que você possa corrigir problemas comuns e fazer com que suas legendas funcionem melhor para você.
Qual é o Melhor Software para Abrir e Editar um Arquivo SRT?
Honestamente, para edições de texto simples ou correções rápidas, você não precisa de nada sofisticado. Qualquer editor de texto simples resolverá o problema.
- No Windows, o bom e velho Bloco de Notas é sua melhor opção.
- No Mac, o TextEdit é tudo o que você precisa (apenas certifique-se de que esteja no modo de texto simples).
A verdadeira beleza do formato SRT é sua simplicidade, e é por isso que essas ferramentas básicas funcionam tão bem.
Agora, se você estiver fazendo um trabalho mais avançado, editores de legendas dedicados como Subtitle Edit ou Aegisub são opções gratuitas fantásticas. Eles oferecem recursos poderosos, como uma pré-visualização de vídeo que reproduz em sincronia com seu texto e ferramentas para deslocar todos os seus carimbos de data/hora de uma vez. Eles são salvadores quando você precisa fazer ajustes em massa.
Mas descobri que o fluxo de trabalho mais eficiente é editar a transcrição antes mesmo de exportar o arquivo SRT. Ao usar uma ferramenta como o Transcript.LOL, você pode fazer todas as suas correções em um editor amigável enquanto o texto ainda está vinculado ao áudio. Essa etapa simples garante que seu texto e tempos estejam perfeitamente sincronizados desde o início, economizando muitas dores de cabeça depois.
Como Corrigir um Arquivo SRT Fora de Sincronia?
Um arquivo SRT fora de sincronia é provavelmente o problema mais comum — e irritante — que você enfrentará. Como você o corrige realmente depende do porquê ele está fora de sincronia.
Se todas as legendas estiverem atrasadas pela mesma quantidade exata — digamos, todas aparecem dois segundos atrasadas — você tem uma correção fácil. A maioria dos editores de legendas tem um recurso de "deslocamento" ou "alterar tempos". Você apenas informa quanto deseja deslocá-las (como -2.000 segundos), e o software ajusta instantaneamente cada carimbo de data/hora no arquivo. Problema resolvido.
Mas e se o tempo parecer derivar, começando bem, mas piorando progressivamente? Isso é quase sempre uma incompatibilidade de taxa de quadros. Seu vídeo pode estar rodando a 29,97 fps (quadros por segundo), mas seu arquivo SRT foi gerado assumindo 23,976 fps. Você precisará abri-lo em um editor de legendas e converter a taxa de quadros do arquivo para corresponder à do seu vídeo.
Para aqueles erros pontuais em que apenas algumas legendas estão erradas, a correção é manual. Você terá que reproduzir o vídeo, pausar exatamente onde o tempo está errado e ajustar os tempos de início e término para esse bloco de legendas específico até que ele se alinhe perfeitamente.
Posso Adicionar Estilos como Negrito ou Cores a um Arquivo SRT?
A resposta curta é não. O formato SRT padrão é intencionalmente apenas texto simples. Ele não suporta nenhum tipo de estilo — sem negrito, itálico, sublinhado ou cores.
Essa limitação é, na verdade, sua maior força. Por ser tão básico, é universalmente compatível com quase todos os players de vídeo e plataformas do planeta.
Minha Opinião: Se você absolutamente precisa de formatação sofisticada, terá que usar um formato diferente como WebVTT (.vtt) ou SubStation Alpha (.ssa). Mas tenha em mente que plataformas como o YouTube permitem que você aplique estilos em seu próprio player de vídeo, mesmo a partir de um simples upload de SRT. Para alcance máximo e zero problemas de compatibilidade, manter um SRT limpo é quase sempre a decisão certa.
Ferramentas de IA Agora Gerenciam o Tempo Automaticamente
Ferramentas modernas de transcrição agora geram carimbos de data/hora em nível de palavra automaticamente, removendo a parte mais propensa a erros da criação de legendas. Isso torna os arquivos SRT de nível profissional acessíveis até mesmo para iniciantes.
Ao manter seu arquivo SRT sem formatação, você garante que ele funcionará perfeitamente em qualquer lugar.
Como faço para enviar um arquivo SRT para o YouTube ou redes sociais?
Enviar seu arquivo SRT finalizado geralmente é a parte mais fácil de todo o processo. Cada plataforma tem uma interface ligeiramente diferente, mas os passos principais são praticamente os mesmos.
No YouTube:
- Acesse o YouTube Studio e escolha o vídeo ao qual deseja adicionar legendas.
- Encontre a aba "Legendas" no menu à esquerda.
- Clique em "Adicionar" (ou edite um idioma existente).
- Você verá uma opção para "Enviar arquivo".
- Escolha "Com temporização" e, em seguida, selecione seu arquivo
.srtdo seu computador.
Para outras plataformas como Facebook, LinkedIn ou Vimeo: Normalmente, você encontrará a opção de enviar um arquivo de legendas durante o processo de upload do vídeo ou nas configurações de edição do vídeo. Basta procurar por palavras como "Legendas", "Subtítulos" ou "CC". Clique nisso e você será solicitado a enviar seu SRT.
Todo o processo foi projetado para ser bastante simples, tornando fácil adicionar essa melhoria crucial de acessibilidade e SEO ao seu conteúdo. Agora que você tem essas perguntas comuns respondidas, deve se sentir muito mais confiante em criar arquivos SRT que tornam seus vídeos melhores.
Pronto para pular o trabalho manual tedioso e criar arquivos SRT precisos em minutos? O Transcript.LOL usa IA inteligente para transcrever e marcar o tempo de seus vídeos automaticamente, permitindo que você exporte legendas perfeitas com um único clique. Experimente o Transcript.LOL gratuitamente e veja quanto tempo você pode economizar!