Creador Maestro de Archivos SRT con Transcript.LOL
Descubre cómo optimizar la creación de subtítulos como tu creador de archivos srt utilizando Transcript.LOL. Aprende consejos prácticos para generar, editar y exportar SRTs precisos.
Kate, Praveen
July 30, 2025
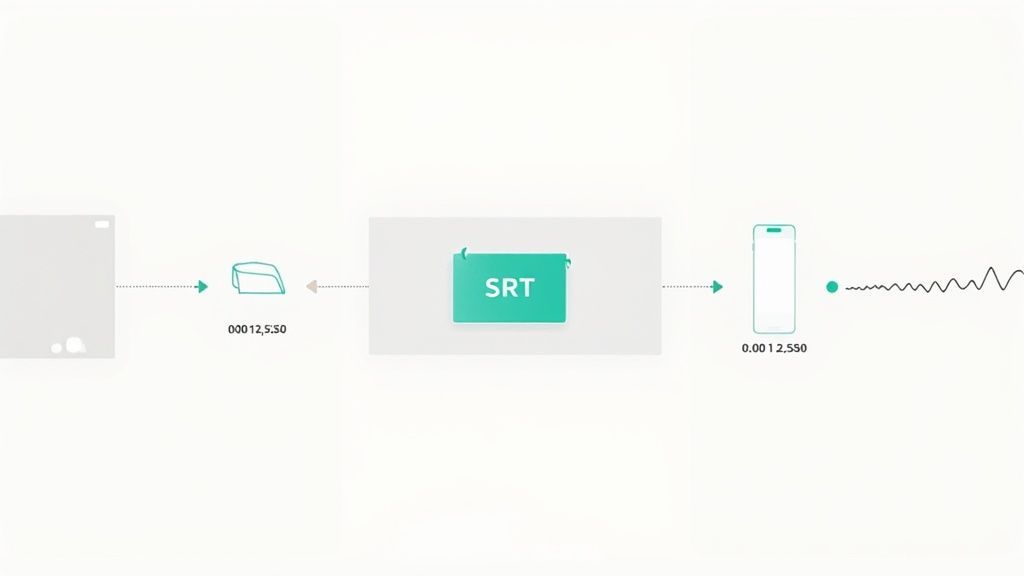
Un creador de archivos SRT toma una transcripción simple y la une en subtítulos cronometrados que aparecen en la pantalla exactamente cuando se dicen las palabras. La herramienta SRT de Transcript.LOL clava esa sincronización hasta el milisegundo, ofreciendo un nivel de precisión y facilidad que los editores de video y los streamers en vivo juran que funciona.
Funciones Principales que Potencian la Creación Precisa de SRT
IA de última generación
Impulsado por Whisper de OpenAI para una precisión líder en la industria. Soporte para vocabularios personalizados, archivos de hasta 10 horas y resultados ultra rápidos.
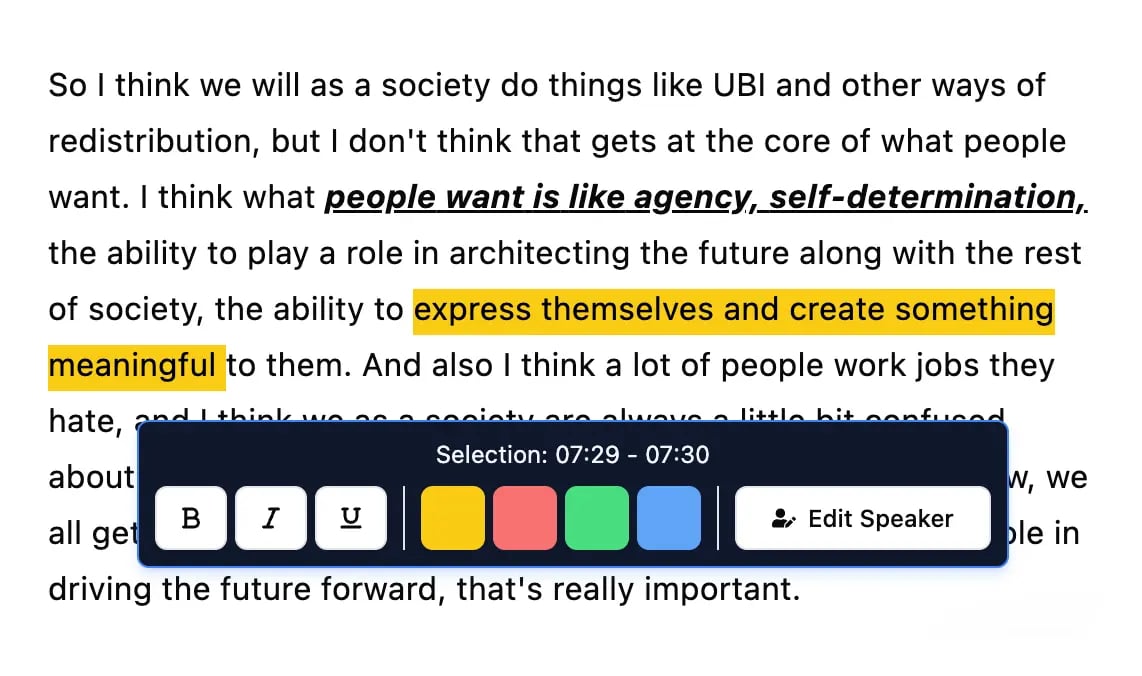
Herramientas de edición
Edita transcripciones con herramientas potentes como buscar y reemplazar, asignación de hablantes, formatos de texto enriquecido y resaltado.
Resúmenes y Chatbot
Genera resúmenes y otros análisis de tu transcripción, prompts personalizados reutilizables y chatbot para tu contenido.
Comprendiendo Conceptos Clave de Subtítulos
En su forma más simple, un archivo SRT sigue un patrón de cuatro partes: un número de índice, una marca de tiempo, el texto del subtítulo y una línea en blanco. Esta estructura sencilla es la razón por la que funciona bien con prácticamente todos los editores de video y plataformas.
¿Por qué SRT Sigue Siendo el Estándar Universal de Subtítulos?
La estructura mínima de SRT la hace compatible con casi todos los reproductores de video, editores y plataformas de transmisión. Como evita metadatos de estilo y diseño, se mantiene ligera, rápida de cargar y fácil de editar, incluso en editores de texto plano.
La precisión en el tiempo no es opcional cuando las palabras pasan volando en la pantalla. Los editores pueden ajustar los marcadores de inicio y fin por milisegundos individuales para eliminar solapamientos o pausas incómodas.
- Precisión de código de tiempo asegura que los subtítulos coincidan exactamente con el diálogo.
- Interoperabilidad cubre VLC, YouTube, Premiere Pro, lectores de pantalla y más.
- Eficiencia de tamaño de archivo mantiene las cargas ultrarrápidas al omitir etiquetas de estilo voluminosas.
Las cadenas de televisión confían en este formato ligero para mantener los subtítulos en vivo sincronizados con los guiones cambiantes. Los creadores independientes adoran cómo estos pequeños archivos de texto se cargan en un instante y se reproducen sin problemas.
Puede que te interese nuestra guía sobre cómo crear subtítulos para videos usando Transcript.LOL.
Estándares Globales de Subtítulos
Desde las redacciones de noticias en Toronto hasta los equipos de postproducción en Singapur, SRT se ha convertido en la opción preferida para proyectos multilingües e iniciativas de accesibilidad.
¿Qué hace que SRT sea indispensable para la transmisión y el streaming? Todo se debe a esos códigos de tiempo a nivel de milisegundos que bloquean los subtítulos en menos de 0.1 segundos.
Los Flujos de Trabajo Modernos de SRT Exigen Precisión de Milisegundos
Los pipelines de transmisión y difusión actuales dependen de una sincronización más ajustada que nunca. Las plataformas esperan cada vez más que los subtítulos se alineen dentro de milisegundos, especialmente para contenido en vivo, cumplimiento de accesibilidad y entrega multilingüe.
Mientras tanto, la ausencia de metadatos de estilo —sin etiquetas de color ni posicionamiento forzado— mantiene los tamaños de archivo pequeños y la compatibilidad por las nubes. Obtenga más información sobre los beneficios de precisión de SRT en sally.io.
"La precisión en la sincronización es crucial: cada milisegundo cuenta cuando los espectadores dependen de los subtítulos."
Por qué SRT destaca sobre otros formatos
SRT omite los detalles de estilo que encontrará en VTT o SSA. Eso puede sonar básico, pero es una gran ventaja en velocidad y simplicidad.
En las transmisiones en vivo, ese formato simplificado permite a los equipos de ingeniería enviar actualizaciones de subtítulos al instante, sin tener que analizar etiquetas. En las suites de postproducción, los archivos SRT se integran directamente en Premiere Pro o DaVinci Resolve, sin dolores de cabeza por la conversión.
- Transmisiones en vivo: Subtítulos en tiempo real con un retraso mínimo
- Clips de redes sociales: Cargas rápidas a IGTV, TikTok y más allá
- Capacitación corporativa: Soporte de subtítulos multilingües para equipos globales
Estos variados casos de uso demuestran por qué SRT sigue siendo la columna vertebral de tantos flujos de trabajo de video.
¿Dónde los Archivos SRT Ofrecen el Mayor Valor?
Eventos en Vivo y Transmisiones
SRT permite actualizaciones rápidas de subtítulos durante espectáculos en vivo, paneles y transmisiones de noticias. Su estructura ligera minimiza el retraso y mantiene los subtítulos alineados incluso cuando los guiones cambian sobre la marcha.
Redes Sociales y Videos Cortos
Los creadores confían en SRT para cargas rápidas a YouTube, Instagram, TikTok y LinkedIn. Los tamaños de archivo pequeños significan una publicación más rápida y una reproducción instantánea en todos los dispositivos.
Contenido Corporativo y de Capacitación
Las empresas utilizan archivos SRT para ofrecer capacitación multilingüe a escala. Los subtítulos mejoran la comprensión, la accesibilidad y la participación de los equipos globales.
Educación y Accesibilidad
Las plataformas educativas dependen de SRT para conferencias, seminarios web y clases grabadas. La sincronización precisa ayuda a los estudiantes a seguir temas complejos sin distracciones.
Escenarios de Sincronización en el Mundo Real
Imagina un evento en vivo: los ponentes cambian de tema sobre la marcha y los panelistas intervienen inesperadamente. El creador de SRT de Transcript.LOL permite a tu equipo ajustar la sincronización sobre la marcha para mantener los subtítulos precisos.
- Las herramientas de exportación y conversión automáticas insertan los subtítulos en cualquier editor o formato futuro en segundos.
Preparando Transcript.LOL para la Creación de Archivos SRT
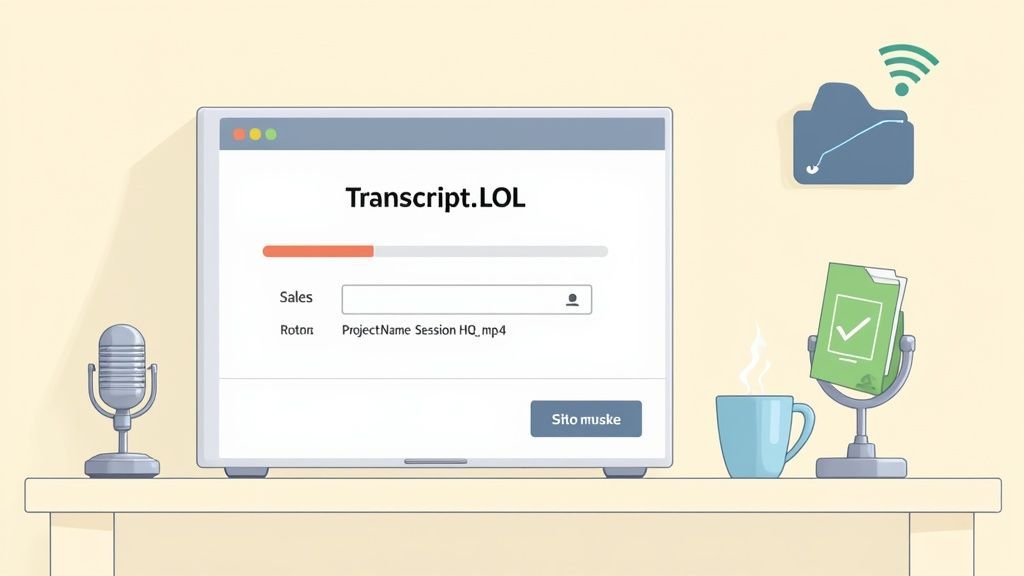
Reúne tus medios de origen y recorta los silencios largos para que Transcript.LOL pueda procesar todo de manera más eficiente. Una convención de nombres como NombreProyecto_Sesion1_HQ.mp4 evita sobrescrituras accidentales cuando estás manejando múltiples tomas.
Para más información sobre cómo preparar tus archivos de video y convertirlos en texto, consulta nuestra guía detallada.
Comprueba la Configuración del Navegador
Asegúrate de que tu navegador esté actualizado y considera deshabilitar cualquier extensión pesada antes de cargar archivos grandes. Este simple paso reduce los bloqueos y las ralentizaciones inesperadas.
- Actualiza Chrome o Firefox a la última versión
- Cierra las pestañas no utilizadas para liberar memoria del sistema
- Realiza una prueba de velocidad rápida para confirmar tu tasa de carga
Organiza Tus Carpetas
Una estructura de carpetas ordenada vale su peso en oro cuando estás trabajando en múltiples revisiones. Siempre empiezo con un directorio raíz con el nombre del proyecto, luego inserto raw_media, transcripts y exports.
- Crea una carpeta de nivel superior etiquetada con el nombre de tu proyecto
- Añade subcarpetas:
raw_media,transcripts,exports - Asigna a cada archivo un nombre claro y único para rastrear cada versión
Un espacio de trabajo ordenado reduce los errores de subtítulos en más de un 30% y acelera los ciclos de revisión.
Con esto en su lugar, lanzar el creador de SRT se siente perfecto.
Realiza la Comprobación del Micrófono
Si tu proyecto incluye voces en off, una prueba rápida del micrófono es innegociable. Un audio limpio significa menos ajustes más adelante.
- Coloca un filtro antipop a unos 5 cm del micrófono para atenuar las oclusivas
- Habla a un volumen natural e inspecciona la forma de onda para ver si es consistente
- Utiliza una interfaz USB o XLR para niveles de entrada fiables
Finaliza la Configuración
Ahora que tus medios tienen nombre, el navegador está recortado, las carpetas están organizadas y los niveles del micrófono están bloqueados, abre el creador de archivos SRT de Transcript.LOL con confianza.
Dedicar unos minutos extra a la configuración vale la pena: tus subtítulos serán más precisos y tu ciclo de revisión pasará volando.
Primeros Pasos con Transcript.LOL
Cuando inicias sesión en Transcript.LOL por primera vez, el panel se siente refrescantemente despejado. Está diseñado para que puedas empezar a trabajar en subtítulos de inmediato, sin tener que buscar el botón correcto.
Imagina terminar una entrevista con un cliente y necesitar los subtítulos listos para el almuerzo. Puedes importar archivos de audio o video en segundos, cambiar de idioma sobre la marcha y pulsar "Transcribir". Cada elemento refleja los comentarios de usuarios experimentados de SRT, por lo que décadas de mejores prácticas están integradas en la interfaz.
Subir tus archivos es indoloro. Simplemente arrastra y suelta, o navega por almacenamiento local y en la nube sin encontrar obstáculos. La función de marca de tiempo masiva incluso maneja múltiples segmentos a la vez, ahorrándote muchos clics.
- Opciones de Importación: MP4, WAV, MOV y más
- Configuración de Idioma: Elige entre más de 100 dialectos, además de detección automática
- Diccionario Personalizado: Añade nombres, acrónimos y jerga de la industria
Herramientas Avanzadas que Optimizan los Flujos de Trabajo de Subtítulos

Importar desde múltiples fuentes
Importa archivos de audio y video desde diversas fuentes, incluyendo carga directa, Google Drive, Dropbox, URLs, Zoom y más.

Detección de hablantes
Identifica automáticamente diferentes hablantes en tus grabaciones y etiquétalos con sus nombres.
Exportar en múltiples formatos
Exporta tus transcripciones en múltiples formatos incluyendo TXT, DOCX, PDF, SRT y VTT con opciones de formato personalizables.
Opciones de Importación del Panel
El panel de importación se divide en tres pestañas: unidades locales, URLs e integraciones en la nube. Está justo en la parte superior de su espacio de trabajo.
Esa captura de pantalla muestra que puede arrastrar y soltar archivos en lotes. Verá barras de progreso y detalles básicos del archivo antes de que comience la transcripción.
Navegación del Menú Simplificada
Una vez que sus archivos estén cargados, mire el menú superior para ver los selectores de idioma y los controles de marca de tiempo. Gracias al almacenamiento en caché inteligente, cambiar de idioma se siente instantáneo. ¿Transcripción masiva? Un clic y listo: las marcas de tiempo y los bloques de texto aparecen casi de inmediato.
Así es como los iconos se mapean en flujos de trabajo reales:
- Icono de micrófono: Iniciar una nueva sesión de transcripción
- Icono de globo terráqueo: Cambiar entre idiomas de subtítulos
- Icono de reloj: Ajustar la configuración de marca de tiempo
Estos elementos del menú evolucionaron a partir de años de comentarios de los usuarios, por lo que no está luchando con controles a medio hacer.
Acelere el Refinamiento del Borrador Inicial
Su primera transcripción no tiene por qué ser tosca. El corrector ortográfico incorporado marca los errores tipográficos a medida que avanza. Invite a compañeros de equipo a dejar comentarios o modificar líneas en tiempo real. Y cuando etiquete a los hablantes, ya sea por iniciales o nombres completos, rastreará el diálogo sin esfuerzo.
“El diseño impulsado por la comunidad crea herramientas que se adaptan genuinamente a cómo trabajamos.”
De hecho, las entradas de vocabulario personalizadas reducen las correcciones manuales en más de un 50%. Eso significa que su borrador inicial a menudo se siente más como un producto casi terminado.
Los primeros adoptantes en la década de 2000 ayudaron a que SRT se convirtiera en el formato de subtítulos preferido. Hoy en día, la mayoría de las plataformas todavía recomiendan exportar o convertir a SubRip (.srt). Puede leer más sobre su historia en Wikipedia.
Para un archivo multimedia típico, la importación y las ediciones iniciales toman menos de dos minutos. Después de eso, está listo para sumergirse en el ajuste fino de la sincronización de los hablantes y el etiquetado para obtener ese SRT perfecto.
Mejores Prácticas para un Flujo de Trabajo Fluido
Antes de exportar, revise la ortografía y la gramática una última vez. Los nombres de archivo claros, como NombreProyecto_ES.srt, mantienen a todos en la misma página.
- Revise su transcripción para ver si hay inconsistencias
- Utilice nombres de archivo descriptivos para evitar confusiones
- Exporte por lotes series grandes de una vez
- Conéctese a Zapier o a un script personalizado para un flujo de trabajo automatizado
Conclusión Clave: Los subtítulos de calidad comienzan con una importación rápida y valores predeterminados inteligentes.
Con estos pasos iniciales completados, está listo para pulir la sincronización, clavar las etiquetas de los hablantes y exportar un SRT impecable. Próximo: técnicas avanzadas de etiquetado y microajustes para que sus subtítulos brillen.
Comparación de la Creación Manual y Automatizada de Subtítulos
Cuando tiene una fecha límite ajustada, elegir entre escribir cada marca de tiempo a mano y dejar que la automatización haga el trabajo pesado puede sentirse como una bifurcación en el camino. Por un lado, la entrada manual le brinda sincronización precisa hasta el milisegundo. Por otro lado, Transcript.LOL procesa marcas de tiempo en lotes, corrige la ortografía automáticamente y etiqueta a los hablantes en una fracción del tiempo.
Aquí hay una captura de pantalla que lo explica: escritura manual en Notepad frente a una ejecución rápida a través de Transcript.LOL:

Para un clip simple de dos minutos, podría pasar 10 minutos alineando cada fotograma manualmente. ¿Transcript.LOL? Está viendo aproximadamente 3 minutos para un borrador inicial. Las comprobaciones de errores se integran inmediatamente con su línea de tiempo, reduciendo los fotogramas desalineados del 15% a menos del 5%. Y una vez que procesa por lotes diez archivos o más, ese ahorro de tiempo simplemente se acumula.
La Creación Manual de Subtítulos No Escala
Crear subtítulos a mano funciona para clips cortos, pero las tasas de error y los costos de tiempo aumentan drásticamente con proyectos más largos o masivos. Sin automatización, la consistencia, la precisión de la sincronización y la velocidad de revisión sufren rápidamente.
Creación Manual vs. Automatizada de Subtítulos
A continuación, una comparación rápida para que sopeses el control frente a la velocidad:
| Atributo | Editor Manual | Transcript.LOL Automatizado |
|---|---|---|
| Tiempo Requerido | 10+ minutos por clip de dos minutos | 3–5 minutos por clip de dos minutos |
| Tasa de Errores | Hasta un 15% de fotogramas desalineados | Menos del 5% con autocorrección |
| Flexibilidad de Edición | Control total de estilo | Ajustes masivos y etiquetas de hablante |
| Configuración | No se necesita cuenta | Inicio de sesión en el navegador y sincronización de configuraciones |
Ya sea que estés puliendo una sola entrevista o procesando en lote toda una serie de conferencias, estas cifras dejan claro qué ruta cumple con tus prioridades.
Diferencias Clave en el Flujo de Trabajo
- Lo manual brilla cuando necesitas un estilo personalizado: piensa en entrevistas en cámara con marca y señales de color.
- La automatización gana en ejecuciones de alto volumen como conferencias universitarias o archivos de podcasts.
- ¿Clips sociales pequeños? Ajustes manuales en minutos. ¿Exportaciones masivas? La automatización te ahorra horas.
- Un enfoque híbrido a menudo garantiza tanto precisión como rendimiento.
Pro Tip: Automatizar tu flujo de trabajo puede aumentar el rendimiento en un 60% una vez que estés manejando docenas de archivos a la vez.
Eligiendo Tu Enfoque
A continuación, se muestra una infografía que muestra cómo empezar a crear un archivo SRT usando Transcript.LOL:
Este árbol de decisión te guía a través de la carga de tus medios, la selección de tu idioma y el inicio de la transcripción, con la menor cantidad de clics posible y la máxima precisión.
Si prefieres crear tus propios archivos SRT en un editor de texto plano, recuerda que cada entrada solo necesita:
- Un contador incremental
- Una marca de tiempo de inicio y fin en formato HH:MM:SS,mmm
- El texto del subtítulo
Dicho esto, los editores profesionales recurren cada vez más a herramientas como Subtitle Edit y Filmora para ajustes basados en línea de tiempo, corrección ortográfica integrada y alineación de código de tiempo sin problemas. Lee más consejos sobre SRT en Filmora: https://filmora.wondershare.com/more-tips/everything-you-should-know-about-srt.html
También podrías querer profundizar en nuestro análisis de la precisión de los subtítulos: consulta nuestra guía sobre la precisión del habla a texto para obtener más información: https://transcript.lol/blog/speech-to-text-accuracy
Refinar Subtítulos con Etiquetas de Hablante y Ajustes de Tiempo
Después de cargar tus subtítulos aproximados, es hora de etiquetar cada voz y ajustar el tiempo hasta la milésima de segundo. El creador de archivos SRT de Transcript.LOL facilita la asignación de nombres de hablantes para que nunca pierdas el rastro en una grabación con múltiples voces.
Las Etiquetas de Orador Mejoran la Claridad y la Accesibilidad
Las etiquetas claras de orador ayudan a los espectadores a seguir las conversaciones más rápido, especialmente en entrevistas, paneles y podcasts. Reducen la confusión, limitan las solicitudes de repetición y mejoran significativamente la accesibilidad para audiencias con problemas de audición.
Optar por iniciales —como "AJ" en lugar de "Alex Johnson"— mantiene cada línea compacta. Pero cuando los espectadores no están familiarizados con todos los involucrados, escribir los nombres completos puede añadir contexto útil.
Consideraciones clave para un diálogo claro:
- Mantén etiquetas consistentes para que tu audiencia escanee los subtítulos sin confusión.
- Desplaza el habla superpuesta empujando la hora de inicio unos 200 ms.
- Divide los tramos largos en fragmentos de 1 a 2 segundos para mantener una velocidad de lectura cómoda.
Impacto en la Accesibilidad
Los ajustes de tiempo sólidos y las etiquetas explícitas de orador hacen más que agudizar el diálogo: hacen que los subtítulos sean mucho más inclusivos. De hecho, los estudios revelan que el 85% de los espectadores no nativos pausan menos cuando los subtítulos reflejan las pausas naturales del habla.
- Añade indicaciones no verbales como [risas] o [música] para transmitir el tono.
- Deja al menos 1,5 segundos por subtítulo para dar respiro a los lectores.
- Utiliza tamaños de fuente y colores contrastantes para una máxima legibilidad.
Estos pequeños detalles nos recuerdan que el tiempo y las etiquetas no son solo elecciones de estilo, son elementos esenciales de accesibilidad.
Mejores Prácticas para el Etiquetado de Oradores
Las etiquetas claras marcan una gran diferencia: las pruebas sugieren que el 73% de los espectadores siguen las conversaciones más rápido cuando los oradores están claramente etiquetados. Siempre empiezo las entrevistas precargando los nombres de los invitados y del anfitrión en mi diccionario de etiquetas.
Cuando los participantes se interrumpen, superpón los códigos de tiempo en Transcript.LOL para que ambas líneas aparezcan. De esa manera, ningún fragmento de diálogo desaparece nunca.
"Etiquetar a los oradores reduce las solicitudes de repetición a la mitad", dice un podcaster experimentado.
Tampoco puedo vivir sin estos atajos de teclado:
- Presiona Alt+← para adelantar la hora de inicio de un subtítulo 100 ms.
- Presiona Alt+→ para extender la hora de finalización 100 ms.
- Toca Ctrl+L para insertar tu plantilla de etiqueta predefinida.
Trucos Adicionales de Atajos
- Mantén presionada la tecla Shift mientras arrastras el borde de un subtítulo para incrementos de 10 ms.
- Combina las teclas de flecha con modificadores para ajustar la alineación a la velocidad del rayo.
- Guarda plantillas de etiquetas personalizadas y reduce las ediciones repetitivas en un 40%, perfecto para oradores con nombres largos.
Ajuste Fino del Tiempo
Conseguir el tiempo justo es parte arte, parte ciencia. Si avanzas los subtítulos demasiado rápido, tus espectadores se los perderán. Si los extiendes demasiado, notarán una desconexión entre el audio y el texto.
En la vista de forma de onda de Transcript.LOL, los picos codificados por colores resaltan las secciones de habla densa. Suaviza los picos más altos para evitar una avalancha de texto.
| Tipo de Ajuste | Desfase Ideal | Caso de Uso |
|---|---|---|
| Pre-desfase Inicio | 50–150 ms antes | Corregir pistas de audio retrasadas |
| Extender Fin | 100–300 ms más | Ralentizar el habla rápida |
| Dividir Subtítulos | En pausas naturales | Dividir monólogos largos |
Para una inmersión más profunda, consulta nuestra guía sobre transcripción con control de código de tiempo.
Ejemplo de Edición Real
Durante una edición reciente de un podcast, detectamos un bloque de subtítulos voluminoso de 12 segundos que resultaba abrumador. Dividirlo en la marca de los tres segundos redujo instantáneamente cada segmento a menos de 42 caracteres, haciendo que cada línea fuera más digerible.
Así es como lo abordamos:
- Busca subtítulos que duren más de 5 segundos.
- Haz clic en el manejador de división donde los oradores pausan naturalmente.
- Ajusta visualmente ambos segmentos y luego ajusta los tiempos con atajos.
Idea Principal: Cuando combinas una segmentación nítida con etiquetas de orador precisas, tus subtítulos se vuelven mucho más navegables e inclusivos.
Antes de exportar, siempre hago una reproducción rápida a 1,5x de velocidad para detectar cualquier subtítulo que desaparezca demasiado rápido. Una comprobación final en diferentes dispositivos asegura que tu archivo SRT se vea pulido y se lea sin problemas, sin importar quién esté mirando.
Exportación de Archivos SRT e Integración de Flujos de Trabajo
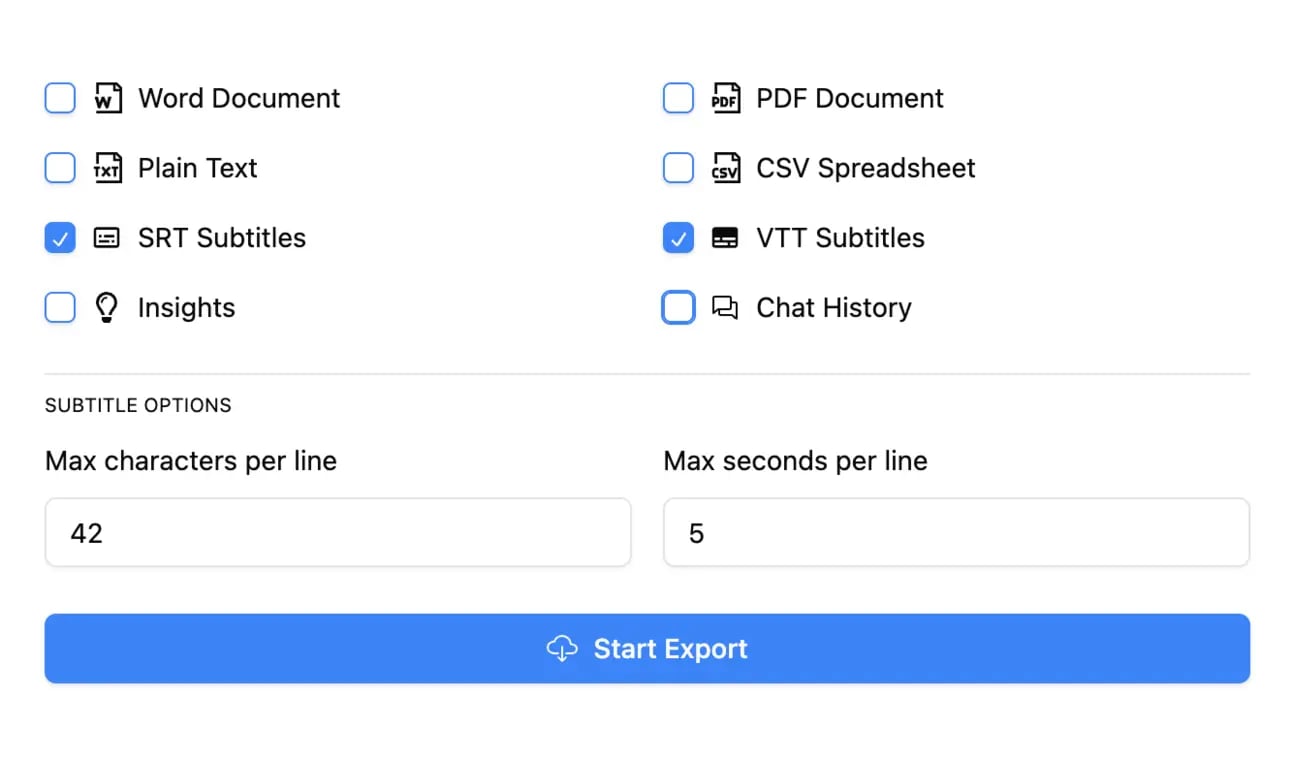
Una vez que hayas ajustado tus subtítulos, es hora de extraerlos de Transcript.LOL con el Creador de Archivos SRT. En unos pocos clics, elegirás un nombre de archivo claro, seleccionarás el conjunto de caracteres correcto y tendrás todo listo para tus plataformas de destino.
En el panel de exportación, verás campos para nombrar y seleccionar el conjunto de caracteres.
Aquí, hemos configurado NombreProyecto_ES.srt y hemos alternado entre UTF-8 y ANSI para evitar problemas de codificación.
Convenciones de Nomenclatura Clave
- Usa
NombreProyecto_Idioma.srtpara que los compañeros de equipo sepan exactamente qué están cogiendo. - Añade versiones (
_v2,_v3, etc.) cuando iteres en ediciones o traducciones. - Utiliza caracteres compatibles con ASCII; este simple paso evita la mayoría de los fallos de carga.
Elegir el conjunto de caracteres correcto es importante, especialmente con acentos y escrituras no latinas. Si distribuyes a nivel mundial, opta por UTF-8 BOM para garantizar que los símbolos se vean bien en YouTube, Vimeo, LinkedIn y otros CMS.
Importación a Plataformas de Edición
Una vez que el SRT esté en tu disco, arrástralo a tu editor de vídeo o CMS sin perder el ritmo.
- Premiere Pro: Archivo > Importar > Subtítulos, luego arrastra el nuevo SRT a tu línea de tiempo y ajústalo en su lugar.
- YouTube Studio:
Visita Subtítulos, haz clic en Subir archivo, selecciona tu
.srty elige el código de idioma. Previsualiza directamente en el reproductor. - Herramientas CMS: Busca un campo de "Subtítulos" o "Captions" en tu formulario de carga; adjunta el archivo y listo.
Idea Principal Los nombres de archivo personalizados y el conjunto de caracteres correcto reducen los errores de importación en un 80%.
Cuando necesites una integración más profunda, los ganchos API de Transcript.LOL pueden enviar subtítulos directamente a tu flujo de trabajo, eliminando pasos manuales.
Automatización de Exportaciones por Lotes
¿Manejas docenas (o cientos) de vídeos? El modo por lotes es un salvavidas. Transcript.LOL te permite poner en cola múltiples exportaciones con un solo comando. Si prefieres hacerlo tú mismo, un script de shell corto puede recorrer los SRT, renombrando, recodificando y enviando.
| Método | Caso de Uso Ideal | Velocidad |
|---|---|---|
| Panel de Exportación Única | Vídeos individuales | Minutos por archivo |
| Modo por Lotes | Series o archivos de conferencias | Segundos por archivo |
La sincronización con los socios de traducción se vuelve fluida cuando los nombres de archivo coinciden con sus especificaciones. Enviar NombreProyecto_FR.srt directamente a tu equipo de localización evita confusiones y acelera los plazos de entrega.
Cuando surgen errores de importación, esto es lo que debes comprobar:
- Formatos de código de tiempo: sin entradas faltantes o mal formadas.
- Límites de longitud de línea (mantén las líneas por debajo de 42 caracteres).
- Codificación de archivo: algunos sistemas prefieren UTF-8 sin BOM.
Prueba tu SRT exportado en algunos reproductores locales (VLC, QuickTime) y plataformas en línea antes de la entrega final. Una prueba rápida te ahorra innumerables dolores de cabeza más adelante.
Preguntas Frecuentes
Aquí tienes un puñado de soluciones para esos molestos problemas de SRT, desde la preparación del audio hasta la exportación de varias pistas de audio. Conseguirás que tus subtítulos queden bien ajustados y tu proceso de exportación funcione a la perfección.
-
¿Cómo Corrijo los Códigos de Tiempo Desalineados? Dirígete al editor de línea de tiempo de Transcript.LOL, busca huecos y luego arrastra los bordes de tus subtítulos hasta que encajen. Si toda la pista se desvía la misma cantidad, la herramienta de desplazamiento masivo te pone de nuevo en marcha en segundos.
-
¿Puedo Personalizar la Precisión del Código de Tiempo? Absolutamente. Cambia entre precisión de milisegundos y de fotogramas en la configuración. Hacer coincidir el estilo del código de tiempo con la velocidad de fotogramas de tu vídeo hace que tus subtítulos se sientan personalizados.
-
¿Qué Calidad de Audio es Ideal para la Transcripción? Apunta a 44.1 kHz o superior, y utiliza un micrófono direccional. Una habitación silenciosa hace desaparecer el ruido de fondo, y tu precisión de transcripción aumenta.
-
¿Cómo Exporto Archivos SRT Multilingües? Termina tu primera transcripción, cambia la configuración de idioma y luego reprocesa. Nombra las exportaciones claramente (piensa en NombreProyecto_ES.srt, NombreProyecto_EN.srt) y nunca las mezclarás.
Si detectas un desvío después de hacer cortes, vuelve a comprobar tus velocidades de fotogramas. Y recuerda: cuando cada conjunto de subtítulos se retrasa un intervalo fijo, la función de desplazamiento masivo es tu arma secreta.
Respuestas Detalladas a Preguntas Comunes
Profundicemos con consejos que pueden reducir tus ajustes manuales hasta en un 50%.
- Comprueba la primera marca de tiempo de cada vídeo. Si ese subtítulo inicial está mal, perseguirás la desalineación durante todo el proceso.
- Previsualiza en VLC o QuickTime antes de finalizar. Detectar el desvío pronto ahorra dolores de cabeza más tarde.
- Guarda siempre tu SRT como UTF-8 sin BOM. Ese pequeño paso evita que aparezcan caracteres extraños en la pantalla.
- Etiqueta a los oradores antes de exportar. Hace que el diálogo fluya con una claridad cristalina cuando los espectadores leen.
"Las pistas de audio limpias y los códigos de tiempo precisos reducen las tasas de error en un 30%", dicen los profesionales de la edición.
1 00:00:01,000 --> 00:00:04,000 Tu texto de subtítulos aquí.
Con estos trucos en tu poder, superarás los habituales obstáculos de los subtítulos y mantendrás cada subtítulo perfectamente sincronizado.
¿Listo para potenciar tus subtítulos con la velocidad y precisión impulsadas por IA? Prueba ahora Transcript.LOL: Transcript.LOL