Cómo Grabar una Reunión en Teams: Una Guía Completa
Aprende a grabar una reunión en Teams con esta guía completa. Cubre permisos, grabación en escritorio y móvil, almacenamiento y consejos para solucionar problemas.
Kate, Praveen
October 2, 2024
Listo para capturar esa conversación importante? Grabar una reunión en Microsoft Teams es sorprendentemente sencillo.
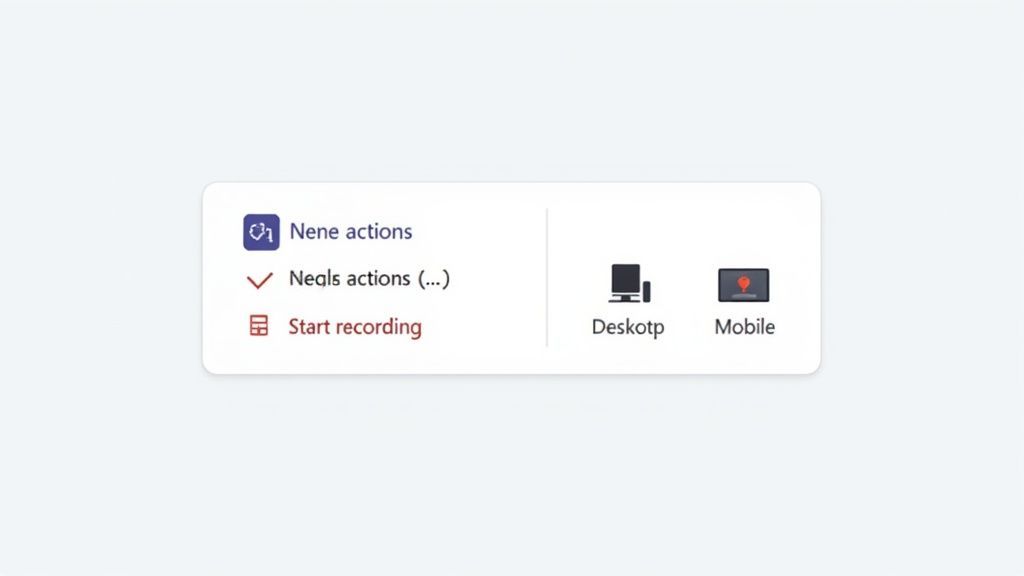
Una vez que tu reunión esté en curso, simplemente ve a los controles de la reunión, haz clic en los tres puntos (...) para 'Más acciones' y pulsa en Iniciar grabación. Eso es todo. Aparecerá una pancarta para que todos sepan que la grabación ha comenzado, manteniendo todo transparente para todos los participantes.
Funciones Clave que Impulsan tu Flujo de Trabajo
IA de última generación
Impulsado por Whisper de OpenAI para una precisión líder en la industria. Soporte para vocabularios personalizados, archivos de hasta 10 horas y resultados ultra rápidos.

Importar desde múltiples fuentes
Importa archivos de audio y video desde diversas fuentes, incluyendo carga directa, Google Drive, Dropbox, URLs, Zoom y más.
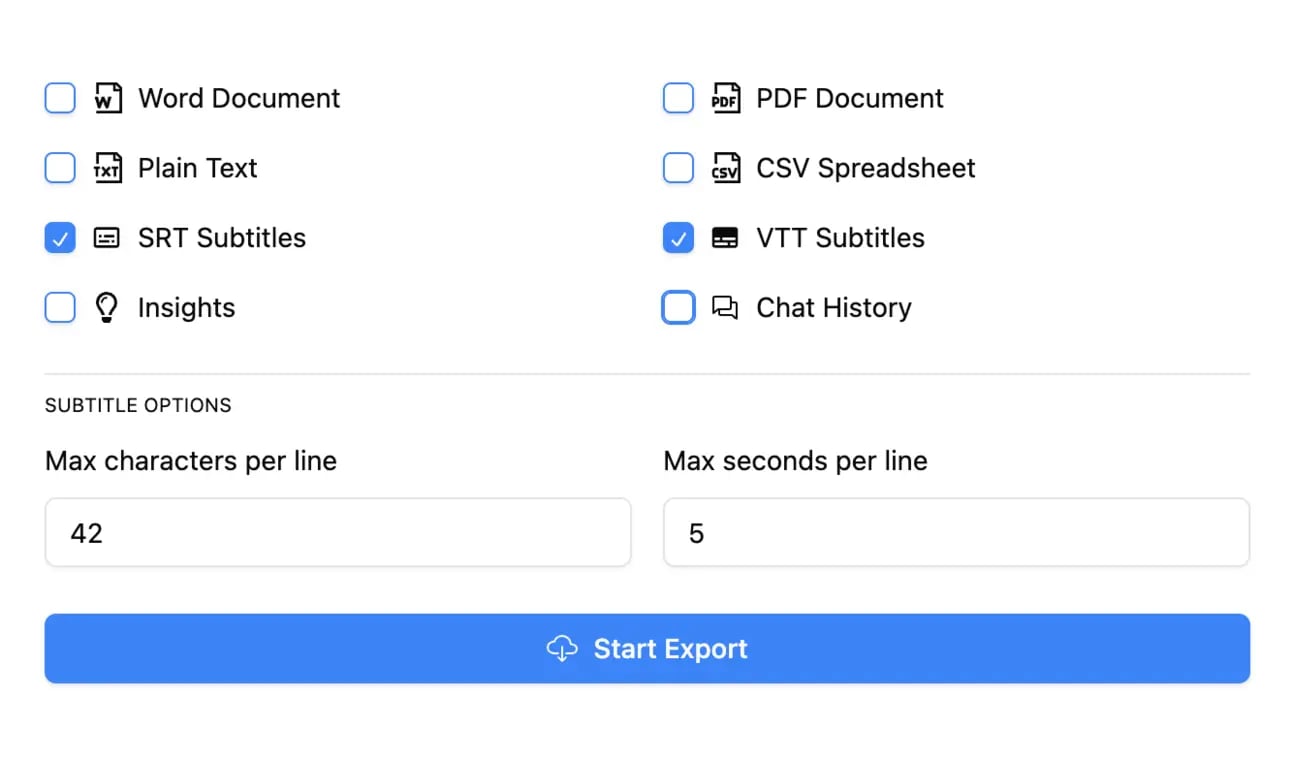
Exportar en múltiples formatos
Exporta tus transcripciones en múltiples formatos incluyendo TXT, DOCX, PDF, SRT y VTT con opciones de formato personalizables.
Cómo Grabar una Reunión de Teams al Instante
Cuando comienza una discusión importante, no quieres estar buscando entre menús. Microsoft diseñó la función de grabación para que sea rápida e intuitiva, permitiéndote capturar audio, video y compartir pantalla con solo un par de clics para que puedas volver a la conversación.
Esta funcionalidad integrada es una gran razón por la que Teams se ha convertido en una potencia en el lugar de trabajo moderno. Las cifras son asombrosas: la plataforma ahora maneja más de 330 mil millones de minutos de reunión en un solo día, un salto masivo desde solo 2.7 mil millones de minutos diarios a principios de 2020. Con alrededor de 320 millones de usuarios activos mensuales, esta función se ha vuelto indispensable para mantener a todos alineados. Puedes profundizar en más de estas asombrosas estadísticas de Teams en Desk365.io.
Este increíble crecimiento solo resalta cuán críticos son las herramientas de grabación fáciles de usar. Tan pronto como comienzas, Teams muestra automáticamente una pancarta de notificación para cada asistente, una característica crucial centrada en la privacidad. Como la persona que inició la grabación, verás un pequeño punto rojo y un temporizador, lo que te dará la tranquilidad de que todo se está capturando.
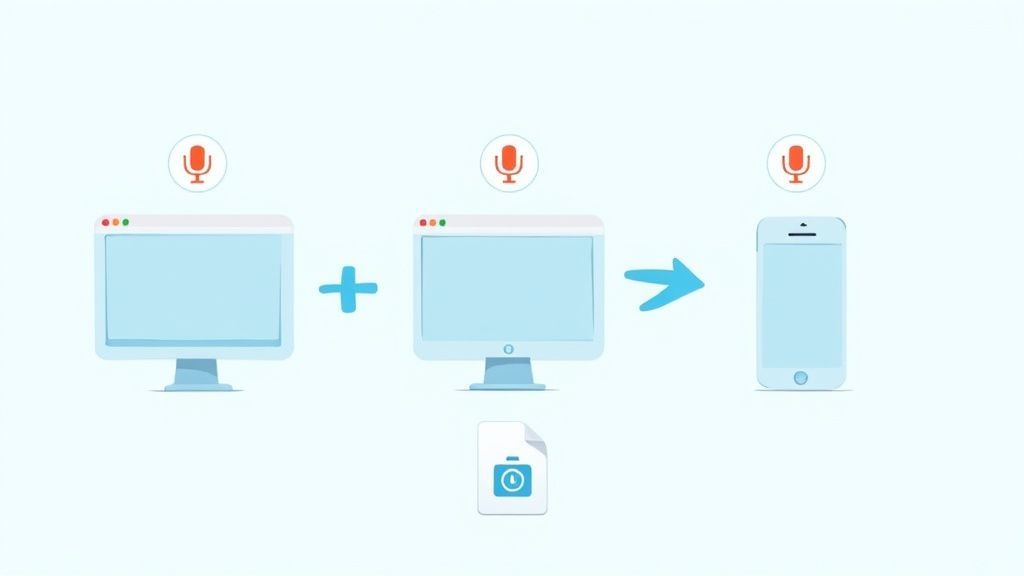
Capacidades de Grabación de Teams por Plataforma
Si bien la capacidad principal de grabar es universal, hay algunas diferencias sutiles dependiendo de si estás en tu computadora o en tu teléfono. Conocer estos matices con anticipación puede ahorrarte dolores de cabeza cuando no estás en tu escritorio principal.
El comportamiento de grabación de Teams cambia ligeramente entre plataformas. Esto es importante porque muchos usuarios asumen que el móvil, el escritorio y la web se comportan igual, pero no es así. Conocer estas diferencias evita grabaciones perdidas y confusiones.
Aquí tienes una comparación rápida de lo que puedes esperar en diferentes dispositivos.
| Característica | Aplicación de escritorio | Navegador web | Aplicación móvil (iOS/Android) |
|---|---|---|---|
| Iniciar/Detener grabación | Sí | Sí | Sí |
| Pausar/Reanudar grabación | Sí | Sí | No |
| Transcripción automática | Sí | Sí | Sí |
| Acceder a controles completos | Completo | Completo | Limitado |
Como puedes ver, la experiencia en la aplicación de escritorio y en un navegador web es prácticamente idéntica. Ambas te brindan el máximo control, incluida la útil función de pausar y reanudar. Esto es perfecto cuando necesitas saltarte un breve descanso o una conversación secundaria sensible sin crear un montón de archivos de video separados.
La verdadera magia ocurre cuando combinas la grabación instantánea con la transcripción. No solo estás capturando una conversación; estás creando un activo permanente y buscable al que tu equipo puede recurrir para obtener información mucho después de que finalice la llamada.
Si estás en movimiento, la aplicación móvil aún te permite iniciar y detener grabaciones, lo cual es genial en un apuro. Solo ten en cuenta que los controles más avanzados, como la pausa, están reservados para las versiones completas de escritorio o web.
Una vez que tu reunión haya terminado, ejecutar la grabación a través de una de las mejores herramientas de software de transcripción de reuniones es el siguiente paso perfecto para convertir rápidamente esa conversación en notas estructuradas y accionables.
¿Qué Puedes Hacer Después de Grabar?
Generar Resúmenes Instantáneos
Convierte reuniones largas en resúmenes concisos que son fáciles de leer y perfectos para compartir con compañeros de equipo ausentes o partes interesadas.
Extraer Elementos de Acción
Identifica automáticamente tareas, responsables, plazos y decisiones para que tu equipo nunca pierda el rastro de lo que se discutió.
Crear Notas Buscables
Convierte el contenido hablado en texto estructurado que puedes buscar, organizar, anotar y reutilizar cuando sea necesario.
Compartir con tu Equipo
Exporta o envía transcripciones y resúmenes en segundos, eliminando cuellos de botella y mejorando la comunicación en tu flujo de trabajo.
¿Por qué no puedo grabar en Teams? Vamos a solucionarlo
https://www.youtube.com/embed/ScWrJ-4Y68U
¿Alguna vez te has unido a una reunión importante, listo para pulsar grabar, solo para descubrir que el botón simplemente... ha desaparecido? Es un momento sorprendentemente común y frustrante, pero casi nunca es un error. La capacidad de grabar en Teams es importante, por lo que el acceso está estrictamente controlado por una combinación de tu licencia de usuario y las políticas de TI de tu empresa.
Antes de que puedas siquiera pensar en grabar, necesitas tener las credenciales adecuadas. Esta función no se otorga a todo el mundo.
- Necesitas la licencia correcta: Esto generalmente significa una suscripción como Office 365 E1, E3, E5, o un nivel Business que incluya capacidades de grabación.
- No puedes ser un invitado: Si te unes a una reunión como invitado o usuario federado, no tendrás la opción de iniciar o detener una grabación.
Si sabes que tienes la licencia correcta pero el botón de grabar sigue jugando al escondite, la respuesta casi siempre reside en el administrador de TI de tu organización. Ellos son los guardianes, utilizando el centro de administración de Teams para establecer reglas muy específicas sobre quién puede grabar y cuándo.
Los Guardianes: Comprendiendo las Políticas de Administración
Tu departamento de TI utiliza lo que se llaman políticas de reunión para gestionar los permisos de grabación. No son un simple interruptor de encendido/apagado; se pueden aplicar a toda la empresa, o pueden ser muy granulares y asignarse a equipos específicos o incluso a usuarios individuales.
Por ejemplo, una empresa podría decidir que todos en el departamento de ventas pueden grabar llamadas de clientes, pero los becarios tienen prohibido grabar cualquier reunión. Todo se trata de control y de asegurarse de que las grabaciones se manejen de manera responsable.
Microsoft ha creado herramientas bastante robustas para esto. Los administradores incluso pueden configurar políticas que inicien automáticamente una grabación y transcripción en el momento en que comienza una reunión, lo que es un salvavidas para asegurar que nunca se pierdan llamadas importantes de cumplimiento o capacitación.
El Acceso a la Grabaciones Depende de las Políticas de TI
La grabación puede estar deshabilitada para ciertos usuarios, roles o departamentos. Si falta el botón de grabar, casi siempre se debe a una política de administrador, no a un error técnico. Confirma siempre tu acceso antes de unirte a reuniones importantes.
El resultado final es este: si no puedes grabar, es por diseño. La función está regida por políticas que buscan un equilibrio entre facilitar el trabajo y cumplir con las necesidades de seguridad y cumplimiento. Un mensaje rápido a tu mesa de ayuda de TI es la forma más rápida de averiguar tus permisos específicos.
No es solo técnico, es sobre el consentimiento
Más allá de los obstáculos técnicos, está el importantísimo elemento humano: el consentimiento. Que el botón de grabar esté ahí no te da vía libre para usarlo sin avisar a nadie. Grabar a personas tiene implicaciones legales y de privacidad reales, por eso Teams envía automáticamente una notificación a todos en la reunión en el momento en que comienza una grabación.
Piensa en un médico que usa Teams para una consulta virtual. Para cumplir con las leyes de privacidad de la salud como HIPAA, su administrador de TI configuraría una política que no solo habilite la grabación, sino que también requiera el consentimiento explícito del paciente. Esto crea un entorno transparente y seguro, protegiendo a ambas partes.
Acertar con estos matices es clave para ser un grabador responsable. También es por eso que es bueno saber cómo se manejan tus datos. Detallamos nuestros propios compromisos en nuestra política de privacidad.
Para aquellos que buscan ampliar los límites de lo posible, vale la pena echar un vistazo al nuevo soporte de la API de Microsoft Teams, que abre un mundo de integraciones personalizadas para usuarios avanzados.
Tu guía práctica para grabar en cualquier dispositivo
 Una vez que tu administrador te haya dado luz verde, estarás listo para empezar a capturar tus reuniones. La buena noticia es que el proceso es casi idéntico, ya sea que estés en la aplicación de escritorio o te unas a través de tu navegador web, por lo que sabrás exactamente qué hacer independientemente de tu configuración.
Cuando estés en la reunión, busca la barra de control, que generalmente se encuentra en la parte superior de tu pantalla. Busca los tres puntos ( ... ) etiquetados como Más o Más acciones. Haz clic en ellos y aparecerá un menú desplegable con todos tus controles de reunión.
Desde allí, simplemente busca y selecciona Iniciar grabación. Eso es todo. Teams comienza inmediatamente a capturar todo: audio, video y cualquier uso compartido de pantalla que ocurra.
En escritorio y web
Usar una computadora te da la mayor flexibilidad al grabar. Tan pronto como presiones ese botón, sucederán algunas cosas para que sepas que está funcionando:
- Aparece una pancarta para todos. Verás un mensaje que dice: "La grabación ha comenzado. Haz saber a todos que están siendo grabados". Esta es una característica de privacidad no negociable integrada directamente en Teams.
- Aparece un icono de grabación. Un pequeño punto rojo y un temporizador aparecerán en la esquina superior izquierda de la ventana de la reunión, sirviendo como una señal visual constante de que la sesión está en vivo.
Una de las características más útiles en escritorio y web es la capacidad de pausar y reanudar tu grabación. Esto cambia las reglas del juego para omitir la pausa de cinco minutos o una conversación lateral sensible sin crear un montón de archivos de video separados. Para hacerlo, simplemente regresa al mismo menú Más acciones (...) y elige Pausar grabación. Cuando estés listo para continuar, simplemente repite el proceso y presiona Reanudar grabación.
En tu dispositivo móvil
Grabar desde tu teléfono es igual de simple, aunque con una diferencia clave. Ya sea que estés en un iPhone o en un Android, tocarás la pantalla para mostrar los controles, buscarás el menú de tres puntos y tocarás Iniciar grabación.
Lo principal que debes recordar en el móvil es que no hay botón de pausa. Solo puedes iniciar y detener. Esto significa que si necesitas tomar un descanso, tienes que detener la grabación por completo y luego iniciar una nueva más tarde, lo que te deja con dos archivos de video separados para administrar.
Pausar una grabación es un consejo profesional infrautilizado. Mantiene tu video final limpio y consolidado, lo que hace que sea mucho más fácil de revisar y compartir. Confía en mí, un solo archivo sin interrupciones siempre es mejor que intentar juntar varios clips más tarde.
Cuando la reunión termine, o hayas terminado de capturar las partes importantes, detenerla es fácil. Regresa al mismo menú Más acciones (...) y selecciona Detener grabación. Teams te pedirá que confirmes una vez más; simplemente haz clic en Detener grabación de nuevo.
Una vez que la hayas detenido, Teams se pone a trabajar procesando el archivo de video. Esto puede llevar unos minutos, o a veces más para reuniones muy largas. Cuando esté listo, la grabación aparecerá en el chat de la reunión o en la conversación del canal. Normalmente también recibirás un correo electrónico con un enlace, así que no podrás perdértelo.
Encontrar y administrar tus grabaciones de reuniones
Así que has grabado tu reunión. Fantástico. Pero ahora viene la gran pregunta: ¿dónde fue a parar el archivo? Saber cómo grabar es solo el primer paso; el verdadero poder proviene de encontrar, administrar y usar ese archivo de video después de que finaliza la llamada.
Microsoft solía usar un servicio llamado Stream, pero desde entonces se ha trasladado a un sistema mucho más inteligente e integrado. Ahora, tus grabaciones se almacenan junto con tus otros archivos.
La ubicación exacta depende completamente del tipo de reunión que fue. Dominar esta distinción te ahorrará muchos dolores de cabeza más adelante.
- Para reuniones regulares, puntuales (no de canal): El video se guarda en una carpeta llamada "Grabaciones" dentro del OneDrive de quien presionó el botón de grabar. Así de simple.
- Para reuniones específicas de canal: La grabación se guarda en el sitio de SharePoint del canal, al que puedes acceder directamente desde la pestaña Archivos dentro de ese canal. Esto lo hace instantáneamente accesible para todos en el equipo.
Esa es la regla de oro: OneDrive para reuniones personales, SharePoint para reuniones de canal. Recuerda eso y nunca más perderás una grabación.
Más Funciones que te Ahorran Tiempo

Detección de hablantes
Identifica automáticamente diferentes hablantes en tus grabaciones y etiquétalos con sus nombres.
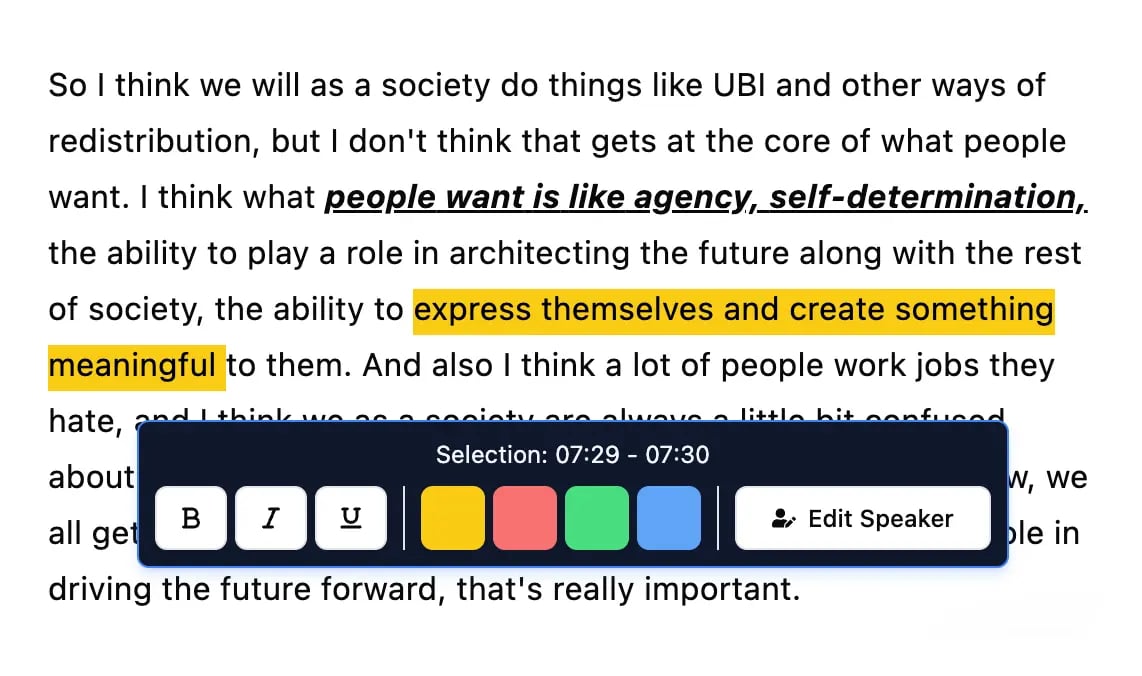
Herramientas de edición
Edita transcripciones con herramientas potentes como buscar y reemplazar, asignación de hablantes, formatos de texto enriquecido y resaltado.
Resúmenes y Chatbot
Genera resúmenes y otros análisis de tu transcripción, prompts personalizados reutilizables y chatbot para tu contenido.
Integraciones
Conecta con tus herramientas y plataformas favoritas para optimizar tu flujo de trabajo de transcripción.
Compartir y proteger tus grabaciones
Dado que tus grabaciones ahora residen en OneDrive o SharePoint, compartirlas es tan fácil como compartir un documento de Word o una hoja de cálculo. Puedes generar un enlace directo, controlar quién puede verlo o editarlo, e incluso añadirle una contraseña para mayor seguridad.
Supongamos que acabas de terminar una importante llamada de inicio con un cliente. La grabación aparece en tu OneDrive. Puedes crear inmediatamente un enlace "solo para ver" y enviárselo al cliente. Esto le permite revisar la discusión sin darle la capacidad de descargar o modificar el archivo original. Tú mantienes el control total.
Piensa en la ubicación de tu grabación como su base de operaciones. Desde OneDrive o SharePoint, puedes controlar sus permisos, rastrear su visualización y decidir su ciclo de vida completo, convirtiendo un simple archivo de video en un activo seguro y manejable.
Navegando por las fechas de caducidad automáticas
Aquí tienes un detalle crítico que no puedes permitirte pasar por alto: la política de caducidad automática. Para evitar que el almacenamiento se descontrole, el administrador de TI de tu empresa puede establecer una vida útil predeterminada para todas las grabaciones nuevas; a menudo es de 60 o 120 días. Una vez transcurrido ese tiempo, el archivo se envía automáticamente a la papelera de reciclaje.
No te asustes. Teams te enviará un correo electrónico antes de que una grabación esté a punto de ser eliminada. Si es un archivo que necesitas conservar, simplemente navega hasta él en OneDrive o SharePoint, abre el panel de detalles y extiende o elimina por completo la fecha de caducidad. Es una solución rápida que garantiza que tus conversaciones más importantes no se pierdan en una limpieza automatizada.
Una vez que tu grabación esté segura, puedes dar el siguiente paso generando una transcripción con marcas de tiempo, que es esencial para una revisión precisa y para recortar momentos clave.
Convirtiendo tus grabaciones en información procesable
Seamos sinceros, una reunión grabada es solo un activo inactivo. Está lleno de valor potencial, pero no te sirve de nada si solo está ahí. El verdadero impulso de productividad ocurre cuando transformas esa conversación en bruto en inteligencia clara y procesable que realmente impulsa tus proyectos. Todo este proceso comienza en el momento en que termina tu reunión y la grabación aterriza en su carpeta designada.
Primero lo primero, necesitas encontrar el archivo de video. Como resumen rápido, si fue una reunión no de canal, la grabación estará en la carpeta "Grabaciones" dentro del OneDrive de quien haya presionado el botón de grabar. Para las reuniones vinculadas a un equipo específico, encontrarás el archivo en el sitio de SharePoint de ese canal, justo debajo de la pestaña Archivos.
Este diagrama de flujo te ofrece una vista rápida de a dónde va todo después de que termina la llamada.
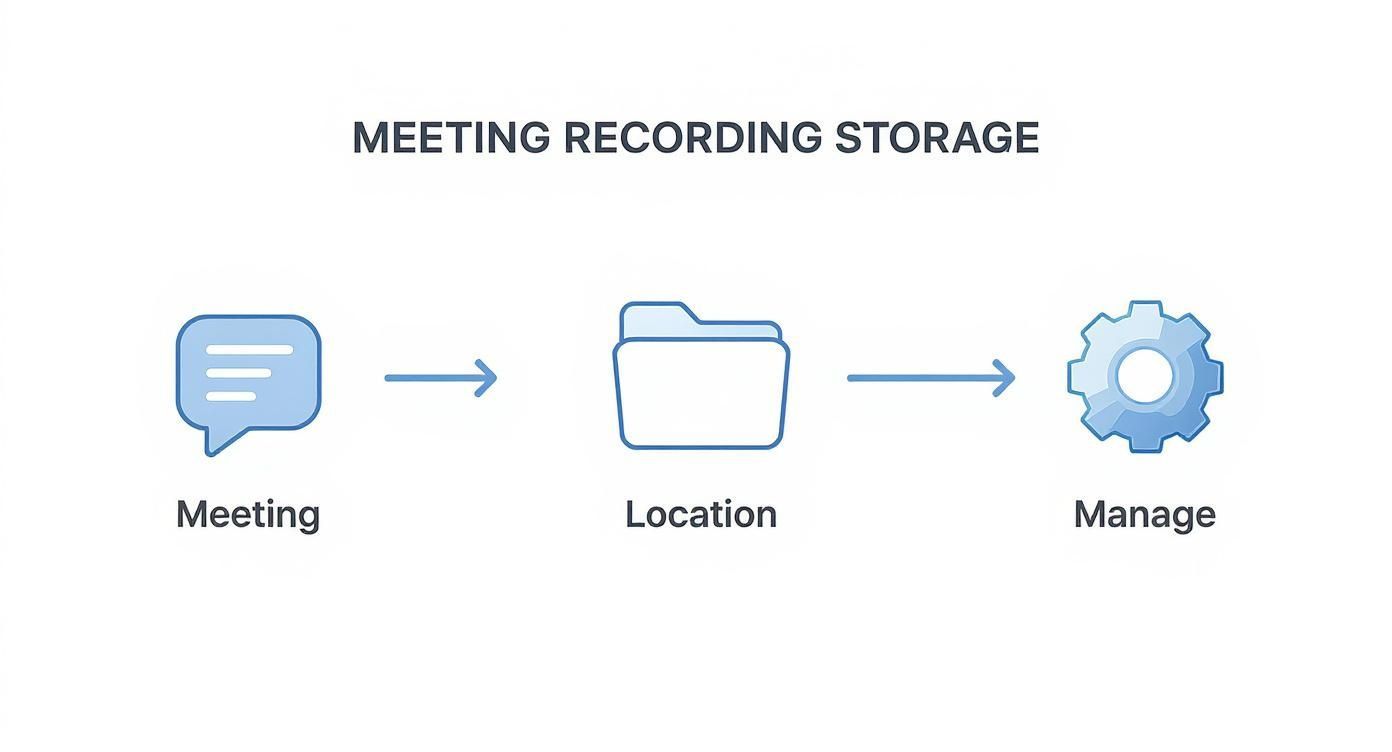
Dominar este sencillo flujo —desde la reunión hasta el almacenamiento y la gestión— es la clave para construir un flujo de trabajo post-reunión eficiente. Una vez que tengas el archivo en mano, el verdadero trabajo puede comenzar.
Del video en bruto a acciones claras
Con tu archivo de video listo, es hora de extraer lo bueno. Nadie tiene tiempo para volver a ver manualmente una reunión de una hora solo para encontrar los puntos clave. Eso es una pérdida masiva de tiempo. En cambio, un flujo de trabajo moderno utiliza un servicio de transcripción de IA para convertir instantáneamente tu grabación en un documento de texto altamente preciso, con marcas de tiempo y etiquetas de hablante.
Esta transcripción se convierte en la base de todo lo demás. Puedes usar una herramienta como Transcript.LOL para subir tu grabación y generar mucho más que un relato palabra por palabra. Piensa en cosas como:
- Resúmenes concisos: Obtén instantáneamente un resumen de alto nivel para compartir con las partes interesadas que no pudieron asistir.
- Decisiones clave: Identifica los momentos exactos en los que se tomaron decisiones críticas, sin más conjeturas.
- Elementos de acción: Extrae y asigna automáticamente las tareas discutidas durante la llamada, asegurando que nada se pierda.
Imagina a un gerente de proyecto tomando la grabación de una sesión de planificación de sprint de 45 minutos. Pueden generar una transcripción y, en cuestión de minutos, tener un resumen limpio y una lista de elementos de acción listos para publicar en el canal del equipo. Esto reemplaza por completo la tediosa tarea de tomar notas en las reuniones manualmente y garantiza una precisión perfecta cada vez.
Este cambio de la grabación pasiva a la inteligencia activa es un punto de inflexión. Convierte tu archivo de reuniones de una polvorienta biblioteca digital en una base de conocimiento dinámica y consultable que impulsa la productividad y la alineación en todo tu equipo.
Para muchas organizaciones, las funciones de grabación y transcripción en Microsoft Teams son ahora centrales para las estrategias de cumplimiento. El análisis de voz puede incluso revelar tendencias macro, ayudando a la dirección a detectar problemas comunes o a confirmar que se realizaron las divulgaciones regulatorias.
Nuevas Capacidades en Herramientas de Reunión Modernas
La transcripción con IA, los resaltados automáticos y los resúmenes instantáneos son ahora expectativas estándar. Estas mejoras están transformando las grabaciones brutas en inteligencia procesable. La mayoría de los equipos hoy en día confían en estas herramientas para la alineación, el cumplimiento y la eficiencia.
La demanda de estas herramientas es una de las principales razones de la constante evolución de Teams, especialmente con tantos que informan de enormes ganancias de productividad en entornos de trabajo híbridos.
Y si realmente quieres maximizar el valor de tus reuniones grabadas, deberías explorar algunas estrategias más amplias de reutilización de contenido para convertir una sola discusión en múltiples activos.
Preguntas Comunes Sobre la Grabación en Teams
Incluso cuando el proceso va bien, siempre surgen algunas preguntas clásicas una vez que empiezas a grabar reuniones en Teams. Abordémoslas de frente para que te sientas seguro y evites los dolores de cabeza habituales.
¿Por Qué Falta el Botón de Grabar?
Esto es casi siempre un problema de permisos, no un fallo técnico. Si no encuentras el botón de grabar, el culpable más probable es que tu administrador de TI haya desactivado la función para tu rol específico. Otra razón común es que no tienes la licencia adecuada: necesitarás un plan como Office 365 E1, E3 o E5.
Ten en cuenta también que ciertos roles simplemente no pueden iniciar una grabación. Esto incluye:
- Invitados que se unen desde fuera de tu organización.
- Usuarios anónimos que no han iniciado sesión en una cuenta de Microsoft.
Tu primera acción siempre debe ser consultar con tu departamento de TI. Ellos pueden confirmar tus políticas de usuario y el estado de tu licencia en solo unos minutos.
¿Quién Recibe Notificación Cuando Comienza una Grabación?
Microsoft Teams no se anda con rodeos en cuanto a transparencia. En el momento en que pulsas "Iniciar grabación", cada participante recibe un banner de notificación justo en la parte superior de su pantalla. Este mensaje deja muy claro que la reunión se está grabando y, si lo has habilitado, transcrito.
Esta es una función de privacidad integrada que no se puede desactivar. Y es algo bueno, ya que garantiza que todos, ya sea en un ordenador de escritorio, en la web o en su teléfono, sepan que la conversación está siendo capturada.
Piensa en esta notificación automática como un apretón de manos digital. Es la forma en que Teams se asegura de que todos estén en la misma página sobre la grabación, fomentando una cultura de transparencia y confianza desde el primer segundo.
¿Cuánto Tiempo se Almacenan las Grabaciones de Teams?
La respuesta aquí depende completamente de las políticas internas de tu organización. La mayoría de los administradores establecen una fecha de caducidad automática para evitar que el almacenamiento se descontrole, a menudo por defecto alrededor de 120 días. No te preocupes, recibirás una notificación por correo electrónico antes de que una grabación se elimine permanentemente, dándote la oportunidad de guardarla.
Si una grabación es demasiado importante como para perderla, puedes evitar fácilmente que se elimine. Simplemente busca el archivo de vídeo en tu OneDrive o en el sitio de SharePoint del canal, abre el panel de detalles y podrás extender o incluso eliminar la fecha de caducidad por completo.
¿Puedo Grabar una Llamada Uno a Uno?
Sí, absolutamente. La función de grabación funciona igual de bien para llamadas uno a uno que para reuniones grupales masivas. Los pasos son idénticos: pulsa el menú Más acciones (...) y selecciona Iniciar grabación.
Tanto tú como la otra persona recibirán la notificación estándar, y una vez que termines, el archivo de vídeo aterrizará de forma segura en la carpeta "Grabaciones" dentro de tu OneDrive personal.
¿Listo para convertir esas grabaciones en resúmenes prácticos, decisiones clave y tareas claras? Transcript.LOL utiliza IA para transcribir instantáneamente tus reuniones de Teams y generar los conocimientos que necesitas para mantener el trabajo en marcha. Obtén transcripciones rápidas y precisas y desbloquea el verdadero valor de tus conversaciones hoy mismo en https://transcript.lol.