Comment fusionner des fichiers audio : un guide pour des montages parfaits
Apprenez à fusionner des fichiers audio en toute transparence. Notre guide couvre les outils gratuits comme Audacity, FFmpeg en ligne de commande, les outils de jonction en ligne et des conseils professionnels pour les créateurs.
Kate, Praveen
December 4, 2024
Au cœur de la fusion audio, il s'agit simplement de combiner plusieurs clips sonores en une seule piste continue. Vous pouvez y parvenir avec des logiciels dédiés comme Audacity, des outils en ligne de commande comme FFmpeg, ou même de simples outils de jonction audio en ligne. Le véritable art consiste à organiser vos fichiers dans le bon ordre avant de les exporter en un seul fichier unifié.
IA de pointe
Alimenté par Whisper d'OpenAI pour une précision de premier plan. Prise en charge des vocabulaires personnalisés, des fichiers jusqu'à 10 heures et des résultats ultra rapides.

Importer depuis plusieurs sources
Importez des fichiers audio et vidéo depuis diverses sources, y compris le téléchargement direct, Google Drive, Dropbox, les URL, Zoom et plus encore.
Exporter en plusieurs formats
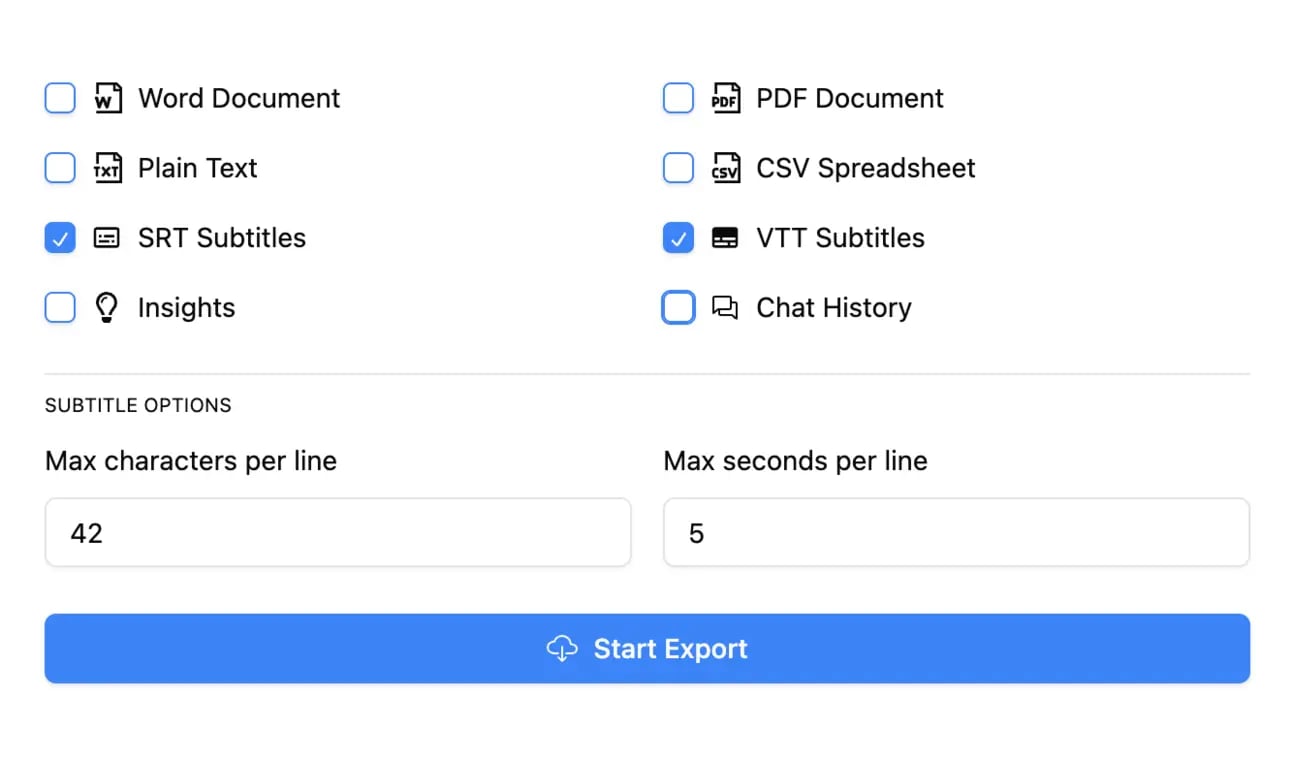
Exportez vos transcriptions en plusieurs formats dont TXT, DOCX, PDF, SRT et VTT avec des options de formatage personnalisables.
Pourquoi vous pourriez avoir besoin de fusionner des fichiers audio
Avant de plonger dans le comment technique, il est bon de comprendre pourquoi vous auriez besoin de le faire. La fusion audio est une compétence fondamentale en production, transformant un tas d'enregistrements séparés en un produit final poli. Le besoin de relier des fichiers audio se présente dans toutes sortes de projets professionnels et personnels, des tâches rapides et simples aux productions complexes.
Pour de nombreux créateurs, c'est juste un mardi normal. Les podcasteurs relient constamment un jingle d'introduction, le segment d'interview principal et un message de fin. C'est ainsi qu'ils créent un épisode unique et homogène, prêt pour leurs auditeurs. Sans cela, ils n'auraient qu'un dossier de clips décousus.
Scénarios courants dans le monde réel
Les applications sont incroyablement diverses et étonnamment pratiques. Pensez à ces situations courantes où la fusion audio est non négociable :
- Production musicale : Les musiciens et les producteurs superposent constamment des pistes vocales, des instrumentaux et des accompagnements pour construire une chanson complète.
- Montage vidéo : Les monteurs doivent synchroniser le dialogue de plusieurs micros ou combiner des effets sonores avec une musique de fond pour créer une ambiance sonore immersive.
- Création de contenu : Vous pourriez avoir besoin de combiner une poignée de notes vocales en un seul journal audio ou de préparer un long enregistrement pour la transcription.
- Projets personnels : Vous avez déjà créé un mix d'entraînement ou une playlist continue pour une fête ? Il suffit de joindre vos chansons préférées bout à bout.
Cette compétence est absolument centrale pour les médias modernes. L'explosion du streaming numérique n'a fait qu'amplifier la demande d'audio parfaitement produit. En fait, le streaming par abonnement représente désormais plus de 50 % des revenus mondiaux de la musique enregistrée. Les artistes fusionnent d'innombrables prises pour créer les pistes finales qui dominent ces plateformes.
La même idée s'applique à l'audio pour les films, les jeux et les publicités, un marché qui a explosé pour atteindre 650 millions de dollars. Vous pouvez approfondir les données sur le marché mondial de la musique pour voir comment ces tendances façonnent les besoins de production.
Point clé : Apprendre à fusionner des fichiers audio n'est pas seulement une corvée technique ; c'est une compétence essentielle pour quiconque travaille avec le son. C'est ce qui vous permet de créer du contenu de qualité professionnelle pour n'importe quelle plateforme.
Préparer vos fichiers pour une fusion impeccable
Un fichier audio fusionné au son parfait ne commence pas au moment où vous cliquez sur "exporter". Il commence par un travail de préparation. Je l'ai vu maintes et maintes fois : se précipiter dans cette étape est la cause n°1 des maux de tête comme les changements de volume brusques, les erreurs de format étranges et les artefacts métalliques qui ruinent simplement le produit final.
Pensez-y comme à la cuisine. Vous ne jetteriez pas un tas d'ingrédients aléatoires et non préparés dans une marmite en vous attendant à un repas gastronomique. Il en va de même pour l'audio.
Standardiser les spécifications de votre audio
La première chose que vous devez absolument faire est de mettre tous vos formats de fichiers sur la même longueur d'onde. Essayer de fusionner directement un fichier WAV, un M4A et un MP3, c'est s'exposer à des problèmes. Certains logiciels peuvent le gérer, mais vous laissez la qualité finale au hasard.
Un peu de travail de conversion en amont permet d'éviter une quantité énorme de dépannage plus tard.
- Pour la qualité : Si la fidélité audio est primordiale, optez pour un format non compressé comme le WAV. Il conserve toutes les données sonores d'origine, vous ne perdez donc rien.
- Pour la compatibilité : Si vous avez besoin d'un bon équilibre entre qualité et taille de fichier gérable, optez pour le MP3 avec un débit binaire élevé (comme 320 kbps). C'est le format de prédilection pour une bonne raison.
Au-delà du type de fichier, vous devez aligner les spécifications techniques. Assurez-vous que chaque clip a le même taux d'échantillonnage (par exemple, 44,1 kHz est standard pour la musique, 48 kHz pour la vidéo) et la même profondeur de bits (par exemple, 16 bits ou 24 bits). Si ceux-ci ne correspondent pas, vous pourriez constater qu'un clip est lu à la mauvaise vitesse ou avec la mauvaise tonalité, une erreur classique de débutant.
Pour vous aider à suivre, voici une courte liste de contrôle à parcourir avant de commencer à combiner quoi que ce soit.
Liste de contrôle de pré-fusion audio
Cette simple liste de contrôle vous aidera à éviter les écueils les plus courants et à garantir que vos fichiers sources sont prêts pour une fusion fluide et de haute qualité.
| Vérification | Action requise | Pourquoi c'est important |
|---|---|---|
| Cohérence du format de fichier | Convertir tous les clips en un seul format (par exemple, WAV pour la qualité, MP3 pour la compatibilité). | Empêche les erreurs logicielles, les artefacts et la perte de qualité imprévisible lors de la fusion. |
| Taux d'échantillonnage correspondants | Assurez-vous que tous les fichiers partagent le même taux d'échantillonnage (par exemple, 44,1 kHz ou 48 kHz). | Arrête la lecture des clips à la mauvaise vitesse ou avec la mauvaise tonalité. |
| Profondeur de bits cohérente | Standardiser la profondeur de bits sur tous les fichiers (par exemple, 16 bits ou 24 bits). | Garantit une résolution audio uniforme et évite les problèmes de compatibilité potentiels. |
| Convention de nommage logique | Renommer les fichiers dans un ordre séquentiel (par exemple, Partie_01_Intro, Partie_02_Interview). | Facilite l'assemblage des clips dans le bon ordre sans devinettes. |
| Organisation de dossier propre | Placer tous les fichiers audio liés pour un seul projet dans leur propre dossier dédié. | Permet de gagner du temps et évite d'utiliser accidentellement le mauvais clip. |
| Vérifier et couper le silence | Écouter le début et la fin de chaque clip, en coupant tout silence inutile ou temps mort. | Crée un produit final plus concis et d'apparence plus professionnelle, sans pauses gênantes. |
| Vérification du niveau de volume | Vérifier rapidement les niveaux de volume de chaque clip pour identifier ceux qui sont nettement plus forts ou plus faibles. | Vous aide à anticiper où vous devrez appliquer une normalisation ou des ajustements de volume. |
Cocher ces cases peut sembler un travail supplémentaire, mais c'est la base d'un résultat professionnel et d'un flux de travail beaucoup moins frustrant.
Rappel important avant la fusion
Avant de fusionner, vérifiez toujours que vos spécifications audio correspondent. Même une légère discordance dans le taux d'échantillonnage, la profondeur de bits ou le codec peut entraîner des décalages de hauteur inattendus ou des problèmes de lecture. Cette simple étape de vérification permet d'éviter 90 % des problèmes liés à la fusion.
Un projet propre et organisé est un projet efficace. Prendre dix minutes pour nommer et trier correctement vos fichiers peut vous faire gagner des heures de frustration à essayer de trouver le bon clip ou à réorganiser des segments.
Mettez de l'ordre dans vos fichiers
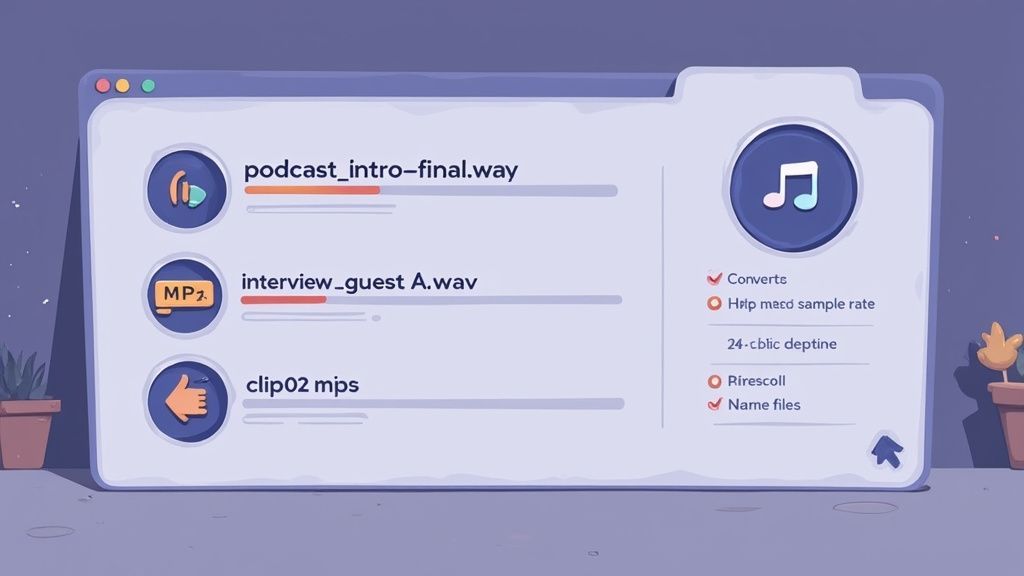
Enfin, parlons organisation. Un dossier rempli de fichiers nommés audio_final_new.wav et recording_2.mp3 est une recette pour le chaos. Croyez-moi, vous vous remercierez plus tard si vous adoptez une convention de nommage claire dès le départ.
Pour un épisode de podcast, cela pourrait ressembler à ceci :
Ep34_Intro_Music.wavEp34_Host_Intro.wavEp34_Interview_Main.wavEp34_Outro_CTA.wav
Cette structure simple rend l'ordre de fusion correct immédiatement évident. Que vous assembliez un podcast ou que vous prépariez une longue interview pour notre guide sur la transcription gratuite audio vers texte, ce niveau d'organisation est non négociable pour un processus fluide.
Si vous souhaitez aller encore plus loin, consulter le guide d'un producteur moderne sur la façon de mixer des chansons peut offrir d'excellents aperçus des principes généraux du flux de travail audio.
Utiliser FFmpeg pour une fusion puissante en ligne de commande

Si vous privilégiez la vitesse, l'automatisation et un contrôle total sur votre audio, il est temps de vous familiariser avec FFmpeg. Oubliez les interfaces graphiques avec des boutons et des chronologies ; cet outil gratuit et open-source est une centrale en ligne de commande pour le traitement audio et vidéo avec une efficacité incroyable.
Certes, le terminal peut sembler un peu intimidant au début, mais maîtriser quelques commandes clés peut transformer complètement votre flux de travail.
Cette méthode change la donne pour les développeurs, les ingénieurs du son et toute personne ayant besoin de traiter un grand nombre de fichiers en masse. Imaginez que vous ayez 50 notes vocales distinctes d'une conférence. Les assembler une par une dans un éditeur visuel prendrait une éternité. Avec FFmpeg, vous pouvez écrire un script simple et les fusionner toutes en quelques secondes.
La commande de concaténation de base
Commençons par le scénario le plus courant : joindre quelques fichiers qui sont déjà dans le même format et utilisent le même codec (comme une poignée de MP3). C'est la manière la plus simple de faire le travail.
Le processus implique la création d'un fichier texte de base qui liste tous les clips que vous souhaitez joindre, dans l'ordre exact où vous en avez besoin.
- Tout d'abord, créez un nouveau fichier texte et nommez-le
mylist.txt. - À l'intérieur, listez vos fichiers audio avec le mot-clé
file, un par ligne, comme ceci :file 'Part_01_Intro.mp3'file 'Part_02_Interview.mp3'file 'Part_03_Outro.mp3' - Assurez-vous de sauvegarder ce fichier texte dans le même répertoire que vos clips audio.
Maintenant, ouvrez votre terminal ou votre invite de commande, naviguez jusqu'à ce dossier et exécutez cette commande :
ffmpeg -f concat -i mylist.txt -c copy Merged_Output.mp3
Cette commande indique à FFmpeg de concaténer (ou de joindre) les fichiers listés dans mylist.txt. Il copie ensuite leurs flux audio dans un nouveau fichier nommé Merged_Output.mp3. Cette partie -c copy est la sauce secrète : elle ré-encapsule les données audio sans les ré-encoder. C'est non seulement incroyablement rapide, mais cela préserve également 100 % de la qualité d'origine.
Gérer les fichiers de formats différents
Alors, que se passe-t-il si vos fichiers sont un mélange hétéroclite : l'un est un WAV, un autre un M4A ? La méthode de concaténation simple ne fonctionnera pas car leurs structures de données sous-jacentes sont complètement différentes.
C'est là que le système de filtres de FFmpeg brille vraiment. Vous utiliserez le filtre concat pour ré-encoder les fichiers à la volée, les rendant compatibles avant de les joindre.
La commande est un peu plus complexe, mais elle est tout aussi puissante.
ffmpeg -i Part_01_Intro.wav -i Part_02_Interview.m4a -filter_complex "[0:a][1:a]concat=n=2:v=0:a=1[a]" -map "[a]" Merged_Output.mp3
Décomposons rapidement ce qui se passe ici :
-i Part_01_Intro.wav -i Part_02_Interview.m4a: Ce sont vos deux fichiers d'entrée.-filter_complex: Ce drapeau indique à FFmpeg que vous êtes sur le point de faire quelque chose de plus avancé.[0:a][1:a]concat=n=2:v=0:a=1[a]: C'est le cœur de l'opération. Il prend le flux audio de la première entrée[0:a]et de la deuxième entrée[1:a], les concatène (concat=n=2signifie deux entrées), et spécifie qu'il n'y a pas de vidéo (v=0) et un flux audio de sortie (a=1). Le résultat reçoit une étiquette temporaire[a].-map "[a]": Ceci mappe simplement ce flux audio étiqueté[a]au fichier de sortie final.
Astuce de pro : Pour les tâches répétitives, vous pouvez encapsuler ces commandes FFmpeg dans un script shell. Cela vous permet de fusionner des centaines de fichiers avec une seule commande, ce qui vous fait gagner énormément de temps.
Cette approche est parfaite pour construire un flux de travail automatisé, comme un processus côté serveur qui combine des extraits audio téléchargés par les utilisateurs en un seul fichier cohérent.
Utilisations pratiques de la fusion audio
Assemblage d'épisodes de podcast
Fusionnez la musique d'introduction, les interviews, les publicités et les outros en un seul fichier d'épisode propre. Parfait pour les créateurs qui souhaitent un flux de publication rationalisé.
Compilation de conférences et de réunions
Combinez des enregistrements en plusieurs parties, des notes vocales ou des sessions de classe en un seul fichier de référence continu pour faciliter l'étude ou la transcription.
Production musicale et de rythmes
Les producteurs fusionnent fréquemment des pistes superposées, des prises vocales ou des segments de rythme pour prototyper des chansons et finaliser des mixages.
Réutilisation de contenu
Créez un seul actif audio fusionné que vous pouvez utiliser dans des outils de transcription pour générer des blogs, des résumés, des citations et des clips pour les réseaux sociaux.
Fusionner l'audio visuellement avec Audacity
Si la saisie de commandes vous semble un peu trop abstraite, il est temps de découvrir Audacity. Pour ceux qui préfèrent une approche plus pratique et visuelle du travail avec l'audio, c'est l'outil idéal. Il est entièrement gratuit, puissant, et présente tout sur une ligne de temps pour que vous puissiez littéralement voir vos ondes sonores.
Cette approche visuelle est une aubaine pour les projets qui nécessitent une touche humaine, comme le montage d'une interview de podcast. Vous pouvez identifier précisément où un intervenant termine et où un autre commence, vous permettant de faire des coupes super nettes et précises. Cette capacité à zoomer et à déplacer des clips vous offre un niveau de contrôle que les outils en ligne de commande ne peuvent tout simplement pas offrir.
Il est facile d'oublier qu'avant des logiciels comme Audacity, fusionner de l'audio signifiait découper et assembler physiquement des bandes magnétiques avec une lame de rasoir. Lorsque les stations de travail audio numériques (DAW) sont apparues à la fin des années 90 — Audacity lui-même a été lancé en 2000 — elles ont complètement changé la donne. Dès 2005, cette approche logicielle est devenue la norme, transformant des tâches de montage qui prenaient des jours en quelque chose que vous pouviez réaliser en quelques minutes. Vous pouvez obtenir plus d'informations sur l'évolution du marché de l'audio sur mordorintelligence.com.
Importer vos clips dans Audacity
Avant toute chose, vous devez importer vos fichiers audio dans le programme. La bonne nouvelle, c'est que vous n'avez pas besoin de les importer un par un.
Sélectionnez simplement tous vos fichiers audio dans le dossier de votre ordinateur et faites-les glisser directement sur la ligne de temps d'Audacity. Chaque fichier apparaîtra sur sa propre piste séparée, empilées les unes au-dessus des autres. C'est votre point de départ.
Cette vue multi-pistes est exactement ce que vous voulez. Elle maintient chaque clip séparé, vous permettant de régler chacun d'eux avant de les assembler tous.
Organiser et aligner vos pistes
Maintenant que vos clips sont chargés, l'objectif est de les aligner bout à bout sur une seule piste. C'est là que l'outil Décalage temporel d'Audacity est votre meilleur ami — recherchez l'icône avec une flèche à deux têtes <->.
Une fois que vous avez sélectionné l'outil Décalage temporel, vous pouvez cliquer sur n'importe quel clip audio et simplement le faire glisser vers la gauche ou vers la droite. Faites glisser votre deuxième clip jusqu'à ce que son début s'ajuste parfaitement à la fin du premier. Faites cela pour tous vos clips jusqu'à ce qu'ils forment un long bloc audio continu.
Astuce de pro : Pour obtenir un alignement absolument parfait, utilisez l'outil de zoom pour obtenir une vue rapprochée là où deux clips se rencontrent. Cela vous permet de voir les formes d'onde en détail et garantit que vous ne laissez aucun petit espace de silence ni ne créez un chevauchement gênant.
Polir votre audio fusionné
Vos fichiers peuvent être dans le bon ordre, mais une fusion brute peut souvent sembler maladroite et peu professionnelle. Quelques étapes supplémentaires peuvent faire une énorme différence.
- Créer des transitions fluides : Pour éviter les coupures brusques, vous pouvez créer un fondu enchaîné. Faites glisser le début d'un clip de manière à ce qu'il chevauche légèrement la fin du précédent. Mettez en surbrillance cette petite section de chevauchement et allez dans
Effet > Fondu enchaîné des pistes. Cela fera fondre en douceur un clip pendant que le suivant apparaît. - Normaliser les niveaux de volume : Si l'un de vos enregistrements est beaucoup plus fort que les autres, cela sera très perceptible. Sélectionnez tout (Ctrl+A sous Windows, Cmd+A sous Mac), puis accédez à
Effet > Normalisation du volume. Cela ajuste automatiquement tous les clips à un volume cohérent et équilibré. - Supprimer le silence excessif : Utilisez l'outil de sélection pour mettre en surbrillance tout silence au tout début ou à la fin de votre piste combinée. Une simple pression sur la touche Suppr permet de s'en débarrasser, vous donnant un produit final beaucoup plus propre.
Une fois que vous êtes satisfait du résultat sonore, il est temps d'exporter. Allez dans Fichier > Exporter et choisissez votre format — MP3 ou WAV sont les plus courants. Audacity mixera ensuite le tout en un seul fichier audio unifié, prêt à l'emploi.

Détection des intervenants
Identifiez automatiquement les différents intervenants dans vos enregistrements et étiquetez-les avec leurs noms.
Outils d'édition
Modifiez les transcriptions avec des outils puissants incluant rechercher et remplacer, attribution des intervenants, formats de texte enrichi et surlignage.
Résumés et Chatbot
Générez des résumés et d'autres analyses de votre transcription, des prompts personnalisés réutilisables et un chatbot pour votre contenu.
Fusions Rapides avec des Outils en Ligne et des Applications Mobiles
Parfois, vous n'avez pas besoin de la puissance d'une application de bureau complète. Lorsque vous avez juste besoin de combiner quelques fichiers rapidement sans installer de logiciel, les outils basés sur navigateur et les applications mobiles sont votre meilleure option. Ils sont conçus pour la vitesse et la commodité, ce qui les rend parfaits pour des tâches simples et sur le pouce.
Disons que vous venez de terminer une série d'entretiens clients enregistrés sous forme de mémos vocaux sur votre téléphone. Vous souhaitez les fusionner en un seul fichier pour vos archives avant même de retourner au bureau. C'est exactement là que ces outils agiles excellent.
Choisir le Bon Outil de Fusion Audio en Ligne
Les outils basés sur navigateur comme Audio Joiner et Clideo vous permettent de télécharger vos fichiers, de les glisser pour les ordonner, et de télécharger le résultat fusionné en quelques minutes. Cela semble génial, mais il est important d'être conscient de leurs limitations et, plus important encore, de leurs politiques de confidentialité.
Étant donné que vous téléchargez vos données sur un serveur tiers, ces outils ne conviennent pas aux enregistrements sensibles ou confidentiels.
Vérifiez toujours quelques points avant de télécharger :
- Limites de Taille de Fichier : De nombreux outils gratuits imposent une limite à la taille ou au nombre de fichiers que vous pouvez télécharger à la fois.
- Politique de Confidentialité : Prenez un moment pour comprendre comment vos données sont stockées et pendant combien de temps. Les bons outils suppriment automatiquement vos fichiers après quelques heures.
- Options d'Exportation : Assurez-vous que l'outil peut exporter dans le format dont vous avez besoin (MP3 est presque toujours une option) sans ajouter de filigrane gênant à votre audio.
Le point clé à retenir ici est que les outils de fusion en ligne sont conçus pour la vitesse, pas pour la sécurité de haut niveau ou les fonctionnalités avancées. Ils sont fantastiques pour les projets non sensibles où la commodité est la priorité numéro un.
Pour un aperçu plus approfondi d'un sujet connexe, consultez notre guide sur les meilleurs outils de conversion audio en texte, car beaucoup d'entre eux fonctionnent également directement dans votre navigateur.
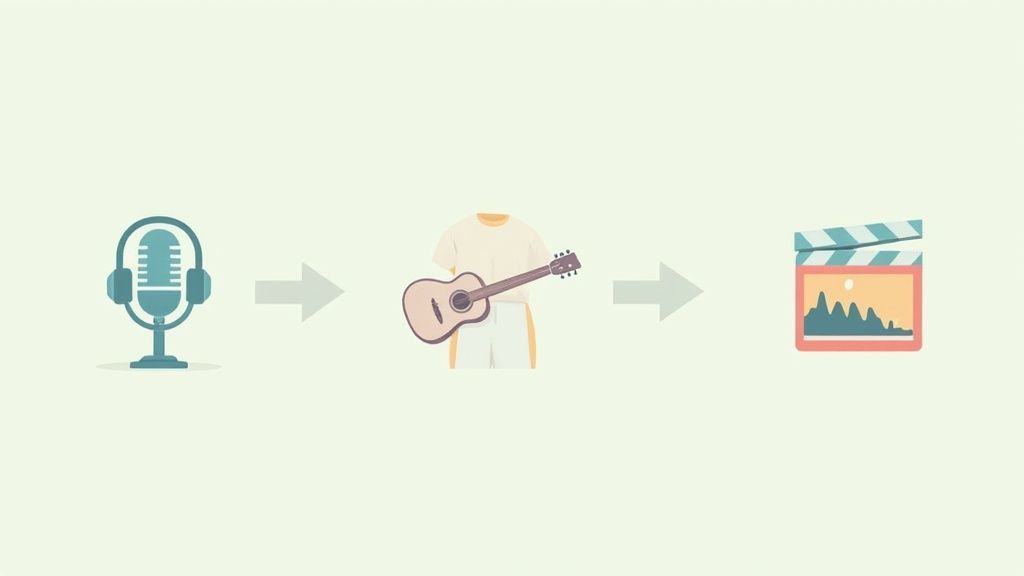
L'infographie ci-dessous peut vous aider à visualiser le flux de travail lorsque vous utilisez un outil plus manuel comme Audacity pour votre fusion.
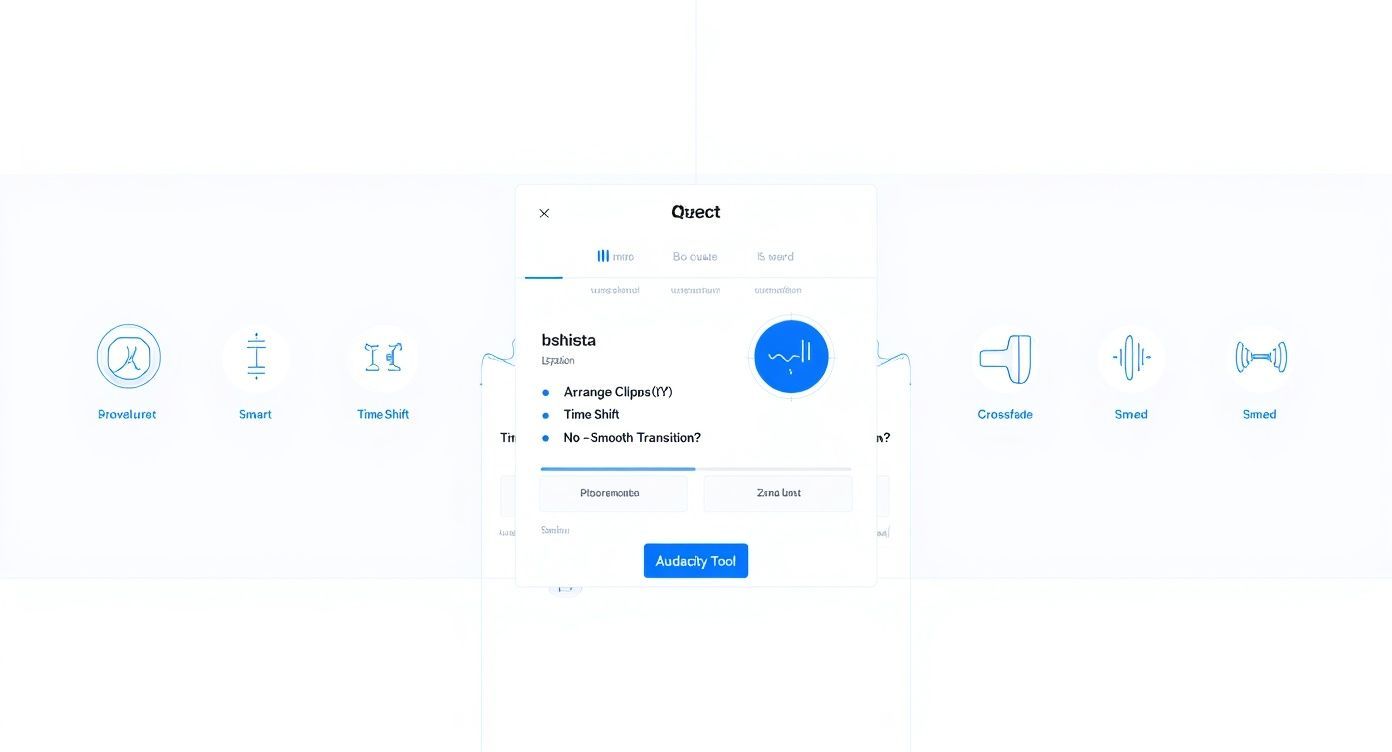
Comme le montre le guide, votre première étape consiste à décider si vous avez besoin de réorganiser des clips — ce qui vous oriente vers l'outil de décalage temporel (Time Shift Tool) — ou si vous avez simplement besoin de créer une transition fluide à l'aide de l'effet de fondu enchaîné (Crossfade).
Meilleures Applications Mobiles pour Fusionner à la Volée
Les applications mobiles apportent l'édition audio directement dans votre poche, ce qui est une aubaine pour les créateurs qui sont toujours en déplacement. Vous pouvez facilement importer des fichiers depuis le stockage de votre téléphone ou un service cloud, les assembler et exporter une piste finale prête pour les réseaux sociaux ou à partager avec votre équipe.
- Sur iOS : Des applications comme Hokusai Audio Editor ou même GarageBand d'Apple offrent une édition multipiste étonnamment puissante. Vous pouvez importer des clips, les raccourcir et les organiser sur une chronologie, un peu comme vous le feriez sur un ordinateur de bureau.
- Sur Android : AudioLab et WaveEditor sont deux choix populaires qui vous offrent de solides capacités de fusion ainsi que d'autres outils utiles comme le découpage et la conversion de format.
Le processus est généralement assez simple : importez vos clips audio dans la chronologie de l'application, organisez-les dans le bon ordre par simple glisser-déposer, puis exportez l'ensemble du projet sous forme d'un seul fichier MP3 ou M4A. Ces applications sont parfaites pour créer des collages audio rapides, assembler des segments de podcast, ou simplement combiner quelques notes vocales.
Comparaison des Méthodes de Fusion Audio
Choisir le bon outil peut sembler décourageant, j'ai donc préparé une comparaison rapide pour vous aider à décider quelle méthode correspond le mieux à vos besoins. Ce tableau présente les forces et les faiblesses de chaque approche que nous avons discutée.
| Méthode | Idéale pour | Avantages | Inconvénients |
|---|---|---|---|
| FFmpeg | Traitement par lots, automatisation et développeurs à l'aise avec la ligne de commande. | Extrêmement puissant, rapide et scriptable. Gère pratiquement tous les formats. | Courbe d'apprentissage abrupte ; pas d'interface visuelle. |
| Audacity | Édition détaillée, fondus enchaînés et contrôle visuel du mixage final. | Gratuit, open-source et riche en fonctionnalités. Offre un contrôle précis de la chronologie. | Peut être excessif pour des fusions simples ; le processus manuel n'est pas rapide. |
| Outils en Ligne | Fusions rapides et simples de fichiers non sensibles sans installation de logiciel. | Très facile à utiliser, rapide et accessible depuis n'importe quel navigateur. | Préoccupations relatives à la confidentialité, limites de taille/nombre de fichiers, nécessite une connexion Internet. |
| Applications Mobiles | Édition et fusion sur le pouce directement depuis votre téléphone. | Très pratique pour les enregistrements sur le terrain, les mémos vocaux et le contenu des réseaux sociaux. | Fonctionnalités limitées par rapport aux ordinateurs de bureau ; le petit écran peut être délicat. |
En fin de compte, il n'y a pas d'outil unique "meilleur" — tout dépend de ce que vous essayez d'accomplir. Pour une fusion rapide et basique, un outil en ligne est fantastique. Pour un épisode de podcast peaufiné, vous voudrez le contrôle qu'Audacity offre. Et pour les flux de travail automatisés, rien ne vaut FFmpeg.
Transformez Votre Audio Fusionné en Contenu Actionnable
Votre fichier audio parfaitement fusionné n'est pas la ligne d'arrivée — c'est le point de départ. La vraie valeur est débloquée lorsque vous transformez cette piste unique et cohérente en contenu que vous pouvez réellement utiliser. Sans cette étape finale, votre audio peaufiné reste juste un fichier sonore, enfermé.
La transcription manuelle d'un long enregistrement, comme un épisode de podcast complet ou une interview en plusieurs parties, est une perte de temps énorme. Je suis passé par là. C'est fastidieux. C'est là que les outils alimentés par l'IA changent complètement votre flux de travail, transformant une tâche de plusieurs jours en quelques minutes.
Du Fichier Audio au Moteur de Contenu
Le processus est étonnamment simple. Une fois votre audio fusionné, il vous suffit de télécharger le fichier final sur un service de transcription comme Transcript.LOL. L'IA se met au travail, générant une transcription très précise avec des horodatages et des étiquettes de locuteur.
Mais c'est bien plus que de simplement mettre les mots par écrit.
Cette transcription devient la matière première d'un puissant moteur de contenu. C'est la base sur laquelle vous pouvez construire une bibliothèque entière d'actifs, maximisant la portée et l'impact de votre enregistrement original.
Avec une transcription détaillée en main, une multitude de nouvelles possibilités s'ouvrent. Soudain, vous avez une mine d'or de matériel à exploiter.
- Créez des Notes d'Émission Instantanées : Extrayez simplement les sujets clés et les horodatages directement de la transcription pour vos auditeurs de podcast. C'est fait.
- Générez des Articles de Blog : Vous pouvez facilement adapter le dialogue de votre audio en un article bien structuré, économisant des heures d'écriture.
- Créez du Contenu pour les Réseaux Sociaux : Repérez les citations les plus percutantes et transformez-les en graphiques accrocheurs pour Instagram, X ou LinkedIn.
- Produisez des Sous-titres Vidéo : Exportez la transcription sous forme de fichier SRT ou VTT pour rendre votre contenu vidéo plus accessible et engageant pour tous.
Au fur et à mesure que vous vous plongez dans la production audio, vous trouverez d'autres moyens d'affiner votre processus. L'exploration de techniques avancées comme l'utilisation de la saisie vocale comme outil de productivité peut encore plus dynamiser votre flux de travail.
En adoptant ces méthodes, vous transformez un fichier audio fusionné en des dizaines de contenus. Pour plus d'idées à ce sujet, consultez notre guide sur les stratégies de réutilisation de contenu efficaces.
Vous Avez des Questions sur la Fusion Audio ?
Même avec les meilleurs outils, vous rencontrerez inévitablement quelques obstacles lors de la combinaison audio. Cela arrive à tout le monde. Passons en revue certains des problèmes les plus courants auxquels les gens sont confrontés et comment les résoudre.
L'une des premières choses qui inquiète les gens est la qualité. Si vous fusionnez un tas de fichiers WAV de haute qualité en un seul MP3, est-ce que vous ruinez le son ? La réponse courte est oui, il y a toujours une certaine perte de données lorsque vous créez un fichier compressé comme un MP3.
Mais voici le truc : si vous le faites correctement, la différence est pratiquement impossible à entendre. Lorsque vous exportez votre piste fusionnée finale, assurez-vous simplement d'utiliser un débit binaire élevé — 320 kbps est la norme d'or. Pour la personne moyenne, cela sonnera parfait. N'oubliez pas de conserver vos fichiers originaux non compressés, juste au cas où.
Une fois votre audio fusionné, ne le laissez pas inutilisé. Convertissez-le instantanément en transcriptions, résumés, notes et contenu. Utilisez Transcript.LOL pour transformer votre fichier fusionné final en informations exploitables en quelques minutes.
Résoudre ces problèmes agaçants
D'accord, qu'en est-il du volume incohérent ? C'est un classique. Vous avez un mémo vocal silencieux juste à côté d'une introduction de podcast retentissante, et le résultat final est un mélange discordant. Vous n'avez pas besoin de revenir en arrière et de retoucher chaque clip manuellement.
C'est exactement pour cela que la normalisation a été conçue. Les éditeurs audio comme Audacity disposent d'un outil "Normalisation de volume" ou "Normaliser" intégré. Appliquez-le simplement à tous vos clips avant d'exporter, et le logiciel ramènera automatiquement tout à un niveau cohérent et équilibré.
Astuce de pro : La normalisation ne consiste pas à pousser tout le monde au volume maximum. Il s'agit d'obtenir un volume perçu uniforme afin qu'un clip ne fasse pas exploser vos tympans pendant que le suivant n'est qu'un murmure. C'est la clé d'un résultat professionnel.
Voici quelques autres questions rapides que nous entendons tout le temps :
- Puis-je fusionner plus de deux fichiers ? Bien sûr. Des outils comme Audacity et FFmpeg ne se soucient pas vraiment de savoir si vous leur donnez deux fichiers ou deux cents. Si vous traitez un lot massif, cependant, le script avec FFmpeg est beaucoup plus rapide.
- Et si mes fichiers sont tous dans des formats différents ? Problème très courant. La solution la plus simple est de convertir tout dans un format unique et cohérent (comme WAV) avant de commencer la fusion. Cette seule étape de préparation vous évitera bien des erreurs étranges.
- Y a-t-il une limite à la longueur du fichier final ? Pas techniquement, mais la praticité est un facteur. Un seul fichier audio de dix heures est un cauchemar à gérer, éditer, ou même télécharger. Si vous avez fusionné l'enregistrement d'un séminaire énorme, la prochaine étape est de le faire transcrire. Notre guide sur comment transcrire des fichiers audio explique comment gérer ces fichiers volumineux efficacement.
Une fois que vous avez votre fichier audio final et fusionné, le vrai travail commence. Transcript.LOL peut prendre ce fichier et le transcrire instantanément, avec des étiquettes de locuteurs et des horodatages. Cela rend incroyablement facile la création de notes d'émission, l'extraction de citations pour les réseaux sociaux, ou la rédaction d'un article de blog complet. Obtenez votre première transcription gratuitement sur https://transcript.lol.