A Guide to Adding Text to Video for Maximum Engagement
Learn how adding text to video can boost views and connect with a wider audience. This guide covers how to create captions, titles, and overlays that work.
Kate, Praveen
March 9, 2026
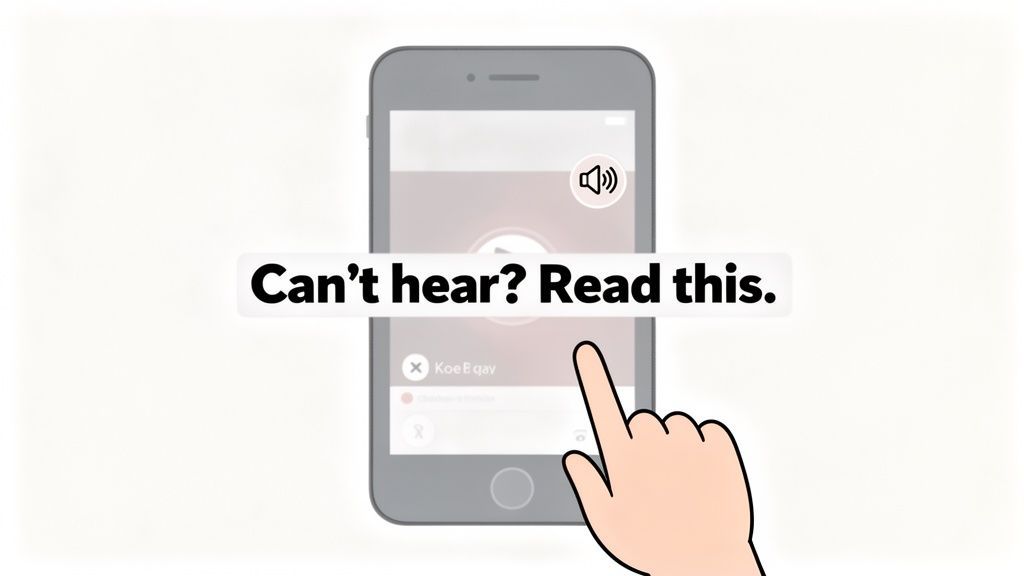
Think about the last time you scrolled through social media. How many videos did you watch with the sound off? If you’re like most people, it was probably almost all of them. In a world of silent scrolling, a video without text is just moving pictures—easily ignored and quickly forgotten.
That's why adding text to video has gone from a nice-to-have accessibility feature to an absolute must-do for anyone creating content. Whether you're a marketer, educator, or just trying to get your message out there, text is your secret weapon. Tools like Transcript.LOL make it simple to get this done right.
Essential Features for Smooth Video Text Processing
State-of-the-art AI
Powered by OpenAI's Whisper for industry-leading accuracy. Support for custom vocabularies, up to 10 hours long files, and ultra fast results.

Import from multiple sources
Import audio and video files from various sources including direct upload, Google Drive, Dropbox, URLs, Zoom, and more.
Export in multiple formats
Export your transcripts in multiple formats including TXT, DOCX, PDF, SRT, and VTT with customizable formatting options.
Why Adding Text to Video Is a Core Strategy
Let's get practical. Imagine you’re a digital marketer who just spent a chunk of your budget on a Facebook ad campaign. Without text, your brilliant video is completely lost on the 85% of Facebook users who watch videos with the sound off. The ad spend is essentially wasted as people scroll right past, missing your message entirely.
Now, add some clear, snappy text overlays to that same video. Suddenly, it grabs attention and communicates its value in seconds, sound or no sound. You've just salvaged your campaign.
The Numbers Don't Lie
This isn't just a hunch; the data is crystal clear. We've seen a staggering 572% increase in caption usage since 2021. By 2023, 254% more businesses were adding text to their videos than just the year before.
Why the huge shift? Because it works. Studies show that well-timed subtitles can boost viewer retention by as much as 65% and significantly increase how long people watch your ads.
It goes beyond social media, too. Think about a corporate trainer creating onboarding videos for a global team. By adding captions, they ensure every new hire understands the material, whether they're in a noisy office or speak a different native language. It just makes the content work better for everyone.
Why Text Is More Usual in Video Content?
Consumption of video content is growing in environments where audio is not always audible. Regardless of background noise, language obstacles, or accessibility requirements, adding text guarantees that viewers understand the message. Captions are now an essential component of successful communication for many authors and businesses.
Benefits Beyond the Obvious
Making content accessible for viewers who are deaf or hard of hearing is incredibly important, but the advantages of adding text go much further.
- Sky-High Engagement: Text keeps viewers hooked, especially in loud places or during silent playback. We have a whole guide on how to increase engagement on social media that dives deeper into this.
- Better Comprehension: When you reinforce what's being said with text on screen, people simply understand and remember it better. It's a proven learning principle.
- A Huge SEO Boost: Search engines can't "watch" your video, but they can crawl a transcript or caption file. This helps your content show up in search results for all your important keywords.
Text on video is no longer an afterthought. It's a fundamental tool that directly impacts watch time, comprehension, and your ability to connect with your audience. The modern viewer expects it, and the most successful creators are already delivering it.
Choosing the Right Kind of Text for Your Video
Adding text to your video isn’t a one-size-fits-all deal. The type of text you pick can make or break your content, and it all boils down to your goal and where people will be watching.
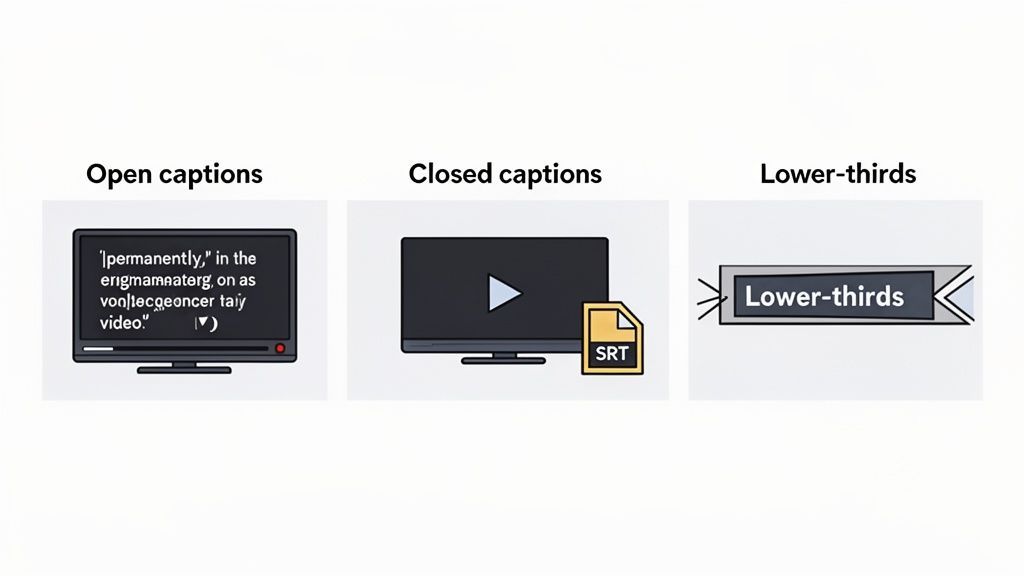
Let's break down the three main players you'll be working with: open captions, closed captions, and dynamic text overlays. Picking the wrong one is an easy way to lose your audience before they even get to your message.
Open Captions for Guaranteed Visibility
You've definitely seen these. Open captions are text that is permanently "burned into" the video file itself. Think of them as part of the footage—viewers can't turn them off.
This makes them the go-to choice for social media. On platforms like TikTok, Instagram Reels, and Facebook, where the vast majority of video is watched on mute, open captions are essential. They ensure your message lands immediately, even if the sound is never turned on.
Because the text is always visible, you get total creative control over its font, style, and position, which is perfect for keeping everything on-brand.
Closed Captions for Accessibility and Control
Unlike open captions, closed captions are delivered as a separate file, usually an SRT or VTT file. This is the classic caption experience where viewers can toggle them on or off in the video player.
This is the standard for platforms like YouTube and Vimeo, especially for longer content like documentaries, tutorials, or corporate training videos. They provide crucial accessibility for viewers who are deaf or hard of hearing and are a huge help for anyone watching in a non-native language.
The bottom line is that closed captions give the user control, which is exactly what people expect on platforms built for long-form video.
If you want to get into the weeds on the technical side, our guide on closed captioning vs subtitles has a much deeper breakdown.
Dynamic Overlays for Context and Engagement
This category covers all the other graphical text elements you see on screen. We're talking about titles, callouts that highlight a key stat, and—most commonly—lower-thirds that introduce a speaker.
These overlays are all about adding a layer of professional polish and directing the viewer's attention.
Imagine a podcast interview. The host uses a clean lower-third to display the guest's name, title, and social media handle. It not only looks slick but also provides real value by driving traffic to the guest's own channels. These are a core part of building a strong, recognizable brand identity through video.
A Comparison of Video Text Formats
Choosing the right format can feel a bit overwhelming at first. This table breaks down the core differences to help you decide which one best fits your project, platform, and audience.
| Text Type | Best For | Pros | Cons |
|---|---|---|---|
| Open Captions | Social media (TikTok, Reels, Shorts), silent-play environments, branded content. | Guaranteed visibility, full control over style and branding, no user action required. | Permanently part of the video, cannot be turned off or translated by the player. |
| Closed Captions | YouTube, Vimeo, educational content, films, accessibility compliance (ADA/WCAG). | User can toggle on/off, supports multiple languages, improves SEO and accessibility. | Requires a separate file (SRT/VTT), style is controlled by the player/user. |
| Dynamic Overlays | Interviews (lower-thirds), tutorials (callouts), branded intros/outros. | Adds professional polish, provides context, directs viewer attention. | Can clutter the screen if overused, purely for visual information, not for dialogue. |
Ultimately, the best choice depends on what you want to achieve. For a quick social clip, open captions are a no-brainer. For a detailed webinar, closed captions are a must. And for adding that professional touch, dynamic overlays are your best friend.
Generating Perfect Captions with Transcript.LOL
Adding accurate closed captions is probably the most common reason people need to add text to their videos. You could try transcribing manually, but let's be honest—it's slow, tedious, and easy to get wrong. Using a dedicated AI tool can give you a nearly flawless result in just a fraction of the time.
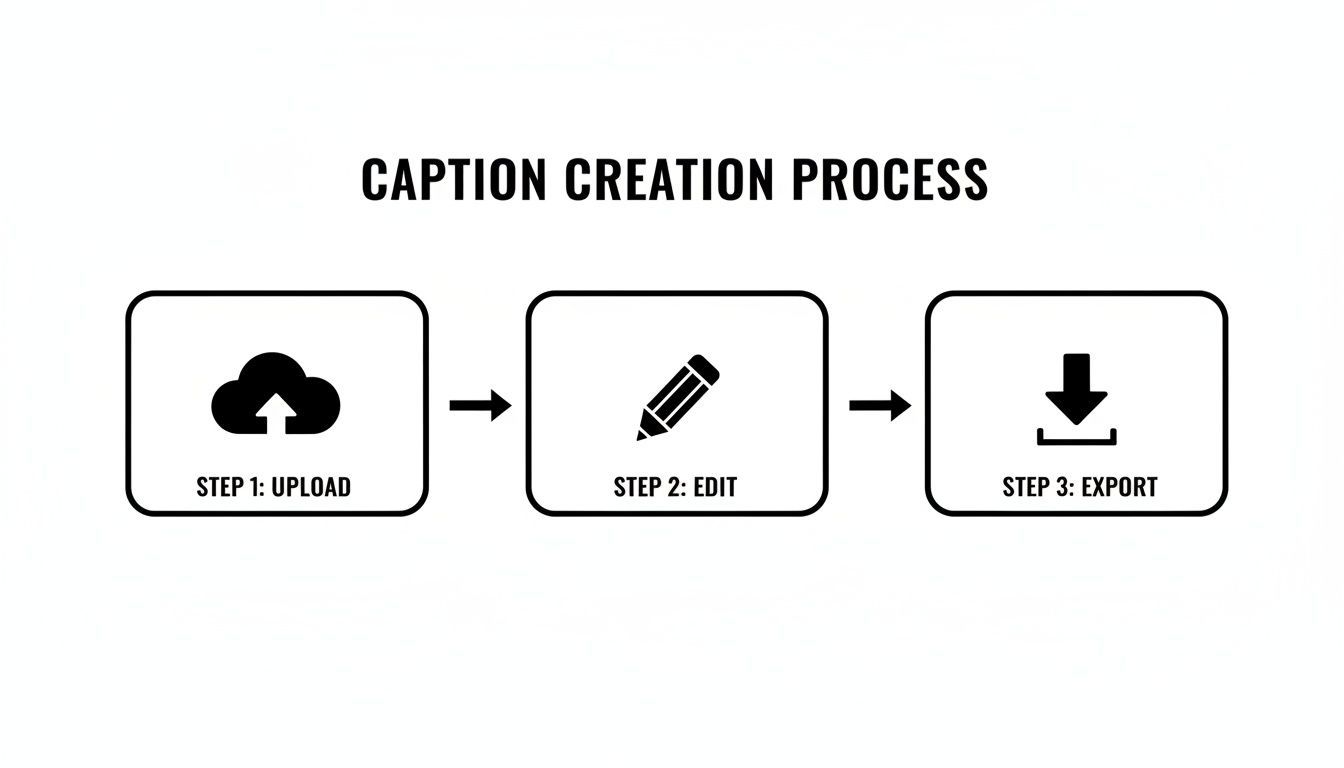
Here's how you can go from a raw video file to a polished, ready-to-use caption file with Transcript.LOL, turning a once-complex job into a few simple clicks.
First things first, you need to get your video into the system. You can either upload a file directly from your computer or just paste a link from a platform like YouTube or Vimeo. The tool starts working its magic right away, using its AI to generate a complete, time-coded transcript.
The clean interface shown above is a big part of the experience. It removes the technical hurdles that often stop creators from even starting the process of adding text to their videos.
Features That Save Hours of Work

Speaker detection
Automatically identify different speakers in your recordings and label them with their names.
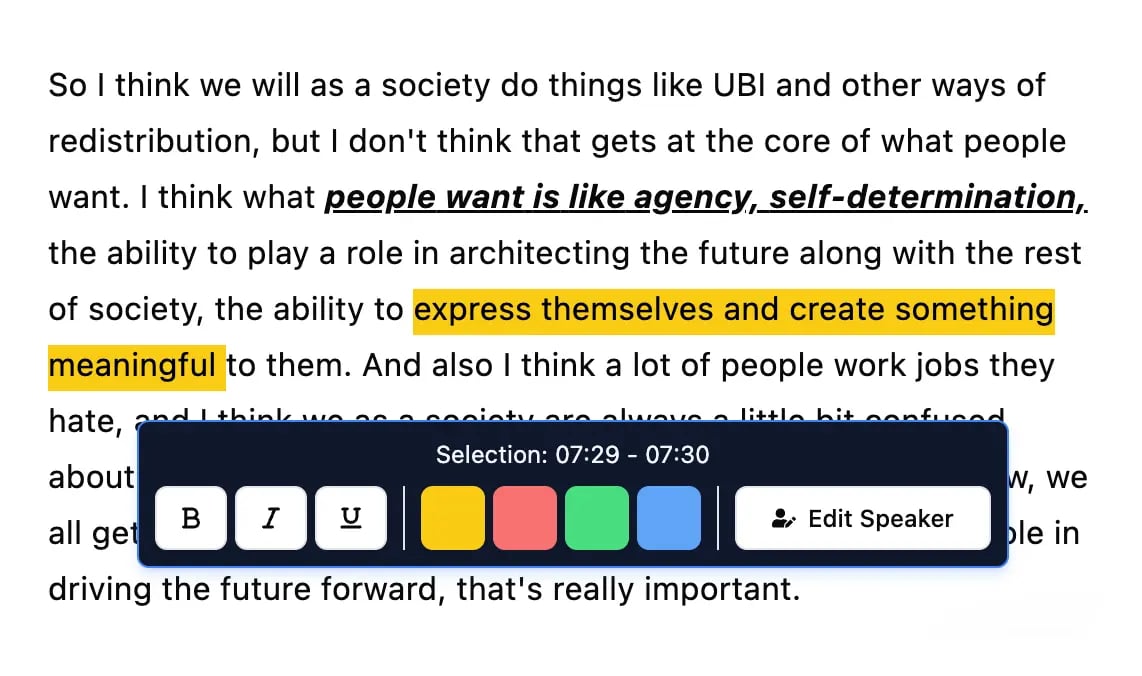
Editing tools
Edit transcripts with powerful tools including find & replace, speaker assignment, rich text formats, and highlighting.
Summaries and Chatbot
Generate summaries & other insights from your transcript, reusable custom prompts and chatbot for your content.
Fine-Tuning Your Transcript
No AI is perfect, but a good one makes fixing mistakes feel effortless. Transcript.LOL gives you an interactive editor where the video plays right alongside the generated text. If you see a mistake, you just click the word and type the fix. The timestamps stay perfectly synced.
Why It's Still Important to Review AI Captions?
Even while AI transcription systems are incredibly accurate, mistakes can still happen. Small errors in the transcript can occasionally be caused by background noise, strong accents, or technical terms. Before publishing, a brief manual inspection guarantees that the final captions are correct, professional, and clear.
This is a lifesaver in a few common situations:
- Assigning Speakers: If you're working with an interview or a panel discussion, you can quickly add speaker labels like "Interviewer" or "Guest 1." This small change adds a ton of clarity and makes the final captions much easier for viewers to follow.
- Custom Vocabulary: Does your video mention specific brand names, industry jargon, or unique acronyms? You can add them to a custom vocabulary list. This teaches the AI to recognize those terms, helping you hit 100% accuracy on future uploads.
- Minor Edits: Fixing names, places, or a word the AI misheard takes just seconds. It's these quick polishes that make your final transcript look professional.
Beyond the tool itself, you can find other valuable resources with quick tips for adding captions to your videos. Combining powerful software with smart practices is what really separates amateur work from a truly professional production.
With Transcript.LOL, your job isn't to create captions from scratch—it's to review and perfect them. The AI handles the heavy lifting, so you can focus on the final touches that make your video accessible and engaging for everyone.
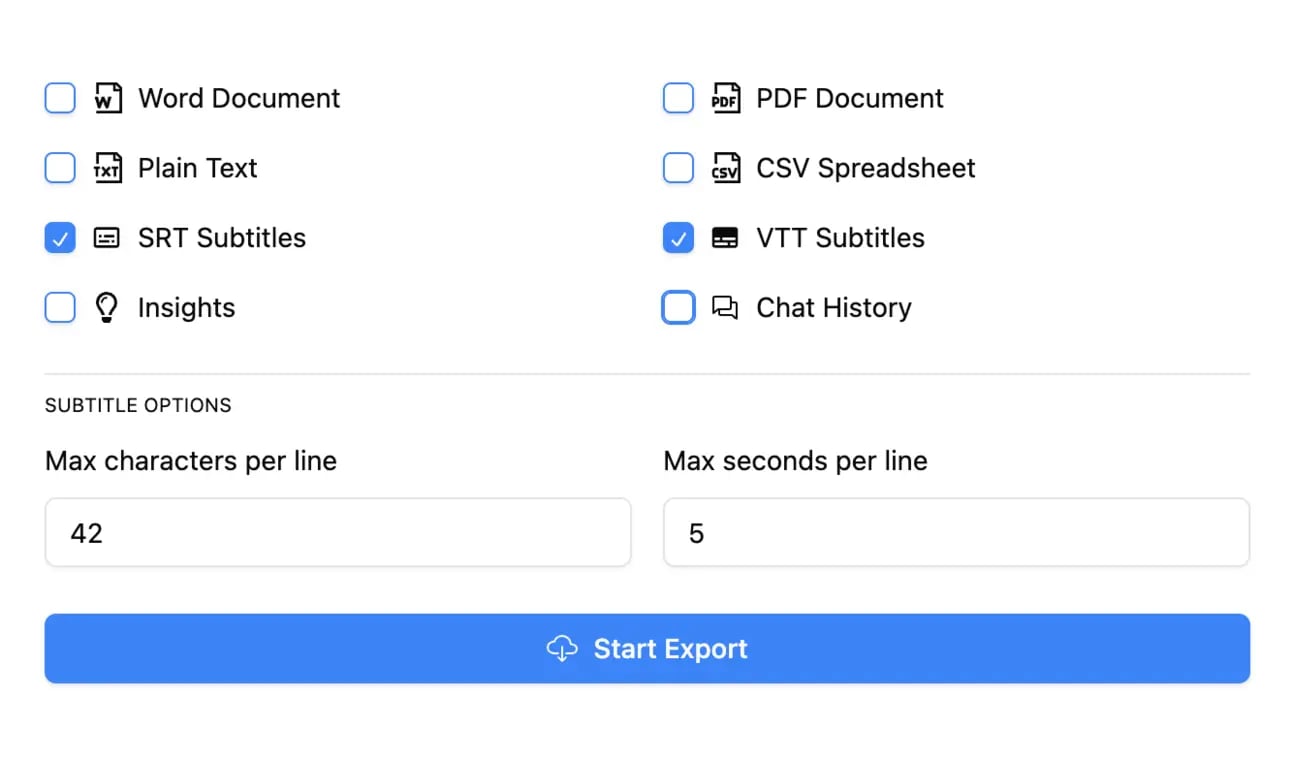
Exporting Your Final Caption File
Once you're happy with the transcript, the last step is to export it in the correct format. This is where a dedicated tool really proves its worth. With a single click, you can download your captions as either an SRT (SubRip Subtitle) or VTT (WebVTT) file.
These two formats are the universal standards accepted by pretty much every video platform and editor out there.
- SRT files are the go-to industry standard. They're compatible with YouTube, Vimeo, Facebook, and professional editors like Premiere Pro and DaVinci Resolve.
- VTT files are a more modern format that offers extra styling options and are popular for web-based video players.
By exporting a clean SRT or VTT, you get a universal asset that’s ready for any scenario. You can dive deeper into creating and using these files in our detailed guide on using an SRT file creator. This simple export step bridges the gap between a raw transcription and a perfectly captioned video, ready for publishing.
A Practical Guide to Adding Text in Your Video Editor
Once you've got your caption file ready or a brilliant idea for your titles, it’s time to bring that text into your video. The best way to do this really comes down to the tools you’re using.
Whether you're just starting out on a mobile app or you're a seasoned pro working in a high-end editing suite, adding text to video can be a smooth and straightforward process. This guide breaks down the specific steps for four popular setups: fast-paced mobile editors like CapCut, user-friendly web tools like Canva, and professional software like Adobe Premiere Pro and DaVinci Resolve.
Creating Eye-Catching Text in CapCut and Canva
For social media creators, speed and visual punch are everything. Tools like CapCut and Canva are built for this world, making it ridiculously easy to add dynamic, animated text to your short-form videos for TikTok and Instagram.
In CapCut, you just tap the "Text" tool, type your message, and dive into a massive library of fonts, styles, and animations. You can make text pop in, slide across the screen, or pulse to the beat with a single tap. The real trick is to keep it bold and brief to grab attention when people are scrolling with the sound off.
Canva gives you a similar drag-and-drop experience. You can start with pre-made text templates or design your own custom titles from scratch. It’s especially handy for creating branded assets, like a consistent title card or an outro screen you can slap onto all your videos.
No matter the tool, the basic workflow is the same. You upload your media, add and edit the text, and then export the final video.
It's also worth knowing about tools that automate this process. For instance, a dedicated text to video generator can create entire video sequences directly from a script, offering a completely different path for bringing your words to life.
Quick Advice for Successfully Including Text in Videos
Keep Text Short and Focused
Usually, viewers watch the video and read the captions at the same time. They will be able to quickly grasp the content without losing sight of the story or images if the text is kept brief.
Use Strong Visual Contrast
The text should be easily distinguished from the background. Captions are viewable even on complicated or bright images when shadows, outlines, or semi-transparent backgrounds are included.
Match Text Timing With Speech
The captions needs to show up concurrently with the spoken words. When captions are timed correctly, viewers may follow along more easily without being sidetracked by hurried or delayed subtitles.
Keep Your Styling Consistent
A professional appearance can be achieved by using the same fonts, sizes, and colors throughout the film. Additionally, maintaining consistency across several films enhances audience familiarity and fortifies brand identity.
Professional Workflows in Premiere Pro and DaVinci Resolve
When you step up to professional editing software, your options for adding text to video get a whole lot bigger. Both Adobe Premiere Pro and DaVinci Resolve have powerful tools for everything from simple closed captions to broadcast-quality motion graphics.
For closed captions, the process is incredibly efficient. Once you generate an SRT or VTT file from a tool like Transcript.LOL, you can import it directly into your project.
- In Premiere Pro: Head to
File > Importand select your SRT file. Just drag it onto your timeline, and Premiere will automatically sync it with your video. - In DaVinci Resolve: Inside the Media Pool, right-click and navigate to
Timelines > Import > Subtitle. Choose your file, and Resolve creates a dedicated subtitle track for you.
This method is perfect for adding standard, user-toggleable captions that meet accessibility guidelines. You can style the text, of course, but its main job is to accurately reflect the dialogue for viewers who need or want it.
Adding text to videos isn't just a nice-to-have—it’s a sales powerhouse. A stunning 78% of marketing professionals report that videos with strategic text overlays directly increased sales, while 87% credit them for boosting lead generation. With 3.48 billion people watching video content, text is your ticket to making sure your message lands with this massive global audience.
Designing Advanced Titles and Lower-Thirds
Beyond captions, Premiere Pro and Resolve are where you can really flex your creative muscles with custom titles and graphical overlays. Both programs have dedicated text tools that give you precise control over every single element. In Premiere, it’s the Essential Graphics panel; in Resolve, it’s the Text+ tool on the Fusion page.
This is where you can design professional lower-thirds to introduce speakers, create slick animated title sequences, or add callouts to highlight key information on screen. The focus shifts from simply adding text to designing with it, integrating it as a seamless element that boosts your video's quality and reinforces your message.
Designing Text for Readability and Impact
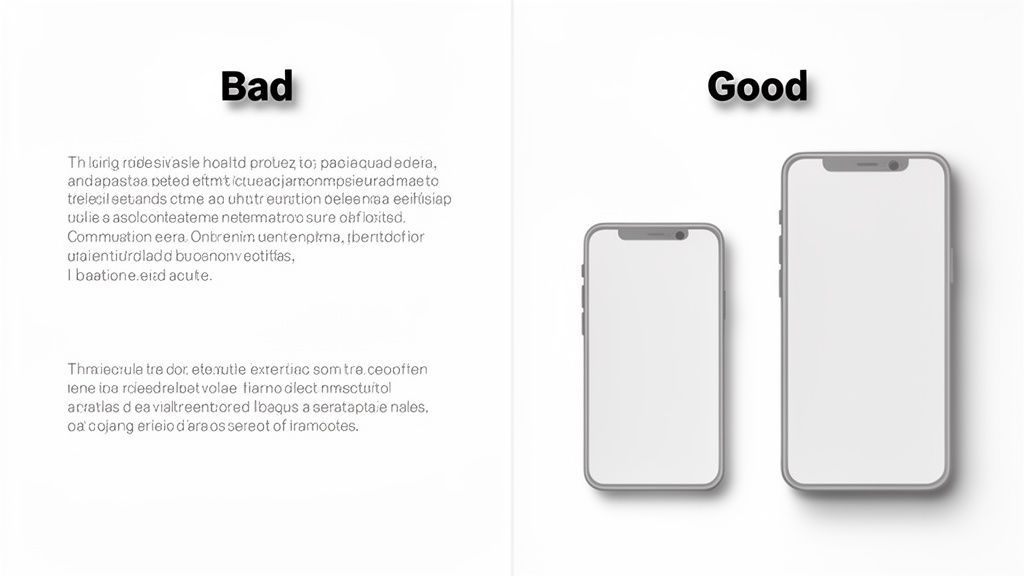 So you've added text to your video. Great. But can anyone actually read it? If your message gets lost in a blur of bad design, you’ve wasted your time.
Effective text is what separates an amateur social post from polished content that actually holds a viewer's attention. The goal is dead simple: make your text easy to read at a glance, no matter what device someone is on.
We’ve all seen it before. That beautiful cursive font that looks great on a 27-inch monitor but becomes an unreadable smudge on a phone. Or white text placed over a bright sky, disappearing completely. Let’s make sure that doesn’t happen to you.
Choosing Fonts and Ensuring Contrast
The foundation of any readable text is a clean, legible font. This isn’t the time for overly decorative or whisper-thin script fonts that people have to squint at. Your best bet, almost every time, is a bold and clear sans-serif font.
Here are a few workhorses known for their fantastic screen readability:
- Roboto: A modern and incredibly versatile font designed by Google specifically for clarity.
- Arial or Helvetica: The classics. They’re no-nonsense, universally available, and just plain easy to read.
- Lato: A friendly yet professional font that works just as well for big titles as it does for subtitles.
- Montserrat: Another clean, popular choice that holds up great, even at smaller sizes.
Once you’ve got your font, you absolutely have to make sure it stands out from your video footage. Placing text directly over a busy, moving background is one of the most common mistakes I see. Fortunately, the fix is easy.
- Add a Drop Shadow: A soft shadow behind the text subtly lifts it away from the background.
- Use an Outline (Stroke): A thin black outline around white text works wonders on almost any background.
- Place it in a Box: A semi-transparent black box behind your captions is a foolproof way to guarantee readability, every single time.
We dive much deeper into picking the perfect typeface in our complete guide to the best font for subtitles. It's worth a read if you really want to nail the details.
Sizing and Timing Your Text Correctly
Text size is non-negotiable, especially with most content being watched on a phone. Here's a simple rule of thumb: before you publish, check the video on your own phone. If you have to squint, it's too small. End of story.
The market backs this up. The global video advertising market is projected to hit a staggering USD 90.88 billion by 2026, and mobile is expected to account for a 67.58% share of that by 2025. With that much money flowing into mobile ads where text is absolutely vital, you can't afford to get the design wrong. You can see more data on these video advertising market trends for yourself.
Video Content Is Becoming Increasingly Text-Driven
Accessibility and audience engagement are becoming increasingly important to creators and businesses as global video consumption continues to rise. These days, text overlays, captions, and subtitles are crucial components for connecting with audiences in various environments and on different devices. This change reflects the preference of modern viewers for rapid, visual information consumption.
Finally, think about timing. Don't flash text on the screen so quickly that your viewers miss it entirely. A good guideline is to leave text on-screen long enough for the average person to read it through twice.
Key Design Takeaway: Your goal is effortless readability. Use a clean sans-serif font, create strong contrast with a shadow or background box, and always test the size on a mobile device. Make it easy for your audience, and your message will land every time.
Common Questions About Adding Text to Video
Even with the best tools, you're bound to run into a few questions when adding text to your videos. It happens to everyone. Let's tackle some of the most common hurdles I see creators face, from technical choices to styling decisions.
What Is the Difference Between Open and Closed Captions?
This is a big one, and the choice depends entirely on where your video will live.
Open captions are permanently "burned into" the video itself. Viewers can't turn them off—they're part of the visual, just like your footage. This is your go-to for social media platforms like TikTok or Instagram, where videos often auto-play on mute and you need to guarantee your message gets across instantly.
Closed captions, on the other hand, are a separate file (usually an SRT or VTT). Viewers can toggle them on or off. This is the standard for platforms like YouTube or Vimeo, giving users control and making your content accessible to a wider audience.
Can I Use My Transcript for More Than Just Captions?
Absolutely. A high-quality transcript from a service like Transcript.LOL is a content goldmine. Thinking of it as just a source for captions is leaving a ton of value on the table.
Here are a few ways to get more mileage out of it:
- Create Title Cards: Pull the most compelling quotes or key phrases directly from your transcript to make dynamic, eye-catching title cards in your video editor.
- Write a Text Intro: Use the summary feature to quickly generate a concise description for your video on YouTube or a punchy intro for a social post.
- Repurpose for Other Content: Easily pull key points to spin up a companion blog post, a series of social media updates, or an email newsletter to promote your video.
What Is the Best Font for Video Text?
When it comes to fonts, legibility is everything. Your number one priority is making sure people can actually read your text, especially on small screens. The best choice is almost always a clean, sans-serif font designed for readability.
Stay away from overly decorative or thin fonts. They might look cool on your big monitor, but they often become a blurry mess on a phone or against a busy background.
For maximum clarity, stick to trusted workhorses like Roboto, Arial, Helvetica, Lato, or Montserrat. Always do a quick gut-check: watch a preview of your video on your phone before you hit publish.
How Can I Stop Text from Getting Cut Off on Different Screens?
The key is to respect the "title-safe area" or "safe zones" in your video editor. Most professional software like Premiere Pro or Final Cut Pro has on-screen guides showing you where to place text so it won’t get cropped by different screen sizes or covered by player controls.
For social media, you also have to account for the platform's user interface. Things like usernames, like buttons, and comment fields can easily block your text. Always place your overlays with these UI elements in mind to ensure nothing important gets covered up.
Ready to create perfectly accurate transcripts and captions in minutes? Transcript.LOL uses powerful AI to turn your audio and video into polished text, ready for any platform. Get started for free at Transcript.LOL.