Unlocking 'time stamp video' Mastery: A Creator's Guide t...
Discover how a time stamp video boosts viewer retention and simplifies editing. Learn practical steps to add timestamps that guide your audience.
Kate, Praveen
February 16, 2026
Adding time stamp video markers isn't just a technical step—it's about transforming your content from a long, intimidating block into a user-friendly, navigable resource. Think of them as clickable chapter markers that let viewers jump straight to the good stuff. This simple change can make a massive difference in viewer retention and overall satisfaction.
Why Timestamps Are Your Secret Weapon for Viewer Engagement
Remember the last time you watched a lengthy tutorial or podcast? You probably found yourself scrubbing back and forth, trying to pinpoint that one specific piece of information you needed. It's a frustrating experience that often ends with the viewer just giving up and leaving.
Timestamps solve this problem completely.
Features That Make Timestamp Creation Effortless
State-of-the-art AI
Powered by OpenAI's Whisper for industry-leading accuracy. Support for custom vocabularies, up to 10 hours long files, and ultra fast results.

Import from multiple sources
Import audio and video files from various sources including direct upload, Google Drive, Dropbox, URLs, Zoom, and more.
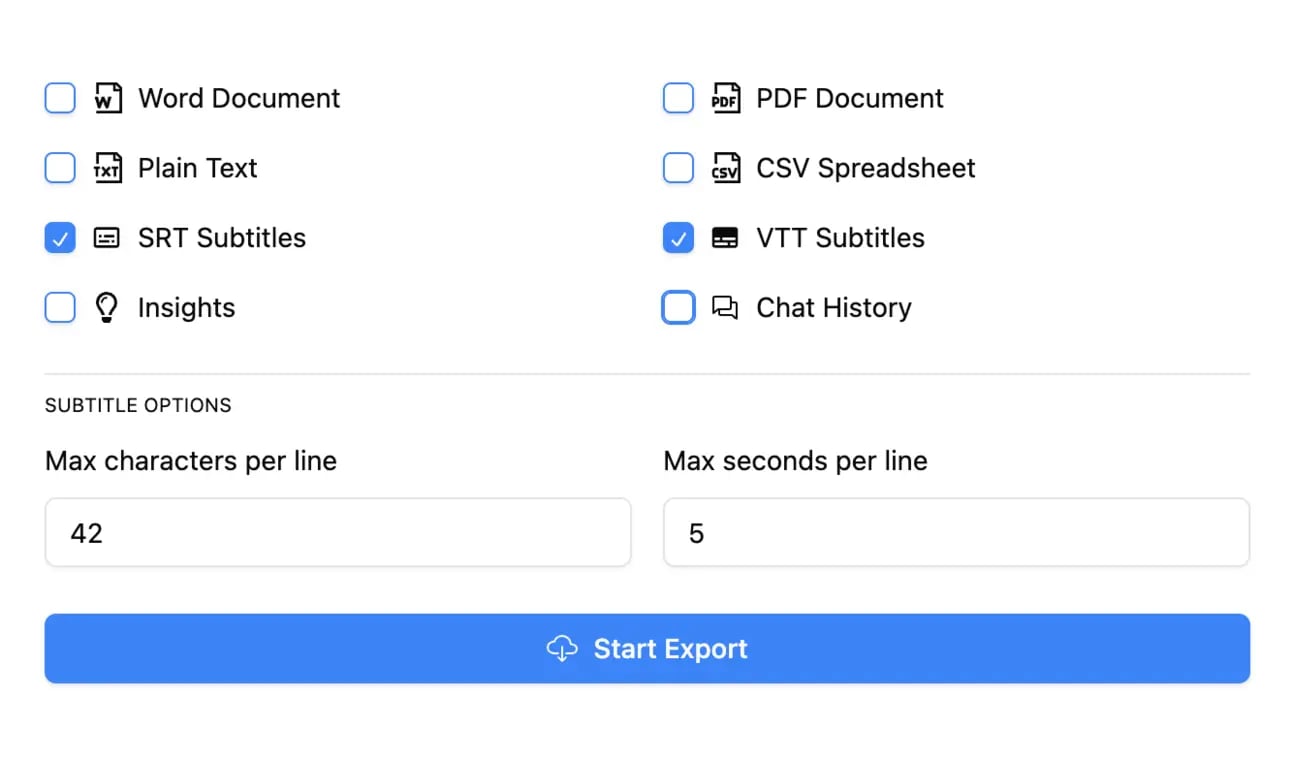
Export in multiple formats
Export your transcripts in multiple formats including TXT, DOCX, PDF, SRT, and VTT with customizable formatting options.
By providing a clean list of time-stamped chapters, you’re handing control over to your audience. It’s like giving them a table of contents, empowering them to consume the video on their own terms. That kind of respect for their time goes a long way in building a loyal following.
Why Timestamps Matter More Than You Think?
Text navigation turns passive videos into interactive experiences. Viewers find answers faster, stay longer, and trust your content more. Small usability upgrades often create the biggest retention gains.
Beyond Navigation: A Major User Experience Upgrade
A properly time-stamped video does more than just help people get around. It fundamentally upgrades the entire viewing experience. From the moment they land on your video, viewers can see a clear outline of what's covered, helping them decide if it’s the right content for them before they even press play.
Here's how that simple change pays off:
- Boosted Watch Time: Instead of bouncing, a viewer who isn't interested in the current section might just skip to another topic, keeping them on your video longer.
- Better Accessibility: Timestamps are a game-changer for accessibility. They help people with different learning styles and make it easy for anyone to review specific sections, like a student re-watching part of a lecture.
- Serious SEO Benefits: Google often pulls video chapters directly into its search results. This gives your content more prime real estate on the results page and attracts clicks from people who know you have the exact answer they’re looking for.
The digital video market is set to explode, projected to hit USD 524.06 billion by 2031. With 93% of businesses already using video for marketing, standing out is harder than ever. Timestamps give you that crucial competitive edge by making your content more precise and engaging.
To give you a clearer picture, let's break down the main advantages.
What Timestamps Really Unlock for Creators?
Faster Consumption
Viewers jump directly to what they need instead of scrubbing blindly. This saves time and reduces frustration. Happy viewers stay longer and watch more.
Professional Structure
Chapters force you to organize content logically. Your videos feel clearer and more intentional. Structure naturally improves storytelling quality.
Reusable Content
Each section becomes a mini asset you can clip or repurpose. Perfect for social posts and highlights. One video turns into many pieces of content.
Stronger Trust
Clear navigation shows you respect the audience’s time. People feel in control of the experience. That builds loyalty and repeat viewers.
Key Benefits of Video Timestamps at a Glance
This table sums up why taking a few extra minutes to add timestamps is one of the highest-leverage activities you can do as a video creator.
| Benefit Category | Impact on Your Content | Who It Helps Most |
|---|---|---|
| User Experience | Makes long videos feel less intimidating and easier to navigate. | Viewers with limited time or specific questions. |
| Viewer Retention | Encourages viewers to skip to other relevant sections instead of leaving. | Creators looking to increase total watch hours. |
| Content Discovery | Chapters appear in Google search results, boosting click-through rates. | Marketers and brands focused on SEO and organic traffic. |
| Accessibility | Helps users with screen readers and those who need to revisit information. | Educators, trainers, and public-facing organizations. |
Ultimately, timestamps signal to both viewers and search engines that your content is well-organized, valuable, and respects the user's time.
A Forcing Function for Better Content
Here’s a benefit most people overlook: creating timestamps forces you to be a better creator. You can't add chapters to a rambling, unstructured video. The process makes you think critically about your content's flow and break it down into logical, distinct segments.
This naturally leads to clearer, more focused videos that are just plain easier for your audience to follow.
By breaking down your content into digestible chapters, you’re not just adding timestamps; you’re creating a more professional and polished final product that respects your viewer's attention.
For creators producing in-depth content like tutorials or interviews, this is non-negotiable. Using the right video podcast software tools can streamline this entire process, making it much easier to bake chapters and clickable timestamps into your workflow from the start. You can see how professionals in different fields are using timestamped transcripts to their advantage at https://transcript.lol/usecases.
Using AI Tools to Automate Your Timestamp Workflow
Let's be honest: manually creating timestamps for a long video is a soul-crushing task. It's the kind of painstaking work that can eat up an entire afternoon. But what used to take hours of listening, pausing, and typing can now be done in just a few minutes, thanks to AI.
Instead of getting bogged down in the tedious stuff, you can let automation handle it. Think about it: a podcaster can upload a two-hour interview and get back a perfectly synced transcript, completely ready for chapter markers, almost instantly. This is a massive shift, freeing you up to focus on the creative work that actually matters.
At the heart of this are advanced speech-to-text models that do more than just convert audio to words. They assign a precise start and end time to every single word, creating a foundational document that’s already mapped to your video timeline.
This simple flowchart shows how an AI tool can take a long, linear video and transform it into a perfectly navigable, interactive final product.
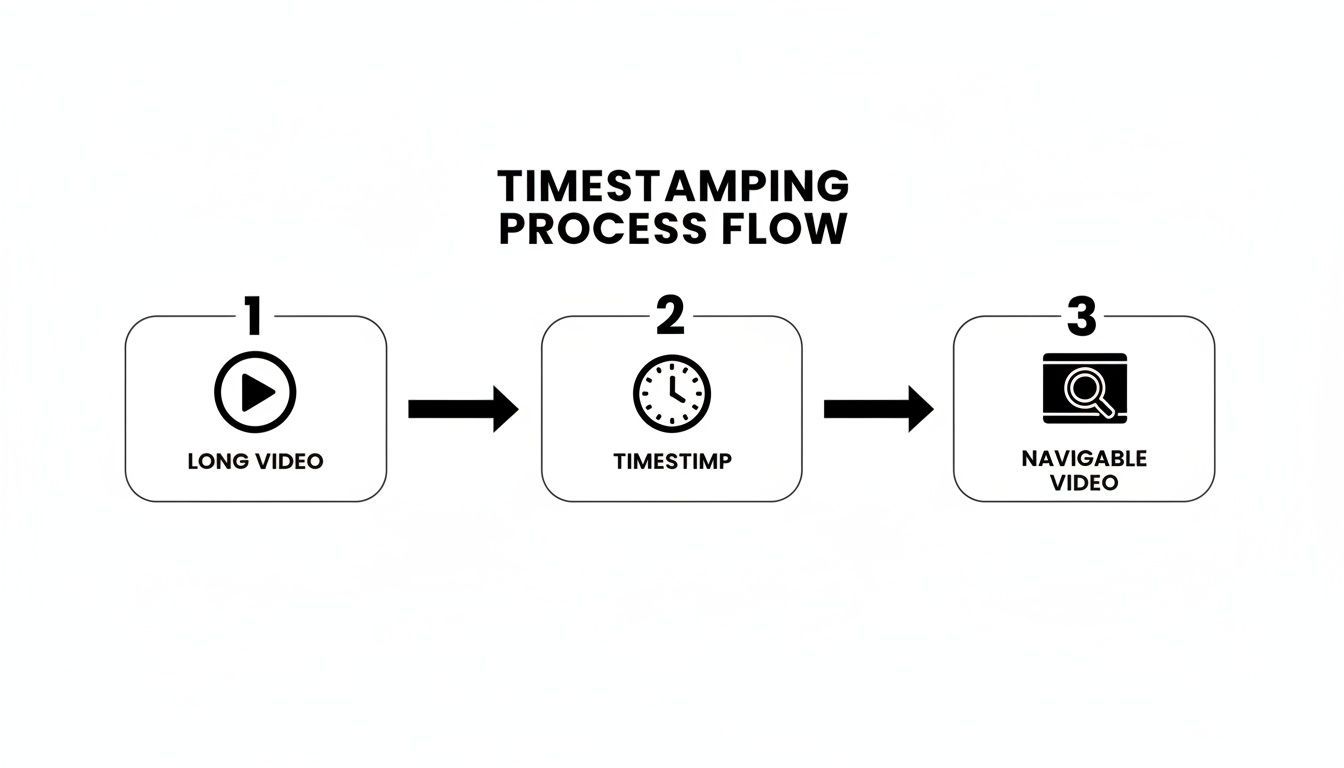
As you can see, adding that time stamp video layer is the key. It’s what turns passive content into an experience your audience can actively engage with.
How AI Transcription Simplifies the Process
Modern transcription services like Transcript.LOL are built to be incredibly straightforward. You just upload your video file—or even easier, paste a link from YouTube, Vimeo, or Google Drive—and the AI handles the rest. In minutes, you have a full transcript with timestamps for every word.
Features for Faster Editing & Insights

Speaker detection
Automatically identify different speakers in your recordings and label them with their names.
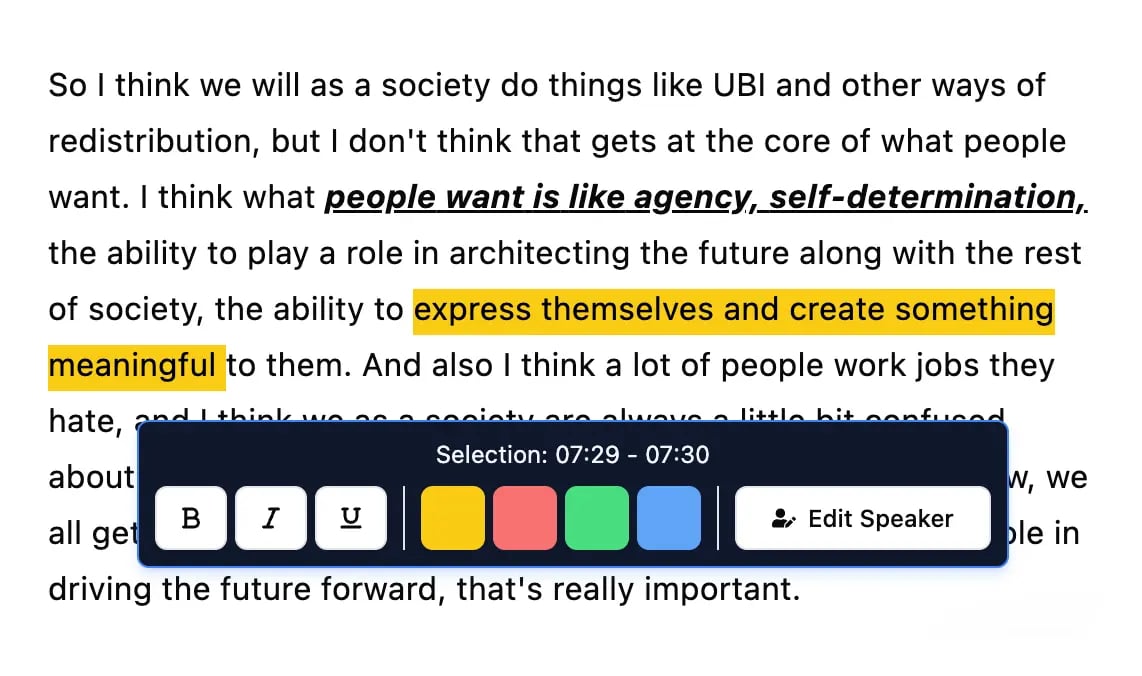
Editing tools
Edit transcripts with powerful tools including find & replace, speaker assignment, rich text formats, and highlighting.
Summaries and Chatbot
Generate summaries & other insights from your transcript, reusable custom prompts and chatbot for your content.
This is a huge leap from the old days of manually scrubbing through footage. The speed and accuracy mean you can churn out more content, faster, without ever having to compromise on quality. If you want to see what's out there, you can explore a variety of AI-powered transcription tools to see what fits your workflow.
The real game-changer with AI isn't just the transcription itself; it's the automated synchronization. Getting a script is one thing. Getting one that’s already perfectly timed to your video changes everything.
This automation is a lifesaver for content with multiple speakers. The AI can often distinguish between different voices and label them for you, which saves you the headache of figuring out who said what and when.
Advanced Features for Pinpoint Accuracy
The best AI tools don't just stop at a basic transcript. They give you features for fine-tuning the output to make sure your timestamps are spot-on.
Here are a few features to look for that lead to a much more polished final product:
- Custom Vocabulary: This is your chance to "teach" the AI specific jargon, product names, or technical terms that are unique to your niche. Adding words like "Photoshop" or a company name like "InnovateCorp" helps prevent silly errors and cuts down on your editing time.
- Speaker Detection: If you're doing interviews, podcasts, or panel discussions, this is a must-have. It automatically identifies who is speaking and labels them in the transcript, making the dialogue clean and easy to follow.
- Interactive Editor: No AI is perfect, so a good editor is crucial. The best platforms link the text directly to the video. You can click on any word in the transcript and instantly jump to that exact moment in the recording to check it and make quick edits.
By leaning on these features, you can build an automated workflow that still produces a professional-grade, highly accurate result every time.
Creating and Using SRT and VTT Subtitle Files
So, you’ve got a perfectly accurate, time-synced transcript. That's a huge win. The next step is to package that text into a format that video players and search engines actually understand.
This is where SRT (SubRip Subtitle) and VTT (WebVTT) files come into play.
Think of them as the universal language for video captions. They're simple text files, but they hold the all-important timing data that syncs your words perfectly with your video. Whether you're uploading to YouTube, Vimeo, or your own website, these files are the industry standard for making your content accessible and searchable.
And this isn't just about putting words on the screen. The metadata inside these files gives search engine crawlers a rich, text-based version of your video to index. This directly boosts your video's discoverability, helping it show up for the exact keywords and phrases spoken in your content.
From Transcript to Actionable Subtitle File
The good news? You don't have to build these files by hand anymore. A tool like Transcript.LOL lets you export your edited transcript as a perfectly formatted SRT or VTT file with a single click.
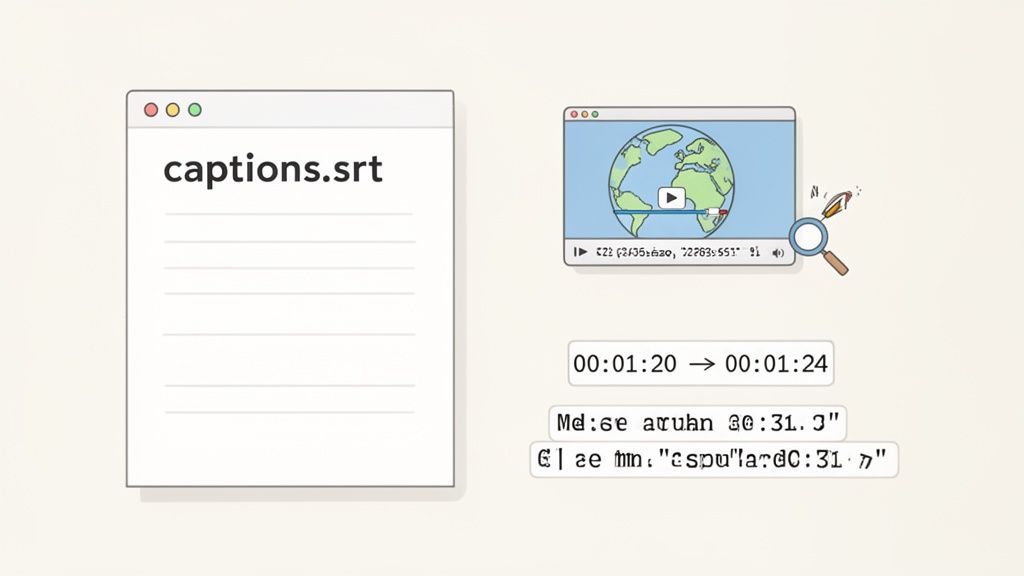
That exported file will contain three key things for each caption line:
- A sequential number for each caption block.
- The precise start and end timecodes.
- The actual text to display during that time.
This seamless export is a must-have in a video streaming market that's projected to hit USD 277.25 billion by 2026. Viewers have high expectations, and accurate, well-timed captions are a non-negotiable part of a professional video experience.
The Difference Between SRT and VTT
While both file types get the job done, there are a few subtle differences. SRT is the older, more widely supported format, loved for its pure simplicity. VTT is the modern standard, offering more advanced options like text styling and positioning.
Here’s a quick breakdown:
| Feature | SRT (SubRip) | VTT (WebVTT) |
|---|---|---|
| Compatibility | Universally supported by nearly every platform. | The standard for HTML5 video; supported by all modern browsers. |
| Formatting | Basic stuff like bold, italics, underline. | Advanced styling with CSS, including text positioning and color options. |
| Metadata | No support for comments. | Allows for metadata notes and comments right inside the file. |
For most creators, especially if you're focused on YouTube, SRT is the perfect choice. Its universal compatibility means it just works, everywhere.
Accurate text is the foundation of any good timed element in video. It's a principle that applies everywhere, from creators to specialized fields like those using a sermon transcription service where precision is critical.
And if you ever need more detail on file exports, you can always check out our guide: https://transcript.lol/docs.
How to Add YouTube Chapters and Clickable Timestamps
So you've got your transcript, and now it's time to turn that raw text into an awesome, interactive experience for your YouTube viewers. This is where YouTube Chapters and clickable timestamps come in, and getting them right is easier than you think.
The process itself is simple, but YouTube is very picky about formatting. There's one rule you absolutely cannot break.
Your very first timestamp must be 00:00. I can't stress this enough. Even if your intro is just music, you have to start the list with that marker. It's the most common reason I see chapters fail to show up, and it’s such a simple fix.
Once you have that 00:00 starting point, you just list out the rest of your chapters. Just type the time (MM:SS or HH:MM:SS), leave a space, and then add your chapter title. Each one needs its own line.
Don't Just Label—Make Your Chapter Titles Work for You
This is where a little strategy goes a long way. Don't just slap generic labels like "Part 2" on your sections. Craft descriptive, keyword-rich titles that tell both viewers and the algorithm what's happening.
Instead of "Editing," try "Editing Drone Footage in Premiere Pro." It gives people a reason to jump to that section and packs in valuable context.
Think of your chapters as a roadmap for your video. A good structure might look something like this:
- 00:00 Intro: What We're Building Today
- 01:25 Choosing the Right Camera Settings
- 04:10 Mastering Key Framing and Motion Effects
- 07:55 Color Grading for That Cinematic Feel
- 11:30 Export Settings for Crisp YouTube Playback
This simple tweak turns a basic time stamp video into a seriously powerful tool for keeping viewers engaged.
Chapters Aren't Just for Viewers—They're for SEO
This isn't just about making your video easier to watch; it's a huge SEO win. With YouTube pulling in USD 9.21 billion in CTV ad revenue, getting discovered is everything. Timestamped chapters feed rich metadata to the algorithm, helping it understand your video on a deeper level.
The result? Google often shows specific chapters from your video directly in search results. If you want to dive deeper into why these details matter, check out these insights on CTV advertising trends at Adwave.com.
By carefully formatting your timestamps, you're doing more than helping your audience. You're giving search engines a play-by-play of your content, which can dramatically boost your chances of getting recommended to new viewers.
It's a straightforward way to improve your video's performance without any extra filming or editing.
A Quick Guide to Timestamp Formatting
Getting the format right is non-negotiable if you want your timestamps to work. While we're focused on YouTube here, it helps to know how other platforms handle them too.
To make sure you're always on the right track, here's a quick reference table.
Timestamp Formatting for Major Platforms
| Platform | Required Format | Example | Key Tip |
|---|---|---|---|
| YouTube | MM:SS or HH:MM:SS | 01:15 or 01:23:45 | The list absolutely must start with 00:00. |
| Vimeo | MM:SS or HH:MM:SS | 01:15 | Add to the description to make them clickable. |
| Podcasts | HH:MM:SS | 00:32:10 | Usually placed in show notes for easy navigation. |
Stick to these simple rules, and you'll make your content more accessible, engaging, and much easier for new audiences to find.
Adding Burned-In Timecodes for Professional Projects
Beyond clickable YouTube chapters, there's a more specialized way to time stamp video content: the burned-in timecode (BITC). This isn't about helping your audience skip ahead; it’s about stamping a permanent, frame-accurate reference directly onto the video itself.
Think of it as a visual clock that's part of the footage. This is absolutely essential in professional settings where every single moment has to be accounted for with razor-sharp precision. For instance, in a legal deposition, a burned-in timecode gives lawyers an indisputable reference point when they're reviewing testimony.
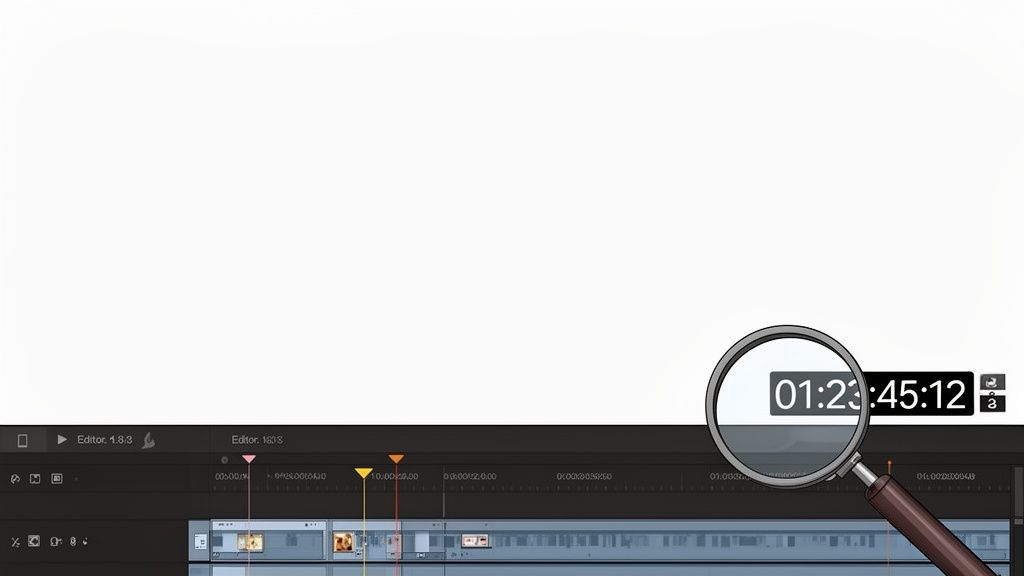
This method goes way beyond the simple MM:SS format you see on YouTube, adopting the professional standard of HH:MM:SS:FF (Hours:Minutes:Seconds:Frames). That level of detail guarantees unmatched accuracy.
When to Use Burned-In Timecodes
Visible timecodes are non-negotiable in certain industries. They aren't meant for your average viewer but serve as a critical tool for detailed analysis and verification.
You'll almost always see them used in:
- Legal Proceedings: Perfect for reviewing deposition tapes, courtroom footage, and other video evidence where exact referencing is a must.
- Academic and Market Research: Researchers rely on BITC to log specific behaviors or comments during focus groups and observational studies.
- Post-Production Workflows: Editors, colorists, and sound designers use review copies with burned-in timecodes to communicate precise changes, like "Adjust the color grade at 01:15:32:04."
In these cases, the ability to cite an exact frame number removes all guesswork. It's the gold standard for any professional video review.
A YouTube chapter might tell you something happened around the two-minute mark. A burned-in timecode proves it happened at exactly 00:02:17:23. That level of detail is indispensable on high-stakes projects.
How to Add Timecodes in a Video Editor
Adding a burned-in timecode is a surprisingly simple process in most professional video editing software, like Adobe Premiere Pro or DaVinci Resolve. It usually just involves applying a specific effect or overlay to your footage.
In Premiere Pro, for example, you'd just search for the "Timecode" effect in your Effects panel and drag it onto your video clip. From there, you can tweak its position, size, and format so it's easy to see without getting in the way. The process is pretty much the same in DaVinci Resolve, where you’ll find a "Timecode Generator" in the effects library.
The real key here is having an accurate guide to work from. Your AI-generated transcript, with its precise word-level timestamps, is the perfect cross-reference. If a transcript notes a key phrase at 00:45:12, you can instantly check it against the burned-in timecode on the screen, confirming a frame-perfect sync between the audio and the visual record. This ensures every word and action is documented with total accuracy.
Got Questions About Video Timestamps? We've Got Answers.
As you start working with timestamps, a few common questions always seem to pop up. Think of this as your go-to guide for those "what if" and "how does" moments that every creator runs into.
Can I Add Timestamps to a Video After It's Already Live?
You bet. One of the best parts about platforms like YouTube is how forgiving they are. You can jump back into your video’s description anytime to add or tweak your timestamp list, and the chapter markers will update automatically.
And if you're working with a caption file, it's just as simple. Just upload the new, corrected SRT or VTT file to replace the old one. The changes usually show up for viewers within a few minutes. Easy peasy.
Do Timestamps Actually Help with Video SEO?
They absolutely do, and in a couple of powerful ways. First, when you create YouTube chapters, Google can pull those directly into its search results. This feature, called "Key Moments," lets people jump straight from the search page to the exact part of your video they care about.
This almost always gives your click-through rate a nice little bump. On top of that, all the text inside your SRT or VTT file gives search engines more context to crawl, helping them understand your video and rank it for the specific keywords people are actually saying.
What’s the Real Difference Between a Timestamp and a Timecode?
People throw these terms around interchangeably, but in a professional context, they mean two different things.
-
A timestamp is what you're probably most familiar with. It's a simple marker like
MM:SS(e.g.,01:35) and is perfect for YouTube chapters or just making notes. -
A timecode is the super-precise, frame-accurate version:
HH:MM:SS:FF(Hours:Minutes:Seconds:Frames). This is the standard in professional video editing where every single frame counts.
For most creators, timestamps are all you'll ever need. But if you're dealing with projects like legal depositions or detailed film edits, knowing the difference is crucial.
Should I Bother Manually Checking AI-Generated Timestamps?
Yes, always. Think of it as a final proofread. While a good AI tool can get you 99% of the way there, a quick human review is what makes the final output perfect.
Don’t Skip the Final Review
AI is extremely accurate but never perfect. Small mistakes in names or timings can hurt credibility. A quick manual scan ensures professional, polished results.
This is especially true if your audio has complex jargon, multiple speakers talking over each other, or rough sound quality in spots. Taking just a few minutes to scan everything ensures your chapters and captions look professional, and that's a small detail that says a lot about your content's quality.
Want to dig deeper into the world of AI transcription? Check out our other FAQs on transcription.
Ready to stop wasting time and start creating perfectly timestamped videos in minutes? Transcript.LOL uses advanced AI to give you fast, accurate, and editable transcripts with speaker labels and multiple export options. Try it for free today!