Best podcast equipment for beginners: Essential gear for...
Discover the best podcast equipment for beginners with a concise gear guide to mics, interfaces, and starter gear for pro-quality sound.
Kate, Praveen
February 9, 2026
When you're just starting out, the best podcast equipment often boils down to two key pieces: a solid, high-quality USB microphone (like the ever-reliable Samson Q2U) and a decent pair of wired headphones.
This simple combo is the perfect entry point. It lets you sidestep the confusing world of mixers and audio interfaces, so you can get clean, professional-sounding audio right out of the box.
Your Podcasting Journey Starts with Great Sound
Welcome to the exciting world of podcasting! Before you hit record and share your ideas with millions of potential listeners, let's talk about the one thing that truly separates the great podcasts from the forgettable ones: audio quality.
The good news? You don't need a decked-out recording studio to sound incredible. This guide is your roadmap to finding the best beginner-friendly gear, cutting through the jargon, and helping you make choices with confidence.
Think of this as your personal cheat sheet for building a high-quality, budget-friendly setup that lets your content shine from episode one. A great setup isn't just about sounding pro—it's about respecting your listener's time and making your message heard, loud and clear.
Good Audio = Listener Retention
Listeners forgive minor mistakes, but poor audio drives them away instantly. Clear, clean sound keeps people engaged longer and makes your podcast feel professional from the very first episode. Great gear isn’t luxury it’s credibility.
What Really Matters for Beginners
As a beginner, your goal is clarity and reliability, not complexity. You want gear that's easy to set up and just works, delivering clean audio every single time. You can always upgrade your kit as your show grows.
For now, focus on these three things:
- Ease of Use: Your gear should feel intuitive. You want to spend your time creating amazing content, not fighting with tech.
- Audio Clarity: The main mission is to capture your voice without distracting hiss, echo, or background noise.
- Reliability: Go with gear that has a proven track record. The last thing you want is for your microphone to die halfway through a killer interview.
To kick things off, let's look at the absolute must-haves for any new podcaster. These four items form the core of your starter studio.
Build Your Starter Studio the Smart Way
Capture Clean Voice
Your microphone should isolate your voice and reject background noise. Clean input reduces editing time and instantly improves perceived quality.
Monitor Everything
Headphones let you hear problems in real time. Catching noise or distortion during recording saves hours of fixing later.
Stable Positioning
A solid stand or boom arm keeps the mic steady and consistent. Small bumps or vibrations can quietly ruin an otherwise perfect take.
Quiet Environment
Even basic gear sounds professional in a treated room. Soft surfaces and fewer reflections matter more than expensive hardware.
Essential Podcast Starter Gear at a Glance
| Equipment Type | Primary Role | What to Look For |
|---|---|---|
| Microphone | Captures your voice | USB for simplicity, good noise rejection |
| Headphones | Monitors your audio | Closed-back design to prevent sound bleed |
| Mic Stand/Arm | Positions the mic correctly | Stability, adjustability, desk or floor mount |
| Pop Filter | Softens harsh sounds | Mesh or foam screen, fits your microphone |
This simple, four-part setup is all you need to record high-quality audio.
The most effective beginner podcast setups are simple and dependable. A basic setup in a good recording environment will always outperform expensive gear in a room with poor acoustics. Turning off an air conditioner is free and can improve your sound more than a new microphone.
Ultimately, your equipment should fade into the background, letting your voice and your message take center stage. This guide will help you pick the pieces that do exactly that, ensuring your podcasting journey starts on a strong, clear note.
Once you've nailed your recordings, you'll need a smart workflow for post-production. You can learn more about streamlining that process on our blog.
Speed Up Your Post-Production with AI
Instead of manually typing or formatting notes, upload your episode and get a clean, ready-to-use transcript in minutes. Perfect for editing, captions, and repurposing content fast.
State-of-the-art AI
Powered by OpenAI's Whisper for industry-leading accuracy. Support for custom vocabularies, up to 10 hours long files, and ultra fast results.

Import from multiple sources
Import audio and video files from various sources including direct upload, Google Drive, Dropbox, URLs, Zoom, and more.
Export in multiple formats
Export your transcripts in multiple formats including TXT, DOCX, PDF, SRT, and VTT with customizable formatting options.
Understanding the Core Four Podcast Essentials
Building your first podcast setup can feel like a huge undertaking, but it doesn't have to be. Forget all the complicated gear you see in pro studios for a minute. To get great-sounding audio, you really only need to nail four key pieces of equipment.
Think of it as your "Core Four." Get these right, and you'll have a rock-solid foundation for producing professional-quality sound from day one. Let's break down exactly what they are and what they do, so you can build your rig with confidence.
The Microphone: Your Voice's Front Door
Your microphone is, without a doubt, the single most important part of your setup. It's the very first thing your voice touches. Think of it like the lens on a photographer's camera—a great lens captures a sharp, vibrant image, while a cheap one makes everything look blurry and dull. Your mic does the same for your voice.
For beginners, mics generally come in two flavors:
- USB Microphones: These are the "point-and-shoot" cameras of the audio world. You just plug them straight into your computer's USB port, and you're ready to go. Everything they need to work is built right in, making them a fantastic, no-fuss option for anyone just starting out.
- XLR Microphones: These are more like the "DSLR cameras." They deliver higher quality and more flexibility, but they need a separate piece of gear—an audio interface—to talk to your computer. This path gives you a much better runway for future upgrades.
When you're looking around, you'll find that a lot of the same principles for capturing a clear voice apply across different fields. Guides for the best gaming microphones often have useful comparisons that can help podcasters, too.
The Audio Interface: Your Personal Translator
If you go the XLR mic route, you're going to need an audio interface. This little box is a translator. Your professional mic speaks an analog language, but your computer only understands digital. The interface is the bridge that lets them communicate perfectly.
But it does more than just translate. It also handles a few other critical jobs:
- Preamps: This is basically a volume knob for your mic. It boosts the very quiet signal from the microphone up to a healthy level for recording, all without adding extra hiss or noise.
- Phantom Power: Some mics, known as condenser mics, need a little bit of power to work. An interface provides this with a simple button, usually labeled "+48V."
- Multiple Inputs: Most interfaces let you plug in more than one microphone. This is an absolute must if you plan to have a co-host or interview guests in person.
Think of an audio interface as the central hub for your sound. It takes the pure audio from your mic, gives it power, controls its volume, and sends a clean, crisp signal to your computer, all ready to be recorded.
Headphones: Your Audio Mirror
Headphones aren't just for listening to your final edit. Their most important job is to let you hear exactly what your microphone is picking up, in real-time, while you're recording. This is how you catch that low hum from the air conditioner, the neighbor's dog barking, or those harsh "p" and "b" sounds before they ruin an otherwise perfect take.
For podcasting, you absolutely want closed-back, wired headphones. The closed-back design keeps the sound in your ears, so it doesn't "bleed" out and get picked up by your sensitive microphone. A wired connection ensures there's no delay (latency), so what you hear is what's happening at that exact moment.
The podcasting world has exploded. The global market, currently valued at $31.49 billion, is expected to skyrocket to $114.48 billion by 2030. That boom means the gear sector alone is pulling in $285-300 million a year. It's no surprise that starter kits like the Focusrite Scarlett 2i2 are flying off the shelves. You can check out more on this expanding market and its trends on Mordor Intelligence.
Cables and Stands: The Unsung Heroes
Okay, these aren't the most glamorous items, but don't sleep on them. A solid microphone stand or boom arm is non-negotiable. It holds your mic in the perfect spot, keeps it steady, and prevents annoying vibrations from your desk from ruining your audio. A good stand is the difference between clean audio and a recording full of distracting thumps and rumbles.
The same goes for your cables. A quality cable ensures a clean, interference-free signal makes its way from your mic to your interface. These pieces might not be exciting, but they are the reliable backbone that holds your entire setup together. They make sure everything just works when you hit that record button.
Choosing Your Podcast Gear for Any Budget
Alright, you know the essential parts of a podcast setup. Now for the fun part: picking the gear that fits your show and your wallet. Diving into the world of audio equipment can feel a bit overwhelming, but I’ve broken it down into three simple tiers to make it easy.
This approach helps you find that sweet spot between cost, quality, and giving yourself room to grow. Whether you're scraping together just enough for a decent mic or you're ready to build a more serious rig, there’s a clear path forward. Let's look at some real-world examples in each category to take the guesswork out of it.
The Budget-Friendly Starter Tier: Under $150
If you're just starting out, the mission is simple: get clean, clear audio without breaking the bank or getting bogged down in technical details. This tier is all about getting the most bang for your buck and proving you don't need a fortune to sound great. The heart of this setup is a solid USB microphone.
USB mics are popular for a reason—they're truly plug-and-play. They have an audio interface built right in, so you can connect one directly to your computer and be recording in minutes. To get the best sound for your money, it's worth checking out the best budget USB microphones that seasoned beginners recommend.
A standout in this category is the Samson Q2U. It’s an absolute workhorse that has been a go-to for podcasters for over a decade because it’s reliable and just sounds good. It also cleverly includes both USB and XLR connections, giving you a natural upgrade path when you're ready.
- Microphone Example: Samson Q2U or Audio-Technica ATR2100x
- Headphones Example: Any reliable pair of wired headphones you have, like the Sony MDR-ZX110.
- Key Advantage: Simplicity and affordability. You can pull together a complete, quality starter kit for well under $150.
The Mid-Range Enthusiast Tier: $200-$500
This is for the podcaster who's ready to level up. If you're serious about your show's growth and think you'll have guests or a co-host down the line, this is the perfect place to start. The big move here is graduating from a USB mic to an XLR microphone paired with a dedicated audio interface.
An XLR setup separates your mic from the "translator" (the interface), which almost always results in cleaner audio with less background hiss. It also unlocks a much wider world of professional microphones to choose from. The Focusrite Scarlett 2i2 is a legend in this space, known for its fantastic preamps and rock-solid reliability. Pair it with a dynamic XLR mic like the Rode Procaster, and you've got a combo that delivers that rich, classic broadcast sound.
By separating the microphone and the audio interface, you gain more control over your sound. This setup allows you to fine-tune your gain levels more precisely and easily add multiple microphones for interviews.
This flowchart helps visualize that core choice between a simple USB setup and a more flexible XLR system.
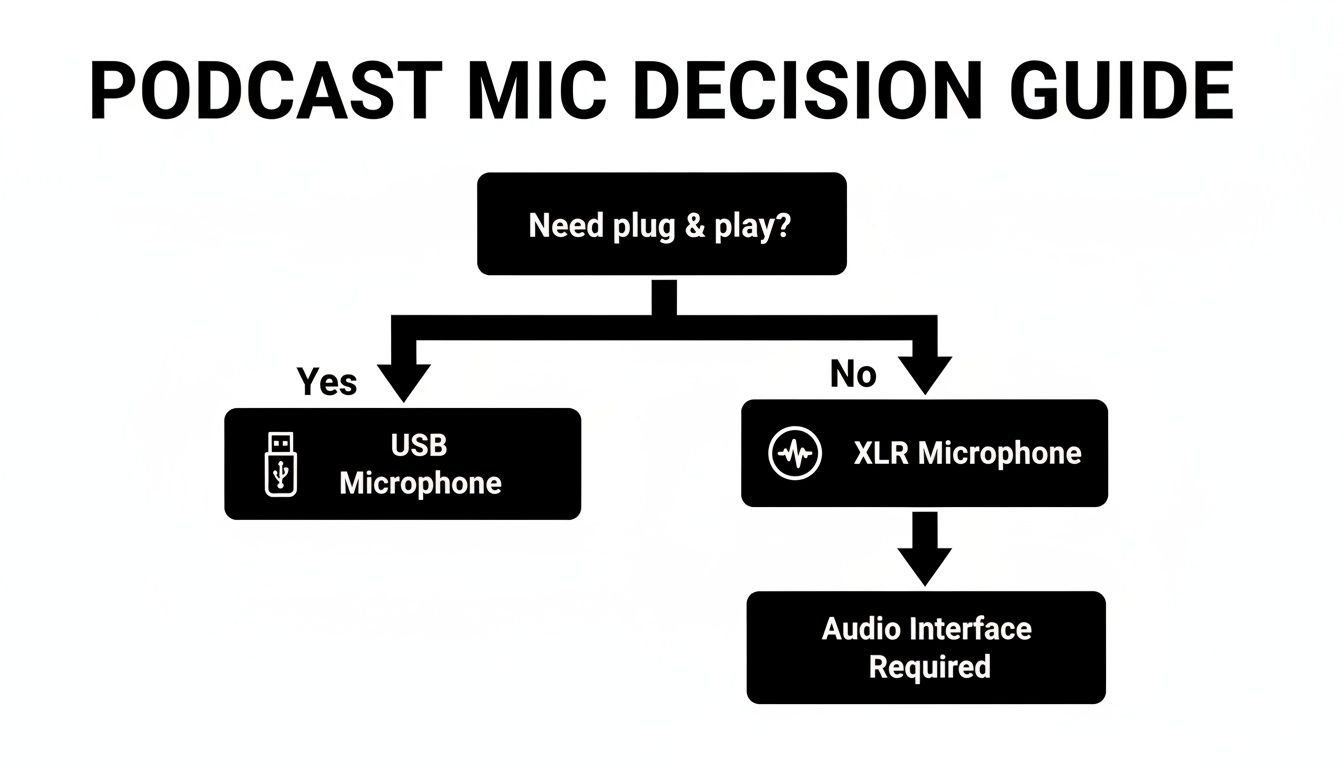
It really comes down to convenience versus future-proofing. Both paths can get you fantastic audio, but the XLR route gives you more room to expand.
The Pro-Level Aspirant Tier: $500+
For creators who want to sound like they've been doing this for years, right from episode one. This doesn't mean buying the most expensive gear you can find, but investing in entry-level industry standards—the kind of equipment trusted by professional broadcasters all over the world.
The undisputed king here is the Shure SM7B. It’s a legendary mic famous for its warm, forgiving vocal tone and incredible ability to reject background noise. It is a "gain-hungry" mic, though, so it’s often paired with a quality interface and a signal booster like a Cloudlifter to get the best out of it. A more modern and user-friendly alternative is the Shure MV7+, a hybrid USB/XLR mic inspired by the SM7B that gives you amazing quality with less hassle.
Investing at this level means your equipment will never be what holds your audio quality back. It’s a bigger upfront cost, but this gear is built to last a lifetime and will grow with you as your podcast becomes a professional production. And once you have those pristine recordings, you'll want to keep that pro quality through to the end by checking out reviews of tools for post-production and transcription.
To make choosing a bit easier, here’s a table summarizing our gear recommendations for each budget.
Podcast Gear Recommendations by Budget Tier
| Tier | Example Microphone | Example Interface | Example Headphones | Estimated Cost |
|---|---|---|---|---|
| Budget | Samson Q2U (USB/XLR) | None (Built-in) | Sony MDR-ZX110 | ~$100–$150 |
| Mid-Range | Rode Procaster (XLR) | Focusrite Scarlett 2i2 | Audio-Technica M20x | ~$300–$500 |
| Pro-Level | Shure SM7B or MV7+ | Universal Audio Volt 2 | Beyerdynamic DT 770 | ~$500+ |
Remember, the "best" gear is the gear that fits your needs and budget right now. You can always upgrade later as your show grows. The most important thing is to start creating
Accessories That Elevate Your Audio Quality

You've got the big-ticket items sorted. Now it's time to talk about the smaller, often-ignored gear that makes a massive difference. These accessories are the secret sauce that takes your audio from "good enough" to genuinely great.
Think of them as the supporting cast in your show. The microphone might get the spotlight, but these tools work quietly in the background, stamping out common audio problems before they ever get a chance to ruin a perfect take. Best of all, they're some of the most affordable upgrades you can make.
Let's break down the four most impactful accessories for any new podcaster.
Taming Plosives with Pop Filters and Windscreens
Ever heard that harsh, thumping "pop" when someone says a word with a 'P' or 'B' on a recording? Those are plosives, and they happen when a burst of air from your mouth slams into the mic’s sensitive diaphragm.
They’re incredibly distracting for listeners and a total nightmare to fix in editing.
This is exactly what a pop filter is for. It’s a simple mesh or foam screen that sits between you and your mic, breaking up that burst of air before it can cause a problem.
- Mesh Pop Filters: These are the classic style that clamps onto your mic stand. They offer top-notch protection without coloring your sound.
- Foam Windscreens: These are the foam balls that slip right over the mic. They’re super convenient but can sometimes muffle the high-end sparkle in your voice.
For most people starting out, a basic mesh pop filter is the way to go. It’s a cheap piece of the best podcast equipment for beginners that delivers an immediate, professional-sounding result.
Securing Your Mic with Stands and Boom Arms
Trying to record with your microphone sitting on a stack of books is a recipe for disaster. Every single tap, bump, or vibration on your desk will travel straight up into the mic, creating a low, rumbly noise that muddies up your audio.
A proper microphone stand is completely non-negotiable for clean recordings.
You have two main choices here:
- Desktop Stands: These are small, simple stands that sit right on your desk. They're cheap and portable, but they're also much more likely to pick up vibrations from your keyboard and mouse.
- Boom Arms: These are the adjustable arms that clamp onto the side of your desk. They give you way better positioning, letting you place the mic exactly where you need it while keeping it totally isolated from desk noise.
A boom arm is a fantastic investment for any serious podcaster. It frees up your desk space and makes sure your mic is always in that perfect "sweet spot."
Absorbing Vibrations with a Shock Mount
A shock mount is your next line of defense against unwanted noise. Just think of it as a suspension system for your microphone. The mic is held in a frame by elastic bands, which absorb any tiny vibrations that travel up the stand from your desk or the floor.
If a boom arm isolates your mic from the desk, a shock mount isolates it from the boom arm itself. Together, they create a powerful defense against accidental bumps, footsteps, and other low-frequency rumbles that can ruin a take.
Not every microphone needs a separate one—some even have shock absorption built right in. But if you keep hearing mysterious thumps in your recordings, a shock mount is often the perfect fix.
Controlling Your Space with Acoustic Treatment
Finally, let's talk about the most important accessory of all. It’s not something you attach to your gear; it's the room you record in.
Hard, flat surfaces like bare walls, windows, and hardwood floors are your enemy. They reflect sound, creating the echo and reverb that makes audio sound hollow, distant, and unprofessional.
You don't need to build a pro-level studio. A little DIY acoustic treatment can do wonders:
- Record in a walk-in closet: All those clothes are fantastic natural sound absorbers. Seriously, it works.
- Hang heavy blankets: Drape them on the walls around your recording area to kill reflections.
- Use pillows and cushions: Place them strategically in corners and on flat surfaces to break up sound waves.
The goal is to "deaden" the room by adding soft, irregular surfaces that soak up sound instead of bouncing it around. This simple—and often free—step can improve your audio more than a microphone that costs hundreds of dollars.
How to Set Up Your New Podcast Equipment
Unboxing new gear is always a thrill, but the real magic happens when you plug it all in. A solid setup is the bridge between owning the best podcast equipment for beginners and actually creating that crisp, professional audio you're after.
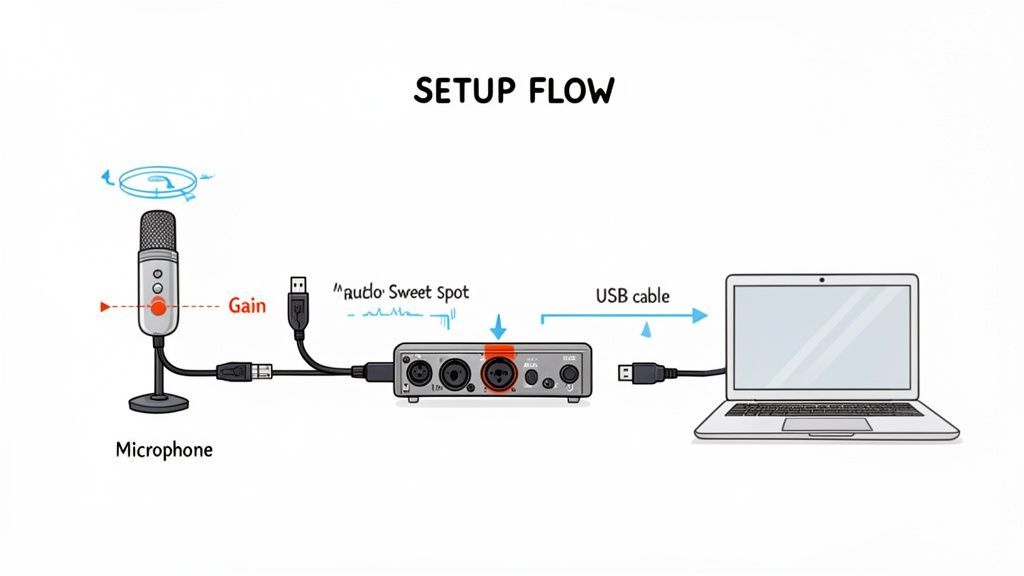
Let's walk through the most common beginner rig: an XLR microphone connected to an audio interface, which then hooks up to your computer. It sounds technical, but it’s surprisingly straightforward and gives you a powerful, flexible recording setup.
The Basic Connection Chain
Think of your setup as a simple path for your voice to travel. It goes from you, into the mic, through the interface (where it's converted from analog sound to digital data), and finally into your computer.
Here’s how to connect everything, step-by-step:
- Mic to Interface: Grab your XLR cable. One end plugs into the bottom of your microphone, and the other goes into the first input jack on your audio interface. Easy.
- Interface to Computer: Use the USB cable that came with your interface to connect it to an open USB port on your laptop or desktop. Your computer should automatically recognize it as a new audio device.
- Headphones to Interface: Plug your wired headphones directly into the headphone jack on the front of the interface. This is critical for monitoring your audio in real-time without any lag.
- Engage Phantom Power (If Needed): If you're using a condenser mic, you'll need to press the "+48V" button on your interface. This sends a small electrical charge to power the mic. Dynamic mics don't need this, so you can leave it off.
This simple chain is the foundation for countless home studios. It’s a setup that’s fueling a podcast equipment market that has rocketed past $3.7 billion in North America alone. With over 4.5 million podcasts out there, a clean, reliable setup is your first step to standing out. You can dig into more stats on how the podcasting boom is shaping the gear market.
Finding the Perfect Gain Level
Once you’re all connected, your most important job is setting the gain. The gain knob isn't a volume control; it’s a sensitivity control. It tells the microphone how much of your voice to capture before the signal ever reaches your computer.
Getting this right is a balancing act:
- Too Low: Your voice will be too quiet, and when you boost it later, you'll also boost all the background hiss and noise.
- Too High: Your audio will "clip." This creates a nasty, distorted crackle that’s impossible to fix in post-production. It's a recording killer.
Your goal is to speak at your normal podcasting volume and see the meter on your interface or recording software consistently bounce into the yellow. You want it to get close to the red, but never, ever touch it. This gives you a strong, clean signal with plenty of headroom for editing.
Start with the gain knob turned all the way down. Hit record, start talking, and slowly turn it up until you find that sweet spot. It's a five-second adjustment that makes all the difference.
Mastering Microphone Technique
The final piece of the puzzle is totally free and can make a budget mic sound like a pro model: good mic technique. It’s all about how you position yourself.
- Distance: Aim to stay about 4-6 inches away from the microphone. This is the sweet spot for most vocal mics, capturing a warm, present tone without sounding boomy or picking up too much room echo.
- Angle: Don't speak directly into the dead center of the mic. Instead, aim your voice at a slight 10-15 degree angle. This helps reduce harsh "S" sounds (sibilance) and popping "P" and "B" sounds (plosives).
The key is consistency. Try to maintain that same distance throughout your recording to avoid weird volume jumps. These simple physical tweaks are just as important as the gear itself.
Once you nail the recording, the next step is post-production. To learn more about that part of the process, check out our documentation on post-production workflows.
7. Your Workflow: From Recording to Publishing
Recording your first episode is a huge milestone, but the real work starts after you hit stop. A smart post-production workflow is what separates a polished, professional-sounding show from raw audio, and it can save you an unbelievable amount of time.
This is where many new podcasters get stuck. The journey from a raw audio file to a published episode involves editing, mixing, and getting your content ready for people to actually find. It's easy to spend more time on these tedious tasks than on creating your next episode.
But it doesn't have to be that way. A well-planned process makes all the difference, and one of the most powerful tools in a modern podcaster's toolkit is transcription. It’s no longer just a nice-to-have for accessibility; it's a content engine.
Turning Audio into Assets with Transcription
A transcript is simply a word-for-word text version of your episode. Manually typing one out is a soul-crushing task, especially if you want to publish consistently. This is where AI-powered services become a podcaster's secret weapon, bridging the gap between recording and promotion.
Don’t Waste Hours on Manual Transcripts
Hand-typing transcripts can take 4–6× the length of your episode. That’s hours lost every week. Automation saves time you could spend recording, promoting, or growing your audience.
An accurate transcript is the foundation for making your podcast more discoverable, accessible, and versatile. It unlocks the full value of your audio by turning spoken words into searchable, repurposable content.
Automating this one step instantly opens up a whole new world of possibilities for your show.
- Boost Your SEO: Search engines can't listen to your audio, but they can crawl text. Dropping a full transcript on your website makes your entire episode searchable, helping new listeners find you through a simple Google search.
- Improve Accessibility: Transcripts ensure your content is accessible to people who are deaf or hard of hearing, which means a larger potential audience for you.
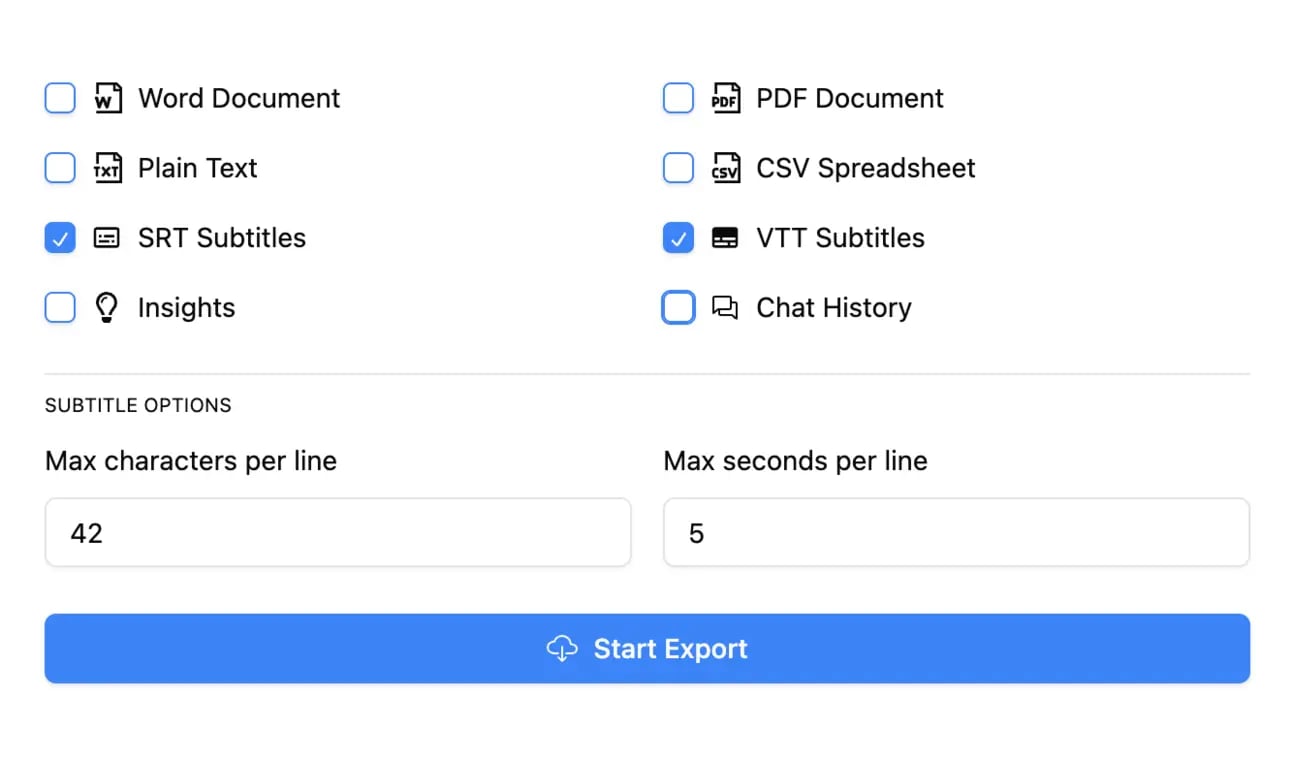
- Create Captions: You can easily export your transcript as an SRT or VTT file to add perfect captions to video clips for social media. This is critical, since a huge amount of video is watched with the sound off.
The Content Multiplier Effect
This is where a service like Transcript.LOL can completely change your process. Instead of just giving you a wall of text, it acts as a post-production command center.
The platform is built around a simple drag-and-drop interface for uploading your audio.
This screenshot shows just how easy it is to get an accurate, speaker-labeled transcript back in seconds.
Once your audio is processed, the real magic begins. You can use integrated AI tools to instantly generate all sorts of content right from your transcript. This turns a single recording into a complete marketing package.
Turn Transcripts Into Ready-to-Publish Content

Speaker detection
Automatically identify different speakers in your recordings and label them with their names.
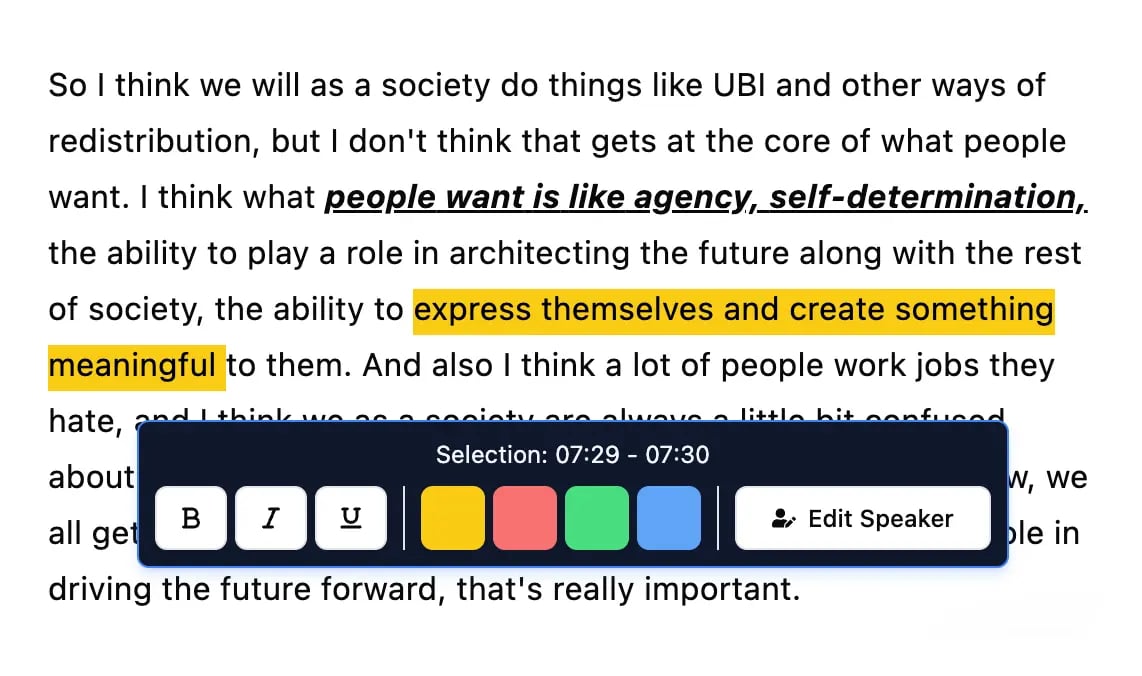
Editing tools
Edit transcripts with powerful tools including find & replace, speaker assignment, rich text formats, and highlighting.
Summaries and Chatbot
Generate summaries & other insights from your transcript, reusable custom prompts and chatbot for your content.
Imagine generating your show notes, a quick summary, the key takeaways, and a dozen social media posts in minutes, not hours. This kind of efficiency maximizes the impact of all your hard work, letting you focus on what you do best: creating great content for your audience.
AI Is Now Standard for Creators
Modern podcasters don’t just record — they repurpose. Transcription and AI tools have become essential for faster publishing, better SEO, and consistent content across platforms.
Common Questions About Beginner Podcast Equipment
Diving into your first gear purchase can feel like you’re staring at a wall of knobs and acronyms. It’s easy to get overwhelmed, but trust me, making the right call is simpler than it looks. Let's clear up some of the most common questions new podcasters have.
Can I Start with Just a USB Mic?
Absolutely. A good USB mic is the fastest, most straightforward way to get great audio from day one. It’s a true plug-and-play solution that lets you skip the extra hardware and get right to creating content.
That said, if your budget has a little wiggle room, an audio interface and an XLR microphone is a fantastic long-term investment. This setup generally delivers better sound quality and gives you a clear upgrade path as your show grows.
What Is the Most Important Piece of Gear?
Your microphone. No question. It's the very first thing your voice touches in the recording chain, and it has the single biggest impact on your final sound. A clean recording from a great mic is a dream to edit, but a fuzzy, thin recording is almost impossible to salvage.
Prioritize getting the best microphone you can afford, even if it means you have to start with more basic accessories. Great audio starts the moment you hit record.
How Do I Improve Sound Without Spending More?
This one’s easy. Focus on two things that cost absolutely nothing: your room and your mic technique. Seriously, these two adjustments can make a night-and-day difference.
- Tame Your Room: Record in a space with lots of soft surfaces. A closet full of clothes is a classic for a reason. Carpeted rooms, heavy blankets, or even a few pillows can absorb sound and kill that distracting echo.
- Perfect Your Technique: Get comfortable speaking about 4-6 inches away from your mic. Try to stay at a consistent angle and distance to keep your audio levels smooth and professional.
For more answers to common podcasting questions, you can explore our detailed FAQ section.
Once you've captured that perfect audio, let Transcript.LOL handle the rest. Instantly turn your recordings into accurate transcripts, show notes, and social media content, streamlining your workflow from recording to publishing. Get started for free today.